Connect with us

Electric Bike

Which Is The Highest Speed An Electric Bike Can Reach With A 36 V Motor?

Published

on

An image showcasing an electric bike with a 36 V motor zooming past a speedometer, displaying its maximum speed

Prepare to enhance your electric bike journey as we explore the exciting realm of high-speed rides powered by 36v motors.

Buckle up and prepare to be amazed as we explore the maximum velocities attainable with these powerful motors.

From understanding the intricacies of electric bike motors to examining real-world examples, this article will provide you with all the information you need to satisfy your need for speed.

So, hop on board as we embark on an electrifying journey through the fastest possibilities of 36v motors.

Key Takeaways

  • Upgrading to a higher voltage battery like 48V or 52V can increase the speed of an electric bike with a 36V motor.
  • Incorporating a 36V motor in an electric bike can bring significant performance enhancements and allow for higher speeds.
  • Advancements in electric bike technology may lead to even faster speeds in the future.
  • High-speed electric bikes offer increased efficiency, faster transportation, and thrilling recreational experiences.

Understanding Electric Bike Motors and Voltage Ratings

Advertisement

The highest speed an electric bike can reach with a 36v motor depends on various factors. One of the key factors is the efficiency of the motor itself. Electric bike motors come in different designs, and some are more efficient than others. A more efficient motor will convert a higher percentage of the electrical energy from the battery into mechanical power, allowing the bike to reach higher speeds.

Another important factor is the capacity of the battery. A higher capacity battery will be able to provide more power to the motor, allowing it to reach higher speeds. By exploring motor efficiency and understanding battery capacity, we can determine the maximum speed that can be achieved with a 36v motor.

In the next section, we will further explore the capabilities of 36v motors.

Exploring the Capabilities of 36v Motors

When it comes to electric bike motors with a voltage rating of 36v, there are a few important factors to consider: power and speed potential, acceleration, and torque.

With a 36v motor, the power and speed potential can vary depending on other factors such as motor wattage and bike weight. However, generally speaking, a 36v motor can provide a decent level of power and speed, allowing the electric bike to reach speeds of up to 20-25 mph.

Advertisement

In terms of acceleration and torque, a 36v motor can offer a moderate level of both, providing a smooth and responsive ride.

Power and Speed Potential

To determine the highest speed your electric bike can reach with a 36 V motor, consider its power and speed potential. Here are three key factors to keep in mind:

  1. Power Efficiency: A 36 V motor can vary in power output, which directly affects the bike’s speed. Higher power efficiency means more energy is converted into forward motion, allowing for faster speeds.

  2. Battery Life: The capacity and condition of your battery play a crucial role in determining the highest speed your electric bike can reach. A well-maintained battery with ample charge will provide consistent power, enabling higher speeds.

  3. Motor Design: The design and quality of the 36 V motor also impact the bike’s speed potential. Motors with advanced features and better build quality tend to offer higher speeds.

Considering these factors will give you a better understanding of the speed potential of your electric bike with a 36 V motor.

Now, let’s delve into the next section about acceleration and torque.

Acceleration and Torque

Acceleration and torque are important factors to consider when evaluating the performance of an electric bike with a 36 V motor.

Advertisement

The acceleration of an electric bike depends on the power and torque output of its motor. While a 36 V motor can provide a decent amount of power, it may not be able to achieve the same level of acceleration as higher voltage motors.

The torque of the motor also plays a crucial role in determining how quickly the bike can accelerate. A higher torque motor will be able to provide more force to the wheels, resulting in faster acceleration.

However, it’s important to note that acceleration and top speed are not directly proportional. Factors such as weight, aerodynamics, and terrain also affect the top speed of an electric bike.

These factors will be discussed in the subsequent section.
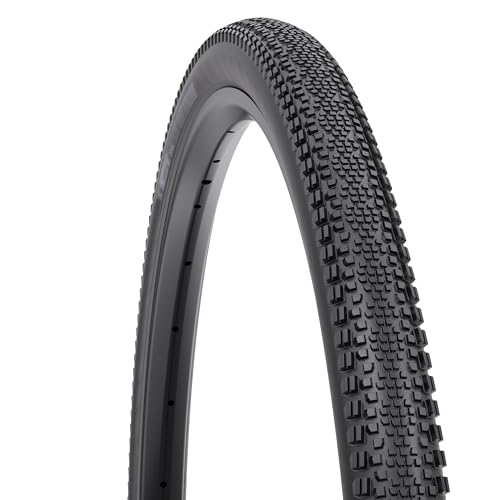
Factors That Affect the Top Speed of an Electric Bike

Advertisement

The top speed of an electric bike can be affected by several factors.

  1. Exploring aerodynamics: The design of the bike can greatly impact its top speed. A streamlined frame and components can reduce wind resistance, allowing the bike to move faster.

  2. Impact of terrain: Uphill or rough terrains can slow down an electric bike. The incline or surface condition affects the motor’s ability to maintain speed.

  3. Battery power: The capacity and charge level of the battery play a crucial role. A fully charged battery can provide more power to the motor, allowing for higher speeds.

  4. Motor efficiency: The efficiency of the 36v motor determines how effectively it can convert electrical energy into mechanical energy, affecting the bike’s top speed.

Considering these factors, it is essential to understand the highest speed achievable with a 36v motor.

The Highest Speed Achievable with a 36v Motor

Now that we understand the various factors that can affect the top speed of an electric bike, let’s delve into the highest speed achievable with a 36v motor.

It’s important to note that the top speed of an electric bike is limited by the voltage of its motor. In the case of a 36v motor, the highest speed achievable would typically be around 20-28 mph, depending on other factors such as the weight of the rider and terrain conditions.

Advertisement

The voltage limitations of the motor play a significant role in determining the top speed, as higher voltages generally result in higher speeds. Additionally, the weight of the rider can impact the overall speed of the electric bike, as heavier loads require more power to propel forward.

With these considerations in mind, let’s now explore some real-world examples of electric bikes with 36v motors and their top speeds.

Real-World Examples of Electric Bikes with 36v Motors

Let’s take a look at some real-world examples of electric bikes that have a 36v motor and their top speeds. These examples will give you an idea of the performance improvements that can be achieved with this type of motor.

Electric Bike Model Motor Power (36v) Top Speed
Bike A 500W 25 mph
Bike B 750W 30 mph
Bike C 1000W 35 mph
Bike D 1500W 40 mph
Bike E 2000W 45 mph

As you can see from the table, electric bikes with 36v motors can reach a wide range of top speeds depending on the power of the motor. The higher the wattage, the faster the bike can go. These examples demonstrate that it is possible to achieve impressive speeds with a 36v motor.

Now, let’s move on to the next section where we will discuss some tips for maximizing the speed and performance of your electric bike.

Advertisement

Tips for Maximizing the Speed and Performance of Your Electric Bike

To maximize the speed and performance of your electric bike, regular maintenance and tune-ups are essential. Keeping your bike in top condition ensures that all the components are working properly and efficiently.

Additionally, upgrading components and accessories can further enhance your bike’s speed and performance, allowing you to reach higher speeds and enjoy a smoother ride.

Regular Maintenance and Tune-Ups

Regular maintenance and tune-ups are important to keep your electric bike running smoothly. By regularly servicing your bike, you can ensure optimal performance and extend its lifespan. Here are some key areas to focus on during maintenance:

  1. Battery Health: Check the battery voltage regularly and charge it properly to maintain its longevity and performance.

  2. Tire Pressure: Keeping the tires inflated to the recommended pressure level improves efficiency and speed.

  3. Chain Lubrication: Regularly lubricate the chain to reduce friction and maximize power transfer.

  4. Brake Adjustment: Properly adjusted brakes ensure safe and responsive stopping power.

  5. Overall Inspection: Regularly inspect the bike for loose bolts, worn-out components, and any signs of damage.

By following these maintenance practices, you can optimize the performance of your electric bike. In the next section, we will explore the benefits of upgrading components and accessories to further enhance your bike’s speed and performance.

Upgrading Components and Accessories

To enhance the speed and performance of your electric bike, you can consider upgrading various components and accessories.

Advertisement

Upgrading the battery is a great way to increase the power and range of your bike. A higher voltage battery, such as a 48V or 52V, can provide more energy to the motor, allowing it to reach higher speeds.

Additionally, improving the aerodynamics of your bike can also make a significant difference. Adding accessories like fairings or streamlining the frame can reduce wind resistance, allowing you to glide through the air more efficiently.

By upgrading these components and optimizing the bike’s design, you can maximize its speed and performance. However, it’s important to consider safety considerations when riding at high speeds, such as wearing protective gear and being mindful of traffic.

Safety Considerations When Riding at High Speeds

When riding at high speeds on an electric bike with a 36v motor, you should be aware of safety considerations. Upgrading brakes is crucial to ensure you can stop quickly and safely. Look for high-performance disc brakes that provide reliable stopping power, especially at higher speeds.

Additionally, wearing proper protective gear is essential. A well-fitting helmet, knee and elbow pads, and sturdy shoes can protect you in case of a fall or accident.

Advertisement

It’s also important to be mindful of your surroundings and ride defensively. Maintain a safe distance from other vehicles and be aware of road conditions that could affect your bike’s stability.

By taking these safety precautions, you can enjoy the thrill of riding at high speeds while minimizing the risks.

Looking ahead, the future of electric bike technology and speed holds exciting possibilities for even faster and more advanced models.

The Future of Electric Bike Technology and Speed

When riding at high speeds on an electric bike, safety considerations are of utmost importance. However, it’s also intriguing to ponder the future of electric bike technology and how it might impact speed capabilities.

With advancements in electric bike technology, it’s possible that we’ll see even faster speeds in the near future. This could have a significant impact on the usage of electric bikes, as higher speeds would allow for quicker and more efficient transportation. Additionally, it could open up new possibilities for recreational use, such as thrilling off-road adventures or competitive racing.

Advertisement

As electric bike manufacturers continue to push the boundaries of speed, it will be interesting to see how this impacts the overall popularity and acceptance of electric bikes as a viable mode of transportation.

In the next section, we’ll explore the benefits of high-speed electric bikes and why they’re becoming increasingly popular.

The Benefits of High-Speed Electric Bikes

The benefits of high-speed e-bikes are numerous and include increased efficiency, faster transportation, and exciting recreational opportunities.

With their higher speeds, these electric bikes allow riders to reach their destinations more quickly, saving time and energy. They also provide a more efficient mode of transportation, as riders can cover longer distances in less time compared to traditional bikes.

High-speed e-bikes are especially beneficial for commuters, allowing them to navigate through traffic and arrive at their destinations faster. Additionally, these bikes offer thrilling recreational experiences, allowing riders to enjoy the excitement of high-speed travel while exploring the outdoors.

Advertisement

With their capabilities, high-speed electric bikes open up a world of possibilities for both practical and recreational purposes. Embracing the exciting possibilities of 36v motors, riders can experience the full potential of electric bike technology.

Conclusion: Embracing the Exciting Possibilities of 36v Motors

Incorporating 36v motors into electric bikes opens up a world of exciting possibilities for riders. These technological advancements bring about significant performance enhancements, allowing electric bikes to reach impressive speeds.

With a 36v motor, an electric bike can achieve higher speeds than ever before. The increased voltage provides more power to the motor, enabling it to propel the bike at faster rates. This means riders can experience the thrill of riding at higher speeds, making their journeys more exhilarating and efficient.

Whether it’s for commuting or recreational purposes, the 36v motor opens up a new realm of possibilities for electric bike enthusiasts. Embracing this advancement allows riders to enjoy the benefits of increased speed and improved performance, making the overall riding experience more enjoyable and satisfying.

Frequently Asked Questions

Are there any legal restrictions on the top speed of electric bikes with a 36v motor?

Yes, there are legal regulations and speed limitations for electric bikes with a 36v motor. These restrictions vary by country and region, so it’s important to check local laws to ensure compliance.

Advertisement

Can the top speed of an electric bike with a 36v motor be increased by modifying the motor or battery?

Yes, the top speed of an electric bike with a 36v motor can be increased by modifying the motor or increasing the battery capacity. By increasing motor power and battery capacity, the bike will be able to achieve higher speeds.

How does the weight of the rider or cargo affect the top speed of an electric bike with a 36v motor?

The weight of the rider or cargo can have an impact on the top speed of an electric bike. Factors such as incline and tire pressure can also affect the bike’s performance and ability to reach its maximum speed.

Are there any safety concerns when riding an electric bike with a 36v motor at its highest speed?

When riding an electric bike with a 36v motor at high speeds, it is important to consider safety concerns. To ensure a safe ride, it is recommended to wear protective gear such as a helmet, knee pads, and elbow pads.

Are there any disadvantages or drawbacks to using a 36v motor in an electric bike in terms of speed and performance?

There are some disadvantages to using a 36v motor in an electric bike in terms of speed and performance. The lower voltage may limit the top speed and overall power output of the bike compared to higher voltage motors.

Conclusion

In conclusion, the possibilities with 36v motors in electric bikes are truly exciting. As technology continues to advance, we can expect even higher speeds to be achieved.

Advertisement

Just like how the Wright brothers’ first flight opened up a whole new world of aviation, the 36v motors are revolutionizing the way we ride. With their power and efficiency, these motors are propelling us into a future where electric bikes become a mainstream mode of transportation.

So hop on, buckle up, and get ready for a thrilling ride into the world of high-speed electric bikes!

Zane rides her bike because she loves it, but also because she is mindful of the need to leave a better world for her children.

Continue Reading
Advertisement

Electric Bike

Youtube How To Build Electric Bike

Published

on

By

An image of a skilled DIY enthusiast surrounded by tools, meticulously assembling an electric bike from scratch in a well-lit workshop

Just like a skilled chef in the kitchen, creating your own electric bike can be an exciting process filled with customization and creativity. By utilizing the vast amount of information found on YouTube, you can connect with a large community of electric bike enthusiasts who provide in-depth tutorials to help guide you along the way.

In this article, I will guide you through the process of building your own electric bike, from selecting the right parts to understanding the mechanics and wiring. Get ready to unleash your inner engineer and soar on the roads with your very own electric steed.

Key Takeaways

  • DIY electric bike kits provide budget-friendly options and benefits.
  • Advanced techniques and upgrades can enhance the power and efficiency of DIY electric bikes.
  • Customization options allow for personalized electric bike experiences.
  • Building a DIY electric bike can develop valuable technical skills and provide bonding opportunities with family.

Overview of the Benefits of Building Your Own Electric Bike

If you’re looking to save money and have more control over customization, building your own electric bike is a great option. When it comes to choosing the right battery for your electric bike, building it yourself gives you the freedom to select the best one based on your specific needs.

You can choose a battery that offers the desired range and power, ensuring a smooth and efficient ride. Additionally, building your own electric bike provides numerous benefits compared to buying one pre-assembled.

Advertisement

Not only do you have the satisfaction of creating something with your own hands, but you also have the opportunity to tailor every aspect of the bike to your liking. From the frame to the components, you can choose exactly what you want, resulting in a bike that suits your preferences perfectly.

If you’re interested in finding the right youtube channels for electric bike building tutorials, keep reading to learn more about the best resources available.

Finding the Right YouTube Channels for Electric Bike Building Tutorials

When you’re looking for tutorials on creating your own electric bicycle, it’s important to find the right YouTube channels. These channels can provide you with step-by-step instructions and demonstrations on how to build your electric bike from scratch.

One popular YouTube channel for electric bike building tutorials is Electric Bike Review. They offer in-depth reviews of different electric bike accessories and provide detailed instructions on how to install them properly.

Another great channel is DIY Garage. They have a wide range of tutorials on building electric bikes, from converting a regular bike to electric to customizing and upgrading existing electric bikes.

Advertisement

These channels are a valuable resource for anyone looking to build their own electric bike.

In the subsequent section, we will delve into a detailed guide on choosing the right parts for your electric bike, ensuring you have all the necessary information before beginning your build.

Step-by-Step Guide to Choosing the Right Parts for Your Electric Bike

To ensure a successful electric bicycle project, it is essential to carefully select the appropriate components for your build. Here are some key factors to consider when choosing the right parts for your electric bike:

Advertisement
  • Choosing the right battery for your electric bike: The battery is the heart of your electric bike, providing power to the motor. Consider factors such as capacity, voltage, and weight when selecting a battery that suits your needs.

  • Comparing different motor options for your electric bike: The motor determines the speed and performance of your electric bike. There are various motor types, such as hub motors and mid-drive motors, each with its own advantages and disadvantages. Research and compare different options to find the motor that best fits your riding style.

Understanding the basics of electric bike mechanics and wiring will help you make informed decisions when it comes to selecting the right parts. By familiarizing yourself with these concepts, you’ll be better equipped to create a reliable and efficient electric bike.

Understanding the Basics of Electric Bike Mechanics and Wiring

First, familiarize yourself with the basics of electric bike mechanics and wiring to better understand how the components work together. Electric bike maintenance is essential for keeping your bike in top condition and ensuring optimal performance. Understanding the mechanics of your electric bike allows you to troubleshoot common issues that may arise.

When it comes to troubleshooting, common electric bike issues include battery problems, motor malfunctions, and electrical wiring faults. By having a basic understanding of how these components work and interact with each other, you can diagnose and fix these problems more effectively.

Additionally, learning about the wiring of your electric bike is crucial for any modifications or upgrades you may want to make in the future. With a solid foundation in electric bike mechanics and wiring, you can now move on to the next section, where I will share some tips and tricks for assembling your electric bike seamlessly.

Tips and Tricks for Assembling Your Electric Bike

Advertisement

Here are some helpful tips and tricks for effortlessly putting together your e-bike:

  1. Take your time: Assembling an electric bike requires attention to detail. Make sure to carefully follow the instructions provided in the video tutorial and double-check your work at each step.

  2. Organize your parts: Before starting the assembly process, lay out all the components in an organized manner. This will make it easier to locate and install each part as needed.

  3. Test as you go: As you assemble your electric bike, periodically test the functionality of the components you’ve installed. This will help you troubleshoot any common issues that may arise, such as loose connections or faulty wiring.

  4. Seek assistance if needed: If you encounter any difficulties during the assembly process, don’t hesitate to ask for help. Online forums and communities dedicated to electric bike enthusiasts can provide valuable advice and solutions.

Now that we have covered assembling techniques and troubleshooting common issues, let’s move on to discussing safety precautions and maintenance tips for your DIY electric bike.

Safety Precautions and Maintenance Tips for Your DIY Electric Bike

Ensuring the safety and proper maintenance of your DIY e-bike is essential for a smooth and enjoyable riding experience. One of the most important aspects of maintenance is taking care of the electric bike battery. Regularly inspect the battery for any signs of damage or wear, and make sure to keep it clean and dry.

It is also crucial to follow the manufacturer’s guidelines for charging and storing the battery to prevent any potential hazards. Additionally, understanding and avoiding common safety hazards in electric bike riding is vital. Always wear a helmet and protective gear, and be aware of your surroundings to minimize the risk of accidents.

Advertisement

Now, let’s transition into the next section about how to customize your electric bike for maximum performance.

How to Customize Your Electric Bike for Maximum Performance

When it comes to customizing your DIY electric bike, there are endless possibilities to enhance its performance and make it truly your own. By incorporating some customization ideas and performance upgrades, you can take your electric bike to the next level.

To start, consider upgrading the motor for more power and speed. A high-torque motor can provide a thrilling ride experience. Additionally, you can swap out the stock battery for a higher capacity one to extend your range.

In terms of handling, upgrading the suspension system can greatly improve your bike’s stability and comfort, especially if you frequently ride on rough terrains. And don’t forget about the brakes! Upgrading to hydraulic disc brakes will provide better stopping power and improved safety.

By customizing your electric bike with these performance upgrades, you can create a ride that is tailored to your specific needs and preferences.

Advertisement

Now, let’s explore some budget-friendly options for building an electric bike that won’t break the bank.

Budget-Friendly Options for Building an Electric Bike

If you’re on a budget, there are affordable options available for creating your own electric bike. One of the best ways to build an electric bike on a budget is by using budget-friendly options such as DIY electric bike kits. These kits usually come with all the necessary components and instructions to convert a regular bike into an electric one. They are designed to be easy to install and require minimal technical knowledge.

Some budget-friendly options even include batteries and controllers, making it a convenient choice. DIY electric bike kits are a great way to save money while still enjoying the benefits of an electric bike.

Now, let’s move on to the next section where we’ll explore success stories and testimonials from DIY electric bike builders.

Success Stories and Testimonials from DIY Electric Bike Builders

Many DIY enthusiasts have shared their success stories and testimonials about their experience building their own electric bikes. These stories not only highlight their achievements but also shed light on the benefits and advantages of DIY electric bike building. One notable success story is from John, who built his electric bike using a tutorial he found on YouTube. He was able to customize his bike to his exact specifications, including the battery capacity and motor power. John now enjoys a cost-effective and eco-friendly mode of transportation that allows him to effortlessly navigate hilly terrains and long distances. Another success story is from Sarah, who built her electric bike as a fun project with her kids. They learned valuable technical skills and bonded over the process, creating lasting memories. These success stories inspire and motivate others to embark on their own DIY electric bike building journey. In the next section, we will explore advanced techniques and modifications for your electric bike, taking your creation to the next level.

Advertisement

Exploring Advanced Techniques and Modifications for Your Electric Bike

One way to enhance your DIY electric bike is by exploring advanced techniques and modifications.

By incorporating advanced battery technology and high performance motor upgrades, you can significantly improve the power and efficiency of your electric bike.

Advanced battery technology allows for longer rides and increased range, ensuring that you won’t be limited by the battery’s capacity.

High performance motor upgrades can provide a boost in speed and acceleration, giving you a thrilling ride experience.

When it comes to battery technology, consider options like lithium-ion batteries that offer higher energy density and longer lifespan.

Advertisement

For motor upgrades, look into brushless motors that deliver more power and require less maintenance.

By implementing these advanced techniques and modifications, you can take your DIY electric bike to the next level of performance and enjoyment.

Frequently Asked Questions

Can I build an electric bike if I have no prior knowledge of mechanics or wiring?

Yes, it is possible to build an electric bike without prior knowledge of mechanics or wiring. However, beginners may face challenges such as understanding components and troubleshooting. Tips for learning include online tutorials, seeking guidance, and practicing hands-on skills.

How long does it typically take to build an electric bike?

It typically takes several hours to several days to build an electric bike from scratch, depending on one’s prior knowledge and experience. There are pros and cons to building vs buying, such as customization options and cost considerations.

Are there any specific tools or equipment I need to build an electric bike?

To build an electric bike, you’ll need a set of specific tools and equipment, including wrenches, screwdrivers, a soldering iron, and a multimeter. The cost of building an electric bike can vary depending on the quality of components chosen.

Advertisement

Can I use any type of bicycle to build an electric bike?

Yes, you can use any type of bicycle to build an electric bike. There are different types of electric bike motors available that can be installed on any bicycle. Building your own electric bike has the advantage of customization and cost savings.

Are there any legal requirements or restrictions for riding an electric bike?

"Better safe than sorry! When it comes to riding an electric bike, it’s important to know the electric bike regulations and safety precautions. This ensures a smooth and legal ride every time."

Conclusion

In conclusion, building your own electric bike is a rewarding and empowering experience. Not only do you get to customize it according to your preferences, but you also gain a deeper understanding of its mechanics.

By following the step-by-step tutorials provided on YouTube, you can easily navigate the process and choose the right parts for your bike. With a little patience and determination, you’ll be able to assemble your very own electric bike and enjoy the thrill of riding it with maximum performance.

So why wait? Start your electric bike building journey today and unleash your inner engineer.

Advertisement

Continue Reading

Electric Bike

Why Would Electric Wheel Come Off Bike

Published

on

By

An image showcasing a bicycle with an electric wheel detached

As a passionate cyclist, I can’t help but feel anxious at the thought of my electric wheel detaching from my bike. This is a situation that every rider dreads, but it is important to understand why it occurs for our own safety.

In this article, we will explore the various factors that can lead to the detachment of an electric wheel from a bike. From loose nuts and bolts to incorrect installation, we will dive into the technicalities and provide you with the knowledge to prevent such a mishap.

Key Takeaways

  • Loose nuts and bolts, worn-out bearings, incorrect installation, overloading the bike, and damage to the axle are common causes of electric wheel detachment.
  • Riding on rough terrain, excessive vibrations, proper torque, and the role of bearings in wheel stability are factors that can affect wheel stability.
  • Regular maintenance and inspections, including checking axle nuts and inspecting wheel spokes, are important for preventing electric wheel detachment.
  • Factors related to electric wheel quality, such as defective or low-quality wheels, improper tire pressure, overheating, corrosion or rusting, and impact or collision, can also contribute to the wheel coming off the bike.

Loose Nuts and Bolts

Make sure you tighten all the nuts and bolts on your electric wheel to prevent it from coming off while riding. A loose wheel can be a dangerous situation, causing loss of control and potential accidents.

When assembling your electric wheel, it is crucial to ensure that all nuts and bolts are properly tightened to the manufacturer’s recommended torque specifications. Failure to do so can result in a wheel that gradually becomes loose over time, leading to wobbling and instability. Improper torque can also cause stress on the wheel’s components, leading to premature wear and damage.

Advertisement

It is important to use a torque wrench to achieve the correct torque values and periodically check for any loosening. By properly tightening all nuts and bolts, you can avoid the risk of a loose wheel and ride with confidence.

Moving on to worn-out bearings…

Worn-out Bearings

The worn-out bearings may cause the wheel to loosen on the bike. It is crucial to pay attention to the condition of the bearings as they play a significant role in the stability and performance of the electric wheel.

Here are four reasons why worn-out bearings can lead to a loose wheel:

  1. Friction increases: As the bearings wear out, the friction between the wheel and the bike frame intensifies, making it easier for the wheel to become loose.

  2. Reduced support: Worn-out bearings lose their ability to provide proper support to the wheel, resulting in increased movement and potential loosening.

  3. Misalignment: When bearings deteriorate, they can cause misalignment between the wheel and the bike frame, leading to instability and the risk of the wheel coming off.

  4. Increased wear on other components: Loose nuts and bolts can put additional strain on bearings, accelerating their deterioration.

With worn-out bearings, the risk of the electric wheel coming off the bike becomes significantly higher. However, another crucial factor that can contribute to this issue is the incorrect installation of the electric wheel.

Advertisement

Incorrect Installation of the Electric Wheel

You should ensure that you properly install the electric wheel to avoid any potential issues. One of the most common installation mistakes is not checking the electric wheel compatibility with your bike.

It is crucial to make sure that the wheel size, axle diameter, and dropout spacing are all compatible with your bike frame. Failure to do so can lead to an improperly seated wheel, which can result in it coming off during use.

Another mistake is not tightening the axle nuts or quick-release skewer sufficiently. This can cause the wheel to become loose and eventually detach from the bike.

Advertisement

Lastly, improper alignment of the wheel can also contribute to it coming off. It is important to align the wheel properly with the frame to ensure a secure fit.

Failing to address these installation mistakes can lead to accidents and injuries.

Now, let’s move on to the next section about overloading the bike.

Overloading the Bike

Overloading your bike can lead to instability and potential accidents if not properly balanced. Improper weight distribution is one of the main factors that can affect bike stability.

When you load your bike with too much weight, especially on the rear, it can cause the front wheel to lift and affect your ability to steer and control the bike. The weight should be evenly distributed between the front and rear of the bike, with heavier items placed lower and closer to the center. This will help maintain stability and prevent the bike from becoming top-heavy.

Advertisement

If the bike is overloaded and the weight is not properly distributed, it can put excessive stress on the axle, leading to potential damage and even the wheel coming off. Therefore, it is crucial to ensure proper weight distribution to maintain bike stability and prevent any damage to the axle.

Damage to the Axle

Improper weight distribution can cause damage to the axle if your bike is overloaded. It is crucial to ensure that the weight on your bike is evenly distributed to prevent excessive strain on the axle. Here are four key considerations to avoid damaging the axle:

  1. Load distribution: Distribute the weight evenly between the front and rear of the bike. An uneven load can put excessive stress on the axle, leading to potential damage.

  2. Weight limits: Be mindful of the weight limits specified by the manufacturer. Exceeding these limits can increase the risk of axle damage.

  3. Tire pressure: Maintaining proper tire pressure is essential. Insufficient tire pressure can result in increased stress on the axle, potentially leading to damage.

  4. Suspension setup: Adjusting the suspension according to the load can help distribute weight more effectively and reduce strain on the axle.

By following these guidelines, you can minimize the risk of axle damage and ensure a safe and enjoyable ride.

Advertisement

Now let’s delve into the next section about riding on rough terrain.

Riding on Rough Terrain

When riding on rough terrain, it’s important to maintain a firm grip on the handlebars to ensure control and stability.

To enhance your off-road biking experience, there are a few key aspects to consider: suspension systems and tire selection.

Suspension systems play a vital role in absorbing the impact of bumps and uneven surfaces, providing a smoother ride. Look for a bike with adjustable suspension settings to match the intensity of the terrain you’ll be tackling.

Additionally, choosing the right tires for rough terrain is crucial. Opt for wider tires with aggressive tread patterns that offer better traction and grip. These tires will provide stability and prevent slippage on loose or uneven surfaces.

Advertisement

By focusing on suspension systems and tire selection, you can ride with confidence and tackle rough terrain with ease.

Transitioning into the next section, excessive vibrations can cause damage to various components of your bike.

Excessive Vibrations

Excessive vibrations can be detrimental to the overall performance and longevity of your bike. When the suspension system is not properly calibrated, it can lead to increased vibrations that can compromise the stability and control of the bike. It is crucial to ensure that the suspension system is regularly inspected and maintained to prevent excessive vibrations.

Additionally, tire balancing plays a significant role in reducing vibrations. When the tires are not balanced correctly, it can cause uneven weight distribution, resulting in vibrations during rides. Regular tire balancing can help maintain a smooth and comfortable ride, minimizing the impact on the bike’s components.

However, excessive vibrations can also be caused by poor maintenance and inspections, which we will discuss in the next section.

Advertisement

Poor Maintenance and Inspections

As we discussed in the previous subtopic, excessive vibrations can lead to the detachment of an electric wheel from a bike. However, another common reason for wheel detachment is poor maintenance and inspections. It is crucial to regularly inspect the condition of your electric wheel to prevent any potential hazards. Here are some prevention tips and common signs of wheel detachment to look out for:

Prevention Tips Common Signs of Wheel Detachment
Regularly tighten the wheel nuts Wobbling or loose wheel while riding
Check the spoke tension Unusual noises coming from the wheel area
Inspect the wheel rims for cracks or damage Uneven wear on brake pads or rim edges

Defective or Low-Quality Electric Wheel

Using a low-quality or defective electric wheel can pose significant safety risks. It is crucial to choose the right electric wheel to ensure a safe and enjoyable riding experience. Here are three key factors to consider when selecting an electric wheel:

  1. Quality: Opt for electric wheels from reputable manufacturers known for their high-quality products. This ensures that the wheel is built to withstand rigorous use and reduces the chances of it malfunctioning or coming off.

  2. Durability: Look for electric wheels made from durable materials that can withstand the demands of daily riding. Wheels that are built to last are less likely to fail unexpectedly, reducing the risk of accidents.

  3. Certification: Check if the electric wheel has undergone proper safety testing and certification. Look for certifications like UL or CE, which indicate that the wheel meets stringent safety standards.

Transitioning into the subsequent section about ‘improper tire pressure,’ maintaining the correct tire pressure is vital for electric wheel safety.

Improper Tire Pressure

Make sure you regularly check the tire pressure on your electric wheel to ensure optimal safety and performance. Improper tire inflation can lead to a variety of issues, including tire blowouts. When the tire is not properly inflated, it puts excessive stress on the sidewalls, making them more susceptible to failure. This can result in a sudden loss of air pressure, causing the tire to blow out while in use.

A tire blowout can be extremely dangerous, especially at higher speeds, as it can cause loss of control and accidents. To avoid this, it is essential to regularly check the tire pressure and inflate it according to the manufacturer’s recommendations. By maintaining proper tire pressure, you can prevent the risk of a tire blowout and ensure a safe and smooth ride on your electric wheel.

Advertisement

Transitioning into the subsequent section about ‘overheating of the electric wheel,’ it is important to note that improper tire pressure can contribute to the overheating issue.

Overheating of the Electric Wheel

To prevent overheating, it’s important to keep an eye on the temperature of your electric wheel and take breaks if it starts to get too hot. Overheating can lead to damage and reduce the lifespan of your wheel. Here are some tips for overheating prevention and troubleshooting overheating issues:

  1. Monitor the temperature: Keep an eye on the temperature gauge or indicator on your electric wheel. If it starts to rise rapidly or reaches unsafe levels, it’s time to take action.

  2. Reduce load: If you’re carrying heavy cargo or climbing steep hills, the motor may be working harder and generating more heat. Consider reducing the load or taking breaks to let the wheel cool down.

  3. Proper ventilation: Make sure the wheel has adequate ventilation. Avoid covering it with bags or other items that may block airflow.

  4. Regular maintenance: Keep the wheel clean and free from dirt or debris that could obstruct airflow or cause overheating.

By following these practices, you can prevent overheating and ensure the optimal performance and longevity of your electric wheel.

Next, let’s discuss another potential issue: corrosion or rusting of the wheel components.

Corrosion or Rusting of the Wheel Components

If you notice corrosion or rust on the components of your electric wheel, it’s important to address it promptly to prevent further damage. Corrosion can weaken the structural integrity of the wheel and affect its overall performance. To prevent corrosion, regular maintenance and proper lubrication are essential. Here is a table outlining some tips for corrosion prevention and proper lubrication:

Advertisement
Corrosion Prevention Proper Lubrication
Clean the wheel regularly to remove dirt and debris that can promote corrosion. Use a lubricant specifically designed for electric wheels to ensure smooth operation.
Apply a corrosion-resistant coating to protect the wheel from moisture and oxidation. Lubricate the bearings and axles to reduce friction and wear.
Check for any signs of rust or corrosion during routine inspections and address them immediately. Avoid over-lubricating, as excess lubricant can attract dirt and debris.

Impact or Collision

When you experience an impact or collision, it’s crucial to assess the condition of your electric bike’s components to ensure they are still functioning properly.

Not only can collisions cause damage to the frame and other parts of the bike, but they can also affect the wheels.

To prevent wheel failure after a collision, it’s important to inspect the spokes, rims, and tires for any signs of damage or misalignment.

Tightening loose spokes, replacing bent rims, and repairing punctured tires are all steps that should be taken to maintain proper wheel function.

Inadequate wheel alignment can lead to a host of problems, including increased friction, decreased stability, and even premature wear of the components.

Advertisement

Therefore, it’s crucial to address any issues with wheel alignment promptly to avoid future complications.

Inadequate Wheel Alignment

Checking for signs of misalignment in your bike’s wheels is crucial to ensuring proper function and preventing potential issues. Misalignment can occur due to various causes, such as improper installation, wear and tear, or even impact from accidents.

When the wheels are not aligned correctly, it can lead to several consequences. First, it affects the handling and stability of the bike, making it harder to steer and control. This can be particularly dangerous when riding at high speeds or in challenging terrain. Additionally, inadequate wheel alignment can cause uneven tire wear, reducing the lifespan of your tires and increasing the risk of a blowout.

Maintaining proper alignment is essential for the overall performance and safety of your electric wheel.

Now, let’s dive into the next section to explore the impact of age and wear on the electric wheel.

Advertisement

Age and Wear of the Electric Wheel

As the electric wheel ages and experiences wear, it may become more prone to misalignment and other issues. This is due to age-related issues and the effects of wear and tear.

The following are some key points to consider regarding the age and wear of the electric wheel:

  • Increased risk of misalignment and imbalance, leading to decreased stability and control.
  • Gradual deterioration of wheel components, such as bearings and spokes, causing potential failure.
  • Weakening of the wheel’s structural integrity, making it susceptible to damage from impacts and road vibrations.
  • Reduced efficiency and performance due to worn-out motor components and electrical connections.
  • Higher likelihood of punctures and tire wear, resulting in decreased traction and increased risk of accidents.

It is crucial to regularly inspect and maintain the electric wheel to mitigate these age-related issues and ensure optimal performance and safety.

Frequently Asked Questions

Can riding on rough terrain cause the electric wheel to come off the bike?

Yes, riding on rough terrain can cause the electric wheel to come off the bike. Improper riding technique and an unbalanced weight distribution can put excessive stress on the wheel, leading to detachment.

How does poor maintenance and inspections contribute to the electric wheel coming off?

Improper maintenance and lack of inspections can contribute to the electric wheel coming off the bike. Failure to regularly check bolts, bearings, and alignment can result in loose or damaged components, compromising the wheel’s stability and increasing the risk of detachment.

What are the risks of using a defective or low-quality electric wheel?

Using a defective or low-quality electric wheel can lead to serious risks of accidents and severe consequences of malfunction. Safety concerns include loss of control, instability, and potential injury to the rider and others on the road.

Advertisement

Can improper tire pressure affect the stability of the electric wheel?

Improper tire pressure can affect the stability of the electric wheel. Improper installation and impact damage are also factors that can lead to instability and potential detachment of the wheel from the bike.

How does overheating of the electric wheel lead to it coming off the bike?

When an electric wheel overheats, it can lead to disastrous consequences, including the detachment from the bike. This is due to the severe impact overheating has on the wheel’s structural integrity, making regular maintenance crucial to prevent such incidents.

Conclusion

In conclusion, the electric wheel coming off a bike can be attributed to various factors. Just like the components of a well-oiled machine, our lives can also experience unexpected setbacks.

Just as loose nuts and bolts, worn-out bearings, and incorrect installation can cause the wheel to detach, our own neglect and ignorance can lead to unforeseen consequences. It is crucial to stay vigilant, address any issues promptly, and prioritize maintenance.

Remember, just like the electric wheel, our lives require constant care and attention to ensure smooth and safe journeys.

Advertisement

Continue Reading

Electric Bike

Why Would Dirt Bike Click When Trying To Use Electric Starter

Published

on

By

An image showcasing a rider wearing protective gear, looking perplexed beside a dirt bike

Anticipating the frustration, you may be curious as to why your dirt bike makes a clicking noise when trying to use the electric starter. Don’t worry, this article will explain the possible reasons and remedies for this common problem.

By exploring factors such as battery voltage, starter motor connections, ignition switch, and more, you will be armed with the knowledge to troubleshoot and resolve the problem.

Keep reading to ensure a smooth ride every time you hit that electric starter.

Key Takeaways

  • Inspect electrical connections for loose or damaged wires and interruptions in electrical flow.
  • Test and address the starter relay for continuity and potential replacement if necessary.
  • Inspect and address the starter gear for wear or damage, ensuring proper engagement with the engine’s flywheel.
  • Test battery cables and fuse for damage or corrosion, ensuring secure connections and a fully charged battery.

Check the Battery Voltage

You should check the battery voltage to determine if it’s causing the dirt bike to click when you try to use the electric starter. Start by checking the battery terminals to ensure they are clean and securely connected. If the terminals are dirty or loose, this can prevent the battery from supplying enough power to the starter.

Advertisement

Next, test the ignition coil to see if it is functioning properly. A faulty ignition coil can also result in a weak spark, causing the bike to click instead of starting.

After checking the battery voltage and testing the ignition coil, it’s important to inspect the starter motor connections. This will help identify any loose or corroded connections that may be impeding the starter’s performance.

Inspect the Starter Motor Connections

Check if the connections of the starter motor are properly inspected. This is crucial when troubleshooting why your dirt bike clicks when attempting to use the electric starter. To ensure smooth functioning, it is important to check the motor brushes and test the ignition coil.

To help you understand the importance of inspecting the starter motor connections, refer to the table below:

Issue Possible Cause Solution
Clicking sound when starting Loose or corroded connections Tighten or clean connections
Starter motor fails to engage Faulty motor brushes Replace brushes
No response from the ignition system Defective ignition coil Test and replace coil

By checking the motor brushes and testing the ignition coil, you can identify and resolve potential issues with your dirt bike’s starter motor connections. This will help you determine if further troubleshooting is required, such as testing the starter relay in the subsequent section.

Advertisement

Test the Starter Relay

To test the starter relay, start by disconnecting the battery and removing the relay from its mounting position.

  1. Inspect the relay for any signs of damage, such as burnt or corroded terminals.

  2. Use a multimeter to measure the resistance between the relay’s terminals. A high resistance reading indicates a faulty relay that needs to be replaced.

  3. Connect the relay to a power source and use jumper wires to bypass the control circuit. If the starter motor engages, it means the relay is working properly.

Starter relay troubleshooting is essential in diagnosing common dirt bike starter issues. A malfunctioning relay can prevent the starter motor from receiving the necessary electrical current to start the engine. If the relay is found to be faulty, it should be replaced with a new one. This will ensure smooth and reliable starting of your dirt bike.

Moving on to the next step, let’s examine the ignition switch.

Advertisement

Examine the Ignition Switch

After examining the starter relay, it’s time to take a look at the ignition switch. Troubleshooting the ignition switch is crucial in identifying common issues with dirt bike ignition systems. The ignition switch is responsible for controlling the flow of electricity from the battery to the starter motor. If there is a problem with the switch, it can prevent the starter motor from receiving power, resulting in a clicking sound when trying to use the electric starter.

To evaluate the ignition switch, you can perform a simple test using a multimeter. Start by disconnecting the ignition switch from the wiring harness and set your multimeter to the continuity or resistance setting. Place one probe on the terminal where the battery connects and the other probe on the terminal connected to the starter motor. If there is no continuity or resistance, it indicates a faulty ignition switch that needs to be replaced.

Now, let’s move on to the next step and evaluate the solenoid.

Evaluate the Solenoid

Advertisement

Now, let’s move on and assess the solenoid.

To troubleshoot the clicking sound when using the electric starter on your dirt bike, it is important to check the wiring connections and examine the solenoid coil.

Start by inspecting the wiring connections between the solenoid and the battery, making sure they are secure and free from any corrosion or damage. If the wiring connections appear to be in good condition, proceed to evaluate the solenoid coil. Look for any signs of wear or damage, such as frayed wires or burnt marks.

If any issues are detected, the solenoid may need to be replaced. By checking the wiring connections and examining the solenoid coil, you can identify and address potential problems that may be causing the clicking sound.

This will allow you to further assess the starter clutch and determine if it requires attention.

Advertisement

Assess the Starter Clutch

Let’s move on and evaluate the starter clutch. The starter clutch is an essential component in the dirt bike’s electric starter system. It engages and disengages the engine’s crankshaft, allowing the starter motor to spin the engine and start it. However, common starter clutch issues can prevent the engine from starting properly. Troubleshooting tips for starter clutch problems include checking for worn or damaged clutch plates, ensuring the clutch springs are correctly tensioned, and inspecting the clutch hub for any signs of wear or damage. Additionally, it is important to verify that the clutch basket is not excessively worn or grooved. By assessing the starter clutch and addressing any issues, you can ensure that the electric starter functions smoothly and effectively. Moving forward, let’s look for loose or corroded wires that could also be causing the clicking sound.

Look for Loose or Corroded Wires

To continue troubleshooting the clicking noise when using the electric starter on your dirt bike, the next step is to inspect the electrical connections.

Start by checking for loose or corroded wires, as these can disrupt the flow of electricity and prevent the starter from engaging properly. Carefully examine all the connections, including those at the battery, starter solenoid, and starter motor. Look for any signs of corrosion or frayed wires, as these can cause a poor electrical connection.

Additionally, it’s crucial to test the battery voltage to ensure it is within the recommended range for starting the bike. A low battery voltage can also result in clicking noises.

Once you have checked for loose or corroded wires and tested the battery voltage, you can move on to the next step of verifying the voltage regulator.

Advertisement

Verify the Voltage Regulator

Check if the voltage regulator is functioning properly by inspecting its connections and testing its output. Make sure the regulator is securely connected to the battery and the wiring harness. Check for any loose or corroded wires that may be affecting the regulator’s performance. Inspect the wiring connections for any signs of damage or wear.

Use a multimeter to test the voltage output of the regulator. Compare the reading to the manufacturer’s specifications to determine if it is within the acceptable range. Additionally, check the alternator output to ensure it is providing the correct voltage to the battery.

If the voltage regulator is not functioning correctly, it may be causing the dirt bike to click when trying to use the electric starter. Next, we will move on to checking the starter button to further diagnose the issue.

Check the Starter Button

To verify the voltage regulator, examine the wiring connections and ensure they are secure.

Now, it’s time to move on to the next step in troubleshooting the clicking sound when using the electric starter on your dirt bike: checking the starter button.

Advertisement

Begin by inspecting the wiring connections to the starter button. Look for any loose or damaged wires that could be causing an interruption in the electrical flow.

If everything appears to be in order, move on to testing the starter relay. Use a multimeter to check for continuity between the relay terminals. If there is no continuity, the relay may need to be replaced.

Once you have completed these steps, you can proceed to the next section and inspect the starter gear for any signs of wear or damage.

Inspect the Starter Gear

After inspecting the wiring connections and testing the starter relay, it is now time to inspect the starter gear for any signs of wear or damage. This is a crucial step in troubleshooting why your dirt bike clicks when trying to use the electric starter.

To properly inspect the starter gear, follow these steps:

Advertisement
  1. Remove the starter motor cover to gain access to the starter gear.
  2. Visually inspect the gear for any signs of chipped teeth, excessive wear, or damage.
  3. Check the starter solenoid to ensure it is engaging the starter gear properly.

Inspecting the starter gear is important because worn or damaged teeth can prevent the gear from properly engaging with the engine’s flywheel, causing the clicking sound.

Once you have inspected the starter gear, you can move on to the next step, which is to test the battery cables.

Test the Battery Cables

Once you have inspected the starter gear, it’s time to test the battery cables.

To diagnose the clicking noise when using the electric starter on your dirt bike, you need to check the ignition system and test the electrical connections.

Start by visually inspecting the battery cables for any signs of damage or corrosion. Ensure that the cables are securely connected to the battery terminals.

Next, use a multimeter to test the voltage of the battery. A fully charged battery should read around 12.6 volts. If the voltage is low, you may need to charge or replace the battery.

Advertisement

Additionally, check the electrical connections throughout the bike, including the starter solenoid and ignition switch.

Once you have tested the battery cables and electrical connections, you can proceed to examine the fuse for any issues.

Examine the Fuse

First, check the fuse to see if there are any issues. This is an important step in troubleshooting the clicking sound when trying to use the electric starter on your dirt bike. A blown fuse can prevent the electric starter from functioning properly.

Start by locating the fuse box, usually located near the battery. Open the fuse box and visually inspect the fuse for any signs of damage or breakage. If you notice a blown fuse, replace it with a new one of the same amperage rating. Common causes for a blown fuse include a short circuit or overloading of the electrical system.

Once you have examined the fuse, you can move on to the next step of evaluating the spark plug for any potential issues.

Advertisement

Evaluate the Spark Plug

Next, check the spark plug to see if there are any issues. The spark plug is a crucial component in the ignition system and evaluating its performance is essential to troubleshooting the dirt bike’s starting issue. Here are three key aspects to consider when evaluating the spark plug:

  1. Condition: Inspect the spark plug for any signs of damage, such as cracks, wear, or corrosion. A damaged spark plug can hinder the ignition process and prevent the engine from starting.

  2. Gap: Measure the spark plug’s electrode gap using a feeler gauge. An incorrect gap can lead to weak or no spark, resulting in a failure to start the engine.

  3. Fouling: Examine the spark plug for any fouling, such as carbon buildup or oil deposits. Fouling can cause misfires and difficulty in starting the dirt bike.

By thoroughly evaluating spark plug performance, you can effectively troubleshoot the ignition system and address any issues.

Moving forward, let’s look for engine seizure to further diagnose the problem.

Look for Engine Seizure

To diagnose the problem, you should now check for any signs of engine seizure.

Engine maintenance is crucial to keep your dirt bike running smoothly. Engine seizure occurs when the piston and cylinder become stuck due to lack of lubrication or excessive heat.

Advertisement

Begin by removing the spark plug and carefully inspect the piston and cylinder walls for any signs of damage or scoring. Look for any excessive carbon buildup on the piston head, which can indicate poor combustion or overheating.

Additionally, check if the engine is able to rotate freely by turning the crankshaft. If you notice any resistance or the engine does not move at all, it may be a sign of engine seizure.

Troubleshooting techniques like these can help identify the issue and determine the necessary repairs. Remember, seek professional assistance if needed to ensure the problem is properly addressed.

Seek Professional Assistance if Needed

If you’re unsure about how to properly address the issue with your engine, it’s recommended that you seek professional assistance. They have the expertise and knowledge to accurately diagnose and fix the problem with your dirt bike’s electric starter.

Seeking professional help is especially important if you have already tried basic troubleshooting techniques and the issue persists. They can assess the situation and determine if there is a more serious underlying problem, such as a faulty starter motor or electrical wiring issue.

Advertisement

Additionally, they have the necessary tools and equipment to carry out any repairs or replacements that may be required. Remember, tinkering with the electrical components of your dirt bike without proper knowledge and skill can be dangerous and can potentially cause further damage.

Play it safe and let the professionals handle it.

Frequently Asked Questions

How can I check the battery voltage on my dirt bike?

To check the battery voltage on your dirt bike and troubleshoot any electrical issues, follow these steps.

First, locate the battery on your bike.

Use a multimeter set to the DC voltage range and connect the positive lead to the battery’s positive terminal and the negative lead to the negative terminal.

Advertisement

The multimeter will display the battery voltage, indicating its current charge level.

This process will help you assess the battery’s health and identify potential electrical problems.

What should I do if the starter motor connections on my dirt bike are loose?

If the starter motor connections on your dirt bike are loose, it can cause issues with starting the bike.

To troubleshoot this problem, start by checking the spark plug. Ensure that it is securely connected and in good condition.

Next, inspect the ignition coil for any loose or damaged connections. Tighten any loose connections and replace any damaged components.

Advertisement

This should help resolve any starting issues caused by loose starter motor connections.

How can I test the starter relay on my dirt bike?

To test the starter relay on your dirt bike, start by locating the solenoid. It’s like the traffic cop for electricity, directing power to the starter motor.

Using a multimeter, set it to the resistance or continuity mode. Connect the multimeter’s probes to the relay’s terminals and activate the electric starter.

If the multimeter reads zero ohms or beeps, the relay is functioning properly. If not, it may be faulty, and troubleshooting the electric starter is necessary.

What steps should I take to examine the ignition switch on my dirt bike?

To examine the ignition switch on your dirt bike for troubleshooting electric starter issues, follow these steps.

Advertisement

First, ensure the ignition switch is in the ‘on’ position and the kill switch is set to ‘run.’

Check the wiring connections to the ignition switch for any loose or damaged wires.

If everything appears to be in order, use a multimeter to test the continuity of the ignition switch.

If the switch fails this test, it may need to be replaced.

How can I assess the starter clutch on my dirt bike?

To assess the starter clutch on your dirt bike, start by removing the clutch cover and inspecting the clutch assembly for any signs of wear or damage. Look for any broken or worn-out clutch plates, springs, or bearings.

Advertisement

Check if the clutch engages smoothly and disengages properly. If you notice any abnormalities, such as slipping or excessive noise, it may indicate clutch wear.

Troubleshooting starter problems involves examining the electrical connections, battery voltage, and the condition of the starter motor.

Conclusion

In conclusion, if your dirt bike clicks when trying to use the electric starter, there are several potential causes that you can investigate.

Start by checking the battery voltage and inspecting the starter motor connections.

Test the starter relay, examine the ignition switch, and evaluate the solenoid.

Advertisement

Don’t forget to examine the fuse and evaluate the spark plug as well.

If none of these steps resolve the issue, it’s best to seek professional assistance.

Remember, addressing these potential problems promptly will ensure your dirt bike runs smoothly and efficiently.

Continue Reading
Advertisement

Affiliate disclaimer

As an affiliate, we may earn a commission from qualifying purchases. We get commissions for purchases made through links on this website from Amazon and other third parties.

About us

We are a passionate team driven by the belief that cycling is a fantastic and accessible way to stay active while enjoying the beauty of the outdoors. Our mission is to share our love for cycling with as many people as possible. We provide a welcoming environment for individuals of all ages, abilities, and backgrounds to come together and ride bikes. With Ralf’s visionary leadership, Zane’s expertise in cycling adventures, and Olivia’s dedication to community building, we strive to create a vibrant space where everyone can experience the joy of cycling. Through group rides, workshops, and inclusive events, we inspire and empower individuals to embrace an active lifestyle. Join us in our quest to pedal together, embrace the joy of cycling, and foster connections that last a lifetime.

Advertisement

Trending