Are you aware that electric bikes are becoming more and more popular, with projections showing global sales reaching 40 million units by 2025?
If you recently purchased an electric bike and are unsure how to set it up, don’t worry! In this article, I will guide you through the process step-by-step using helpful YouTube tutorials.
From choosing the right bike to adjusting and fine-tuning, we’ll cover everything you need to know to get started on your electric bike adventure.
Key Takeaways
- Thoroughly research and consider specific needs and preferences when choosing an electric bike.
- Follow step-by-step YouTube tutorials for bike assembly to ensure proper setup.
- Pay attention to the battery capacity and voltage when choosing a battery for your electric bike.
- Safety gear, including a helmet, gloves, knee pads, and bright reflective clothing, is essential for riding an electric bike.

XDSBIKE Cross200 21 Speed Hybrid Bike Commuter City Bike, for Men and Women, 700C Wheel Lightweight Aluminum Alloy Frame (Matte Black, Frame Size 15")
Design: Hybrid design combines the best features of road and mountain bikes, alllowing you to navigate efficiently all...
As an affiliate, we earn on qualifying purchases.
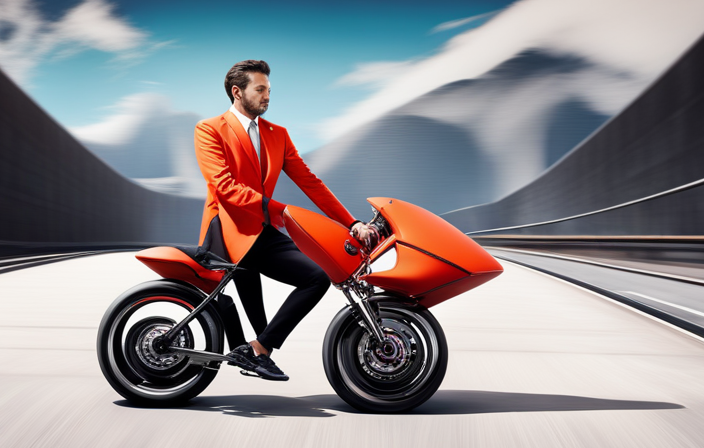
Introduction to Electric Bikes
Electric bikes, also known as e-bikes, are a popular mode of transportation for their convenience and eco-friendly features. These bikes are equipped with a battery-powered motor that provides assistance while pedaling, making it easier to tackle hills and longer distances.
One of the key benefits of electric bikes is their ability to reduce the effort required for cycling, making them accessible to a wider range of riders. When choosing an electric bike, it is important to consider the battery. The battery determines the range and power of the bike, so it’s crucial to choose one that suits your needs. Factors such as battery capacity and voltage are important to consider.
Research and choose the right electric bike for you by taking into account your riding style, terrain, and desired range.

VEVOR Hybrid Bike, Lightweight Aluminum Frame Bike, 700c Wheel Men Women Hybrid Bicycle, Step-Over Adult Urban City Commuter Bikes, with 24-Speed Shimano Drivetrain, Alloy Adjustable Stem, Dual Brakes
Hybrid Bike: The bicycle is made with a lightweight aluminum alloy frame, offering durability and a weight capacity...
As an affiliate, we earn on qualifying purchases.
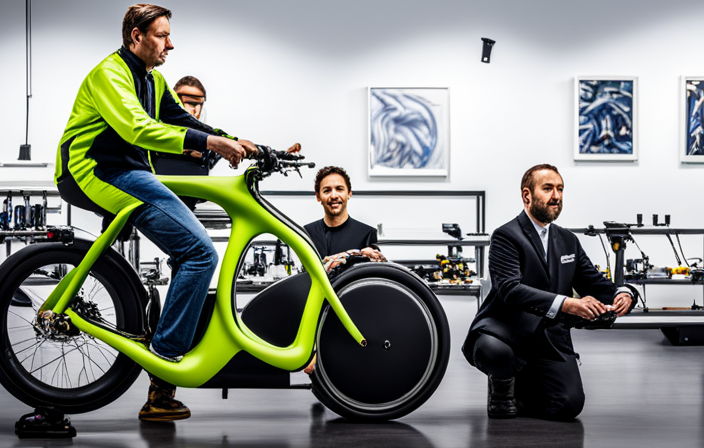
Research and Choose the Right Electric Bike for You
When choosing the right e-bike for you, make sure to thoroughly research and consider your specific needs and preferences.
Electric bikes come in various styles and sizes, each offering different features and capabilities. Consider factors such as the motor power, battery range, and weight capacity to ensure that the bike can handle your desired riding distances and terrains.
Additionally, think about your comfort and safety by examining the bike’s frame size, suspension, and braking system. It’s also important to research electric bike maintenance and troubleshooting, as these bikes require regular care to keep them running smoothly.
Finally, consider the benefits of electric bikes in urban environments, such as reducing traffic congestion and lowering your carbon footprint.
With this information in mind, you can now move on to gather the necessary tools and equipment for setting up your electric bike.

Schwinn Wayfarer Hybrid Bike, 700c Mens and Womens Bike, 7-Speed Hybrid Bicycle, Retro Steel Frame, Front and Rear Linear Pull Brakes, Fenders, Cargo Space, Adult Bicycle
HYBRID BICYCLE: Ride in comfort and vintage style with the Wayfarer by Schwinn. With 700c wheels, this mens...
As an affiliate, we earn on qualifying purchases.
Gather the Necessary Tools and Equipment
In order to assemble my electric bike, I gathered the necessary tools such as Allen wrenches, screwdrivers, and a torque wrench. These tools were essential for properly tightening bolts and adjusting components during the assembly process.
Additionally, I made sure to have the appropriate safety gear including a helmet, gloves, and knee pads to ensure my safety while riding the electric bike.
Tools Needed for Bike Assembly
To assemble your electric bike, you’ll need a few tools. These tools are essential for bike maintenance and troubleshooting common issues that may arise during the assembly process.
First and foremost, you’ll need a set of metric Allen wrenches in various sizes. These are used to tighten bolts and screws throughout the bike.
Additionally, a pair of pliers will come in handy for gripping and twisting wires or cables.
A torque wrench is also necessary to ensure that all bolts are tightened to the correct specifications.
Finally, a set of screwdrivers, both flathead and Phillips head, will be needed for various screws on the bike.
Once you have gathered these tools, you can move on to the next step, which is gathering the necessary safety gear for riding.
Safety Gear for Riding
Before you start riding, make sure you have the proper safety gear. Safety gear is of utmost importance when it comes to riding an electric bike. The right equipment can protect you from potential accidents and minimize the risk of injuries. One crucial piece of safety gear is a helmet. When choosing a helmet, make sure it fits properly and meets safety standards. Look for helmets with adjustable straps and adequate ventilation to ensure comfort during rides. Additionally, consider wearing knee and elbow pads for added protection. It is also important to wear bright and reflective clothing to increase visibility on the road. Remember, safety should always be a priority when riding an electric bike.
When you’re ready to start assembling your electric bike, follow step-by-step YouTube tutorials for guidance.

WEIZE 700C Hybrid Bike for Adults, 14 Speed Road Bike, City Commuter Bicycle with Caliper Brakes, High-Carbon Steel Racing Adult Bike, Urban Adult Bicycle for Men and Women, White
Caliper brake system: The hybrid bike adopts a dual caliper brake design, making daily maintenance more convenient and...
As an affiliate, we earn on qualifying purchases.
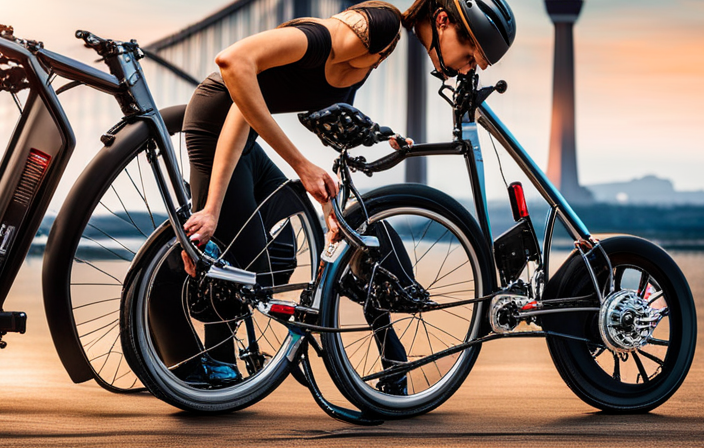
Follow Step-by-Step YouTube Tutorials for Bike Assembly
In this discussion, I’ll guide you through the process of assembling your electric bike using step-by-step YouTube tutorials.
We’ll cover key points such as frame and fork assembly, installing the electric motor and battery, and attaching the wheels.
Additionally, we’ll explore the finishing touches needed to complete your bike assembly.
By following these tutorials, you’ll be able to assemble your electric bike with precision and efficiency.
Frame and Fork Assembly
Start by attaching the frame and fork together using the provided bolts and screws.
Here are three important steps to ensure a secure and proper assembly:
-
Align the holes on the frame and fork: Make sure the holes on both the frame and fork are aligned before inserting the bolts. This will ensure a proper fit and prevent any unnecessary stress on the components.
-
Tighten the bolts securely: Use a wrench or Allen key to tighten the bolts until they are snug. Avoid overtightening, as this can damage the frame or fork.
-
Check for stability: Once the frame and fork are attached, give them a gentle shake to check for any looseness or wobbling. If you notice any instability, double-check the bolts and tighten them if necessary.
Now that the frame and fork are securely attached, we can move on to the next step of installing the electric motor and battery.
Installing the Electric Motor and Battery
To install the electric motor and battery, you’ll need to follow these steps carefully.
First, let’s start with the electric motor installation. Begin by locating the mounting brackets on the frame, which are usually near the bottom bracket. Attach the motor securely using the provided bolts and make sure it is aligned properly.
Next, connect the motor to the wiring harness, ensuring that all the connections are secure and insulated.
Now let’s move on to the battery installation. Find a suitable location on the frame, preferably near the center of gravity, and secure the battery mount using the provided screws. Carefully attach the battery to the mount, making sure it is stable and won’t interfere with other components.
Finally, transition to the next step of attaching the wheels and finishing touches by ensuring that both the motor and battery are securely in place.
Attaching the Wheels and Finishing Touches
After successfully installing the electric motor and battery, it’s time to move on to the next step: attaching the wheels and adding the finishing touches to your electric bike. This is an exciting phase because it brings you one step closer to experiencing the thrill of riding your newly converted electric bike.
To attach the wheels, start by aligning the axle with the dropouts on the fork or frame. Once aligned, tighten the nuts or quick-release levers securely. Don’t forget to double-check that the wheels are centered and spin freely without any wobbling.
Now that the wheels are in place, it’s important to test the electric motor. Connect the battery to the motor and turn on the power. Listen for any unusual noises and observe whether the motor is functioning properly. If everything seems good, you’re almost there!
In the next section, we will discuss adjusting and fine-tuning your electric bike for optimal performance. But before we dive into that, let’s make sure everything is working smoothly with the current setup.
Adjusting and Fine-Tuning Your Electric Bike
When it comes to adjusting and fine-tuning my electric bike, there are a few key points that I focus on.
First, setting the proper seat height is crucial for comfort and efficiency while riding.
Next, I make sure to adjust the handlebars and brakes to ensure that I have a comfortable and secure grip.
Lastly, I always check and adjust the gears and suspension to ensure smooth and efficient shifting and a comfortable ride.
By paying attention to these key points, I can optimize my electric bike for the best riding experience.
Setting the Proper Seat Height
Adjusting the seat height correctly is essential for a comfortable and efficient electric bike setup. Finding the proper seat position is crucial to avoid discomfort and prevent injuries.
To adjust the seat height, start by standing next to the bike and ensuring that both feet are flat on the ground. Next, sit on the saddle and check if your leg is slightly bent when the pedal is at its lowest position. If your leg is fully extended or too bent, adjust the seat accordingly. Use the quick release lever or the seat post clamp to raise or lower the seat until you find the right height.
Once the seat is set, you can move on to adjusting the handlebars and brakes for optimal control and safety.
Adjusting the Handlebars and Brakes
To achieve optimal control and safety, it’s important to adjust both the handlebars and brakes.
Start by adjusting the handlebars to a comfortable position.
Loosen the bolts on the stem and rotate the handlebars until they are aligned with your shoulders.
Tighten the bolts to secure them in place.
Next, check the brake levers.
They should be positioned so that they are easily reachable and can be activated with a slight squeeze.
Adjust the levers by loosening the bolts and sliding them up or down the handlebars.
Once you have the handlebars and brakes set up correctly, make sure to adjust the pedal position for optimal efficiency.
Troubleshoot common brake issues such as squeaking or weak stopping power.
Now, let’s move on to checking and adjusting gears and suspension for a smooth ride.
Checking and Adjusting Gears and Suspension
Before starting your ride, it’s important to check and adjust the gears and suspension on your bike. This will ensure a smooth and comfortable ride, as well as optimize your bike’s performance. Here are four key steps to follow when checking gears and adjusting suspension:
-
Check gear shifting: Start by shifting through all the gears to make sure they engage smoothly and without any skipping or hesitation. If you notice any issues, you may need to adjust the cable tension or limit screws.
-
Adjust derailleur alignment: Ensure that the derailleur is properly aligned with the gears by visually inspecting its position. If it is misaligned, use the barrel adjuster or limit screws to make the necessary adjustments.
-
Inspect suspension components: Check the suspension forks and rear shock for any signs of damage or wear. Make sure they are properly lubricated and adjust the air pressure or rebound settings according to your weight and riding style.
-
Test the suspension: Take your bike for a short test ride to evaluate the suspension’s performance. Pay attention to how it absorbs bumps and adjusts to your weight. If needed, fine-tune the settings to achieve the desired comfort and responsiveness.
Now that you have checked and adjusted your gears and suspension, let’s move on to understanding and maintaining your electric bike.
Understanding and Maintaining Your Electric Bike
To understand and maintain your electric bike, you’ll need to regularly check the tire pressure and battery level. Understanding battery maintenance is crucial for maximizing the lifespan of your electric bike’s power source. It’s important to know how to properly charge and store the battery to prevent damage and ensure optimal performance. Troubleshooting common electric bike issues is also essential to keep your bike running smoothly. From diagnosing electrical problems to addressing motor or controller issues, knowing how to troubleshoot can save you time and money. To assist you in understanding and maintaining your electric bike, refer to the table below for a quick reference guide on battery maintenance and common troubleshooting tips.
| Battery Maintenance | Troubleshooting Common Issues |
|---|---|
| – Regularly charge the battery | – Check electrical connections |
| – Store the battery in a cool, dry place | – Test the motor and controller |
| – Avoid overcharging or undercharging | – Inspect for loose wires |
By following these guidelines and staying proactive with maintenance, you can ensure a smooth and enjoyable ride on your electric bike. Now, let’s explore some safety and riding tips for electric bikes.
Safety and Riding Tips for Electric Bikes
Now let’s take a look at some safety and riding tips for e-bikes.
When it comes to electric bike maintenance, it’s important to regularly check the brakes, tires, and lights to ensure they are in good working condition. It’s also a good idea to keep the battery charged and clean any dirt or debris off the bike after each ride.
As for common safety concerns, always wear a helmet and follow the rules of the road. Be aware of your surroundings and signal your intentions to other cyclists and motorists. Additionally, practice proper riding techniques such as using both brakes evenly and maintaining a steady speed.
By following these tips, you can ensure a safe and enjoyable ride on your electric bike.
Now let’s transition into exploring different riding routes and destinations.
Exploring Different Riding Routes and Destinations
Let’s take a look at some great riding routes and destinations for e-bikes.
When it comes to exploring new places on my electric bike, I always make sure to have the right riding gear. Wearing a helmet, reflective clothing, and gloves not only keeps me safe but also makes me visible to other road users. Additionally, I regularly check my e-bike’s tire pressure, brakes, and battery to ensure a smooth and trouble-free ride.
As for the routes, one of my favorites is a scenic trail that winds through a nearby forest. The lush greenery and peaceful atmosphere make it a perfect escape from the city.
Another fantastic destination is a waterfront path that offers picturesque views of the ocean. Riding along this route is a truly refreshing experience.
As I continue to explore different riding routes and destinations, I can’t wait to share my experiences with other electric bike enthusiasts in the upcoming section about joining electric bike communities and events.
Joining Electric Bike Communities and Events
Joining electric bike communities and events is a great way to connect with fellow e-bike enthusiasts and participate in exciting group rides. It’s amazing to be part of a local group that shares the same passion for electric bikes.
By joining these communities, you can gain valuable knowledge and tips from experienced riders, and even make new friends along the way. Participating in group rides is not only fun, but it also allows you to explore new routes and destinations that you may not have discovered on your own.
You can experience the thrill of riding in a pack, enjoying the camaraderie and support of your fellow riders. So, if you’re looking to enhance your electric bike adventures, joining local groups and participating in group rides is definitely a must.
It’s a wonderful way to expand your horizons and continue exploring the world of electric bikes.
Conclusion and Continued Electric Bike Adventures
To conclude, you can continue your electric bike adventures and explore new horizons. As you delve deeper into the world of electric bikes, it’s important to understand electric bike maintenance and how to troubleshoot common issues. By taking proper care of your electric bike, you can ensure its longevity and optimal performance. Regularly check the tires for proper inflation and make sure the brakes are functioning well. Keep the battery charged and clean, and be mindful of any strange noises or vibrations during your rides. If you encounter any issues, consult the user manual or seek assistance from a professional. Electric bike communities and online forums are also great resources for troubleshooting tips and advice. With proper maintenance and troubleshooting, you can continue enjoying your electric bike adventures for years to come.
| Maintenance Tips | Troubleshooting Tips | Adventure Ideas |
|---|---|---|
| Check tire pressure | Battery not charging | Explore scenic trails |
| Clean and lubricate | Motor not starting | Visit local attractions |
| Inspect brakes | Strange vibrations | Plan a longer trip |
| Charge battery | Error codes on display | Join group rides |
Frequently Asked Questions
Can I convert my regular bike into an electric bike?
Yes, you can convert your regular bike into an electric bike using electric bike conversion kits. By doing so, you can enjoy the benefits of having an electric bike like increased speed, ease of climbing hills, and longer distances.
What is the average cost of an electric bike?
Electric bikes vary in cost depending on features, but the average price is around $1,500 to $3,000. With their convenience, eco-friendliness, and ability to tackle hills effortlessly, the benefits of electric bikes are worth the investment.
How long does it take to charge an electric bike battery?
It typically takes around 3-6 hours to fully charge an electric bike battery. However, the charging time can vary depending on the battery capacity and charger used. It’s important to follow the manufacturer’s guidelines to maximize battery lifespan.
Can I ride an electric bike in the rain?
Riding an electric bike in the rain requires proper technique. Did you know that 70% of electric bike riders face challenges in wet conditions? To ride safely, maintain a firm grip, brake gently, and regularly clean and lubricate your bike for optimal performance.
Are electric bikes legal in all countries?
Electric bikes are legal in many countries, but regulations vary. Pros include eco-friendliness and convenience, while cons include high initial cost and limited range. They reduce pollution and traffic congestion, making them an environmentally-friendly transportation option.
Conclusion
As I wrap up my electric bike adventure, I can’t help but feel a sense of exhilaration and satisfaction. The journey of setting up my electric bike has been a thrilling ride, filled with ups and downs.
From researching and choosing the perfect bike to following step-by-step tutorials, I’ve learned so much along the way. But this is not the end, it’s only the beginning.
With my newly assembled electric bike, I am ready to explore new routes, join communities, and embark on countless unforgettable adventures. The electric bike world is vast and exciting, and I can’t wait to see where it takes me next.
So, fasten your helmet and get ready to join me on this electrifying journey!