Connect with us

Electric Bike

How To Ride An Electric Bike – Youtube

Published

on

An image of a person confidently riding an electric bike, effortlessly navigating through a scenic park

Riding an electric bike feels like gliding through the breeze on a mystical flying carpet. It’s an exciting adventure that merges the excitement of biking with the convenience of electric assistance.

If you’re ready to embark on this exciting journey, YouTube is your ultimate guide. With a plethora of high-rated tutorials and helpful comments, you can learn everything from basic riding techniques to advanced hill climbing.

Join me as we delve into the world of electric bike riding through the lens of YouTube.

Key Takeaways

  • Search for ‘Electric Bike Riding Tutorial’ on YouTube
  • Look for videos with high ratings and positive comments
  • Choose tutorials that suit your learning style and experience level
  • Familiarize yourself with electric bike components

Search for "Electric Bike Riding Tutorial" on YouTube

You can search for ‘Electric Bike Riding Tutorial’ on YouTube, where you’ll find a plethora of videos that can help you learn the basics of riding an electric bike.

Advertisement

These tutorials are a great resource for beginners and even experienced riders looking to brush up on their skills. In these videos, you’ll learn not only how to ride your electric bike but also important maintenance tips and safety precautions to ensure a smooth and safe ride.

When it comes to electric bike maintenance, these videos will guide you on how to properly inspect your bike, check the tire pressure, and keep the battery in good condition. They will also provide tips on how often to clean and lubricate the chain, as well as how to adjust the brakes and gears for optimal performance.

In terms of safety precautions, these tutorials emphasize the importance of wearing a helmet and other protective gear, as well as following traffic rules and signals. They will teach you how to maintain a proper riding posture, use hand signals to communicate with other road users, and be aware of your surroundings at all times.

To get the most out of these tutorials, look for videos with high ratings and positive comments. This will ensure that you are learning from reliable sources and getting accurate information.

Look for videos with high ratings and positive comments

Check out videos that have high ratings and positive comments to find the best resources for learning how to ride an e-bike. When it comes to learning how to ride an electric bike, there are countless tutorials available on YouTube. However, not all of them are created equal. By seeking out videos with high ratings and positive comments, you can ensure that you’re learning from the best resources out there.

Advertisement

One important aspect to consider is the quality of the electric bike being used in the tutorial. Look for videos featuring high rated electric bike models, as this can give you a better understanding of how to handle a top-notch e-bike. These models often have advanced features and superior performance, allowing you to experience the full benefits of electric bike riding.

Furthermore, videos with positive comments can provide valuable insight into the effectiveness of the tutorial. Reading comments from viewers who have successfully learned from the video can give you confidence that the content is helpful and reliable.

Start with beginner-friendly tutorials

To get started, begin by searching for beginner-friendly tutorials that are easy to follow and understand. YouTube is a great platform to find such tutorials, as there are countless videos available for learning how to ride an electric bike. When searching, make sure to include keywords like ‘beginner-friendly’ or ‘easy to follow’ to narrow down your options. It’s important to choose the right tutorial that suits your learning style and level of experience.

Advertisement

Once you’ve found a tutorial that catches your interest, take the time to watch it in its entirety. Pay attention to the instructor’s explanations and demonstrations. They will guide you through the process of riding an electric bike step by step. You’ll learn about basic techniques such as starting, stopping, and turning, as well as more advanced skills like shifting gears and maintaining balance.

While watching these tutorials, you may also come across valuable information about electric bike accessories. Electric bike accessories can enhance your riding experience and provide added safety and convenience. Some popular accessories include helmets, lights, locks, and racks. Familiarizing yourself with these accessories will help you make informed decisions when it comes to outfitting your electric bike.

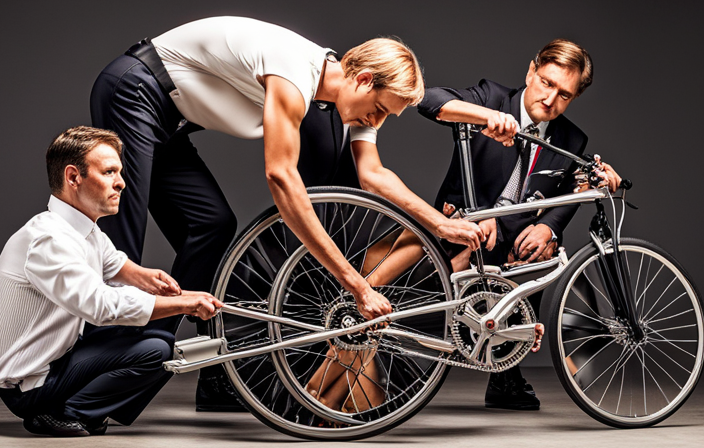
Familiarize yourself with the different parts of an electric bike

Start by familiarizing yourself with the various components of an e-bike. Understanding the different parts will not only help you choose the right electric bike for your needs but also enable you to properly mount and dismount the bike. Here is a table that outlines the key components of an electric bike:

Component Description Purpose
Frame The main structure of the bike Provides support and stability
Battery Stores electrical energy Powers the motor
Motor Provides assistance when pedaling Helps to propel the bike
Controls Buttons or display to control the bike’s settings Allows you to adjust speed and mode

Choosing the right electric bike is essential for a comfortable and enjoyable riding experience. Consider factors such as the type of terrain you’ll be riding on, the distance you plan to travel, and your riding style. Whether you prefer a mountain bike, a city bike, or a folding bike, there is an electric bike suitable for you.

Now that you are familiar with the components of an e-bike and have chosen the right one, it’s time to learn how to properly mount and dismount the bike. Transitioning smoothly between these actions will ensure your safety and make your riding experience more enjoyable.

Advertisement

Learn how to properly mount and dismount the bike

Now that you’ve chosen the right e-bike, let’s talk about how to properly mount and dismount it for a safe and smooth riding experience.

The mounting technique is crucial to ensure your safety and the longevity of your bike. To mount the e-bike, start by standing on the left side of the bike with your dominant foot on the ground. Then, swing your other leg over the saddle and gently lower yourself onto the seat. Make sure to position your feet on the pedals, ready to start riding.

When dismounting the e-bike, slow down and find a flat and stable surface. Shift your weight slightly to one side, lift your dominant leg off the pedal, and swing it back over the saddle. Keep your other foot on the pedal until your dominant foot is firmly on the ground. This dismounting technique will help you maintain balance and avoid any sudden movements that may cause accidents.

Advertisement

Now that you know how to mount and dismount your e-bike properly, let’s move on to the next step of practice balancing and steering on a flat surface.

Practice balancing and steering on a flat surface

Once you’ve mastered mounting and dismounting, it’s important to practice balancing and steering on a flat surface to improve your riding skills.

Balancing techniques and steering techniques are essential for maintaining control and maneuvering your electric bike effectively.

Here are some tips to help you refine these skills:

  • Keep your body centered: Maintain a balanced posture by keeping your weight evenly distributed over the bike.
  • Focus on your core: Engage your core muscles to stabilize your body and maintain balance.
  • Look ahead: Keep your eyes focused on the path ahead to anticipate obstacles and make smoother turns.
  • Practice slow turns: Start by making small, controlled turns to get a feel for how the bike responds to your steering inputs.

By practicing these techniques, you will develop a better sense of balance and control over your electric bike.

Once you feel comfortable with balancing and steering, you can move on to mastering the basic controls, including accelerating and braking.

Advertisement

This will allow you to confidently navigate different terrains and fully enjoy the experience of riding an electric bike.

Master the basic controls, including accelerating and braking

To improve your riding skills, it’s important to practice mastering the basic controls of accelerating and braking on your electric bike. Proper acceleration and braking techniques are crucial for a smooth and safe ride. Let’s start with acceleration techniques. When starting from a stop, gently twist the throttle to gradually increase speed. Avoid jerky movements that may cause instability. As you gain confidence, you can apply more throttle to accelerate faster. When it comes to braking, it’s important to use both the front and rear brakes for maximum efficiency. Apply gradual pressure to the brake levers to slow down smoothly. Remember to shift your body weight slightly backward to maintain balance and prevent the bike from tipping forward. Now, let’s take a look at a table that summarizes the key points of acceleration and braking techniques:

Acceleration Techniques Braking Techniques
Gradually twist throttle Apply gradual pressure to brake levers
Avoid jerky movements Use both front and rear brakes
Increase throttle as confidence grows Shift body weight slightly backward

Learn how to shift gears (if applicable)

To efficiently control the speed and power of your electric bike, it’s essential to learn how to shift gears smoothly. Shifting gears on an electric bike is similar to shifting gears on a regular bicycle. Here are some shifting techniques and gear changing tips to help you master this skill:

  1. Anticipate the terrain: Before you encounter a hill or a steep incline, shift to a lower gear to make pedaling easier. Similarly, shift to a higher gear on flat ground or when going downhill to maintain your speed.

  2. Shift one gear at a time: When shifting gears, it’s best to change one gear at a time. This allows the chain to smoothly transition from one gear to another, preventing any unnecessary strain or damage.

  3. Ease off the pedals: When shifting gears, ease off the pressure on the pedals for a split second. This relieves tension on the chain and makes it easier to shift smoothly.

  4. Practice and experiment: Each electric bike may have a slightly different gear shifting system, so it’s important to practice and get familiar with your bike’s specific gear ratios. Experiment with different gear combinations to find the most comfortable and efficient setup for your riding style.

By mastering these shifting techniques and gear changing tips, you’ll have better control over your electric bike’s speed and power.

Now, let’s move on to practicing riding in a straight line and making turns.

Advertisement

Practice riding in a straight line and making turns

After mastering the art of shifting gears, it’s time to move on to the next important skill: riding in a straight line and making turns. This is crucial for maintaining control and stability while riding an electric bike.

To practice riding in a straight line, find a wide and open space, such as an empty parking lot or a quiet street. Start by pedaling slowly and focusing on keeping your bike moving in a straight path. It may take a few tries to get the hang of it, but with practice, you’ll be able to ride in a straight line effortlessly.

Once you feel comfortable riding in a straight line, it’s time to work on your turning techniques. Look for areas with gentle curves or corners to practice. Approach the turn at a controlled speed, and lean your body slightly in the direction you want to turn. Remember to use your handlebars to guide your bike smoothly through the turn.

As you gain more experience, challenge yourself by practicing on uneven surfaces like gravel or grass. This will help improve your balance and control in different riding conditions.

Now that you have mastered riding in a straight line and making turns, it’s time to build confidence by gradually increasing your speed.

Advertisement

Build confidence by gradually increasing your speed

Once you feel comfortable riding in a straight line and making turns, it’s time to build confidence by gradually increasing your speed. Building confidence is crucial when it comes to riding an electric bike, as it allows you to fully enjoy the experience and take advantage of the bike’s capabilities.

Start by increasing your speed in small increments, focusing on maintaining control and balance. As you become more comfortable, you can gradually increase your speed even further. This gradual approach will help you build confidence in your ability to handle higher speeds and react quickly if needed. Remember to always prioritize safety and wear protective gear such as a helmet and knee pads.

By increasing your speed on the electric bike, you will also gain a better understanding of how it handles at different speeds and how it responds to your input. This knowledge will be essential as you learn how to navigate different types of terrain, such as hills, gravel, or rough surfaces. Understanding how your electric bike performs at higher speeds will give you the confidence to tackle any challenges that may come your way.

Transitioning into learning how to navigate different types of terrain, it’s important to take into account the specific characteristics of each terrain and adjust your riding technique accordingly.

Learn how to navigate different types of terrain

When navigating different types of terrain, remember to adjust your technique based on the specific characteristics of each terrain. One important aspect to consider when riding an electric bike is the type of battery it uses. There are different types of electric bike batteries available, such as lithium-ion, lead-acid, and nickel-metal hydride. Each type has its own advantages and disadvantages, so it’s important to choose the one that best suits your needs.

Advertisement

In addition to the battery, another crucial factor in navigating different terrains is choosing the right tires. The type of tires you use can greatly affect your riding experience and performance. For example, if you’re riding on rough or off-road terrains, it’s recommended to use wider tires with deeper treads for better traction and stability. On the other hand, if you’re riding on smooth pavements or roads, thinner tires with less rolling resistance can help you achieve higher speeds.

To help you understand the importance of adjusting your technique based on different terrains, here’s a table that shows the characteristics of various terrains and the recommended adjustments:

Terrain Characteristics Recommended Adjustments
Mountain Steep slopes, uneven surface Use a lower gear, shift your weight back
Gravel Loose surface, reduced grip Lower tire pressure, maintain balance
City streets Smooth pavement, obstacles Stay alert, follow traffic rules

Master hill climbing techniques

Mastering hill climbing techniques can greatly enhance your riding skills and confidence on different terrains. When it comes to conquering hills, there are a few advanced riding techniques that can make all the difference.

First, it’s important to approach the hill with enough speed and momentum to carry you up. This means shifting to a lower gear and pedaling with power before you reach the incline. As you start climbing, maintain a steady and controlled pace, focusing on your breathing and keeping your upper body relaxed.

It’s also crucial to distribute your weight properly, shifting it forward to maintain traction on the front wheel and prevent it from lifting off the ground. Another technique to remember is to stay seated and pedal smoothly, avoiding any sudden jerks or shifts in your body position. By practicing and perfecting these hill climbing techniques, you’ll be able to tackle even the steepest inclines with ease.

Advertisement

To ensure a safe and enjoyable ride, it’s important to practice proper safety measures, such as wearing a helmet and using hand signals. These precautions are essential for your well-being and the safety of others around you. Wearing a helmet can protect you from head injuries in the event of a fall or collision. Additionally, using hand signals to indicate turns or stops can help communicate your intentions to other riders and motorists, reducing the risk of accidents.

Practice proper safety measures, such as wearing a helmet and using hand signals

To ensure your safety and the safety of others, it’s crucial to wear a helmet and use hand signals while cycling. This applies to all types of biking, including electric bikes. In fact, electric bikes have become increasingly popular for commuting, thanks to their numerous benefits.

Not only do they provide an eco-friendly mode of transportation, but they also offer an efficient way to get around town. However, it’s important to remember that riding an electric bike comes with its own set of safety considerations. One way to enhance safety is by incorporating wearable technology specifically designed for electric bike riders.

These devices can provide real-time information about your speed, battery life, and even alert you of potential hazards on the road. By wearing this technology, you can stay informed and take necessary precautions to ensure a safe ride. In addition to wearing a helmet and using hand signals, investing in this wearable technology can greatly enhance your overall safety while riding an electric bike.

Now that we’ve covered safety measures, let’s move on to the next section: watching videos on maintenance and troubleshooting tips.

Advertisement

Watch videos on maintenance and troubleshooting tips

You can find helpful videos on maintenance and troubleshooting tips for your electric bike by searching on YouTube. It’s always important to keep your electric bike in good condition to ensure optimal performance and longevity. Regular maintenance and knowing how to troubleshoot common issues can save you time and money in the long run. Here are some maintenance tips and troubleshooting techniques that you can learn from YouTube videos:

Maintenance Tips Troubleshooting Techniques
Regularly clean your bike Identify and fix electrical issues
Check tire pressure Diagnose and repair motor problems
Lubricate the chain Resolve battery charging problems

By watching these videos, you can learn how to properly clean your electric bike, check tire pressure, and lubricate the chain. Additionally, you can gain insights on troubleshooting techniques such as identifying and fixing electrical issues, diagnosing and repairing motor problems, and resolving battery charging problems.

With the knowledge gained from these videos, you’ll be able to maintain your electric bike effectively and quickly troubleshoot any issues that may arise. It’s important to stay proactive in keeping your electric bike in top shape to ensure a smooth and enjoyable riding experience.

Transition: Now that you have learned some valuable maintenance and troubleshooting tips, another great way to enhance your electric bike journey is to join online communities or forums to connect with other electric bike riders and exchange tips and experiences.

Join online communities or forums to connect with other electric bike riders and exchange tips and experiences

By joining online communities or forums, you can connect with fellow electric bike riders and share valuable tips and experiences. The benefits of joining these communities are numerous.

Advertisement

Firstly, you can learn from the experiences of others and gain insights into common challenges faced by electric bike riders. Whether it’s finding the best routes, dealing with battery issues, or navigating traffic, there’s a wealth of knowledge available within these communities. Additionally, you can get recommendations for the best accessories, maintenance tips, and even find local riding groups.

One common challenge faced by electric bike riders is range anxiety. This refers to the fear of running out of battery power before reaching your destination. By connecting with other riders in online communities, you can learn strategies to extend your battery life and plan your rides more effectively.

Another challenge is finding reliable repair and maintenance services. Online forums can provide recommendations for trusted mechanics or even DIY tips for fixing common issues.

Frequently Asked Questions

How do I find electric bike riding tutorials on YouTube with high ratings and positive comments?

To find reliable electric bike riding tutorials on YouTube with high ratings and positive comments, consider looking for videos that cover what to consider when purchasing an electric bike. These videos often provide detailed and informative guidance.

What are the different parts of an electric bike that I should familiarize myself with?

To fully understand an electric bike, it’s important to familiarize yourself with its key components. The electric bike battery powers the motor, which is responsible for propelling the bike forward. Knowing these parts will enhance your overall riding experience.

Advertisement

How do I properly mount and dismount an electric bike?

To properly mount an electric bike, approach from the left side and hold the handlebars firmly. Swing your leg over the saddle and position both feet on the ground. To dismount, stop the bike, place both feet on the ground, and swing your leg back over the saddle.

How do I shift gears on an electric bike?

To shift gears on an electric bike, I use a smooth and fluid motion, like dancing with the bike. I adjust the gears based on the terrain, using the shifting techniques I’ve learned, ensuring a comfortable ride.

What are some common maintenance and troubleshooting tips for electric bikes?

To ensure the optimal performance of your electric bike, it’s important to prioritize electric bike battery maintenance. Regularly check and clean the battery connections, monitor the battery level, and store it properly. Troubleshooting common electrical issues may involve inspecting the wiring, connectors, and fuses for any damage or loose connections.

Conclusion

In conclusion, learning how to ride an electric bike is an exciting and fulfilling journey. By following the step-by-step tutorials on YouTube, you can quickly become proficient in riding and mastering the different techniques.

Just like a bird soaring through the sky, riding an electric bike gives you a sense of freedom and exhilaration.

Advertisement

Remember to always prioritize safety, connect with fellow riders, and stay up-to-date with maintenance tips.

So hop on your electric bike and let the adventure begin!

Ralf is a devoted husband and father who loves spending time with his family. He enjoys riding his bicycle as much as possible, and takes every opportunity he can to get out on the open road. Ralf is a kind and gentle person who wants only the best for those around him.

Continue Reading
Advertisement

Electric Bike

How To Turn Your Bike Into Electric

Published

on

By

An image showcasing a step-by-step transformation of a traditional bicycle into an electric one

Have you ever wished for your bike to transform into an electric powerhouse, effortlessly gliding through the streets with a surge of power? Well, fellow cycling enthusiasts, get ready for your wildest dreams to come true!
[Translated into English (United States)]

In this article, I will guide you through the exhilarating process of turning your ordinary bike into an electrifying marvel. Get ready to embrace a whole new level of speed, convenience, and eco-friendly transportation as we delve into the intricate world of electric bike conversions.

Let’s get electrified!

Key Takeaways

  • Power Assist Integration and Regenerative Braking enhance bike’s range and efficiency
  • Accessories and Features transform regular bike into powerful electric ride
  • Maintenance is important for optimal bike performance and safety
  • Effortless Hill Climbing, Increased Speed, and Extended Range improve overall cycling experience

Assessing Your Bike’s Compatibility

You’ll need to assess if your bike is compatible for the conversion. Evaluating compatibility is crucial to ensure a successful electric bike transformation.

Advertisement

Start by identifying necessary modifications that may be required. First, examine the frame of your bike. It should be sturdy enough to support the added weight of the electric components. Check the spacing between the rear dropouts to confirm if it can accommodate the electric motor hub.

Next, evaluate the fork and make sure it has enough clearance for the front wheel motor or battery pack. Assess the brakes and determine if they are compatible with the increased speed and weight of the electric bike. Additionally, consider the drivetrain and gears, as they may need adjustments to handle the added power.

By thoroughly evaluating compatibility and identifying necessary modifications, you can proceed confidently with your bike-to-electric conversion project.

Choosing the Right Electric Conversion Kit

When selecting the appropriate electric conversion kit, it’s important to consider the specific features that best suit your needs. Here are four key factors to consider when comparing different types of electric conversion kits:

  1. Motor power: Different kits offer varying power outputs, ranging from 250 watts to 1000 watts. Consider your intended use and terrain to choose the right power level for optimal performance.

  2. Battery capacity: The capacity of the battery determines the range of your electric bike. Higher capacity batteries allow for longer rides but may also increase the weight of your bike.

  3. Controller system: The controller manages the flow of power from the battery to the motor. Look for a kit with a reliable and efficient controller system for smooth operation.

  4. Cost and performance: Understand the cost implications of the conversion kit, including the initial purchase price and potential maintenance costs. Additionally, consider the performance implications, such as the top speed and acceleration capabilities of the kit.

By carefully considering these factors, you can choose the right electric conversion kit that meets your specific requirements.

Advertisement

Gathering the Necessary Tools and Equipment

To gather the necessary tools and equipment, start by making a list of items needed for the electric conversion. The key to a successful conversion is choosing the appropriate battery and finding the best conversion kit supplier. When it comes to selecting the battery, consider factors such as voltage, capacity, and weight. A higher voltage will give your bike more power, while a higher capacity will allow for longer rides. It’s important to find a battery that fits securely on your bike and is compatible with the conversion kit. As for the conversion kit supplier, look for a reputable company that offers a wide range of options and has good customer reviews. Research and compare different suppliers to find the best one for your needs.

Item Description Supplier
Electric Conversion Kit Includes motor, controller, and cables XYZ Electric
Lithium-ion Battery 48V, 15Ah Battery World
Battery Mount Securely attaches battery to bike frame Bike Accessories Co.
Battery Charger Charges the battery Power Tech
Conversion Kit Tools Wrenches, screwdrivers, pliers, etc. Tool Time
Wiring Harness Connects the components Electric Bike Parts Unlimited

Removing Existing Bike Components

Start by removing the existing bike components that will be replaced during the electric conversion. This process requires a careful approach to ensure the bike frame remains intact.

Begin by loosening and removing the pedals using a pedal wrench.

Advertisement

Next, detach the front and rear brakes by loosening the bolts and removing the brake calipers.

Take off the chain by using a chain tool to push out the pins and separate the links.

Remove the derailleur by unscrewing the bolts that hold it in place.

Finally, detach the handlebars by loosening the stem bolts and sliding the handlebars out.

Throughout this process, it’s crucial to handle the bike components with care to avoid any damage or misalignment.

Advertisement

Installing the Electric Conversion Kit

Now, you can begin installing the electric conversion kit by following the provided instructions. The first step is to install the motor onto the bike frame. Make sure to secure it tightly using the provided mounting brackets. Next, connect the motor to the controller using the appropriate wiring harness. The controller is the brain of the electric system and will control the speed and power output of the motor. Once the motor and controller are connected, it’s time to program the controller. This step is crucial as it allows you to customize the performance of your electric bike. Follow the instructions to set the desired speed limits, acceleration, and other parameters. After programming, double-check all the connections and make sure everything is secure before testing the electric system.

Connecting the Wiring and Battery

After securing the motor onto the bike frame, the next step is to connect the wiring and battery.

This is a crucial part of the electric conversion process as it ensures that the motor receives the necessary power to function.

Advertisement

To start, I carefully route the wiring from the motor to the battery location. I make sure to secure the wiring using zip ties to prevent any loose connections.

Next, I connect the positive and negative wires from the motor to the corresponding terminals on the battery. It is important to double-check the polarity and ensure that the connections are tight and secure.

Once the wiring is properly connected, I install the battery onto the bike frame using the provided mounting brackets. This ensures that the battery is securely in place and protected during rides.

Testing and Fine-Tuning the Electric System

After connecting the wiring and battery, the next step in turning your bike into an electric one is to test and fine-tune the electric system. This crucial phase involves evaluating the system’s performance and making any necessary adjustments to optimize its efficiency. To help you with this process, I have created a table outlining different testing methods and performance analysis techniques:

Testing Methods Performance Analysis
Range testing Battery capacity
Speed testing Motor power output
Hill climbing Torque
Acceleration Efficiency

By conducting range testing, you can determine the distance your electric bike can travel on a single charge. Speed testing allows you to assess the motor’s power output, while hill climbing tests the torque capabilities. Additionally, analyzing acceleration and efficiency provides insights into the overall performance of your electric bike. Utilizing these testing methods and performance analysis techniques will ensure that your electric conversion is successful and meets your expectations.

Advertisement

Adding Additional Accessories and Features

To enhance your electric ride, you can add extra accessories and features.

One way to improve your electric bike is by adding power assist. This feature allows you to pedal with less effort, especially when going up hills or against strong headwinds. By integrating power assist, you can increase your bike’s range and make your ride more enjoyable.

Another useful feature to consider is regenerative braking. This technology allows you to convert the energy produced during braking into electrical energy, which can then be stored in the battery for later use. Not only does this extend your bike’s battery life, but it also provides a more efficient and eco-friendly riding experience.

By adding these accessories and features, you can truly transform your regular bike into a powerful and efficient electric ride.

Maintaining and Troubleshooting Your Electric Bike

Make sure you regularly check for any maintenance issues or troubleshoot any problems that may arise with your electric bike. Proper maintenance and troubleshooting can help ensure that your bike continues to perform optimally and extend its lifespan. When it comes to troubleshooting the battery, there are several common issues to look out for. These include checking the battery connections, inspecting for any physical damage, and monitoring the battery voltage. Additionally, troubleshooting the motor involves checking the motor connections, inspecting for any physical damage, and listening for any unusual noises during operation. It is also important to refer to the manufacturer’s manual for specific troubleshooting steps and recommendations. Remember, a well-maintained and properly troubleshooted electric bike will provide you with a smooth and enjoyable riding experience.

Advertisement
Troubleshooting Battery Troubleshooting Motor
Check battery connections Check motor connections
Inspect for physical damage Inspect for physical damage
Monitor battery voltage Listen for unusual noises

Enjoying the Benefits of Electric Cycling

One of the greatest benefits of electric cycling is the ability to effortlessly cruise up steep hills. With an electric bike, you can say goodbye to the struggle of pedaling uphill and enjoy a smooth, effortless ride.

Here are some advantages and benefits of electric cycling:

  • Increased speed: Electric bikes allow you to travel at faster speeds than traditional bikes, making your commute or leisurely ride more efficient.

  • Extended range: The electric motor assists you in pedaling, extending your range and allowing you to go further without getting tired.

  • Reduced effort: Electric bikes make cycling easier on your joints and muscles, reducing the strain and effort required to pedal.

  • Eco-friendly transportation: By choosing to ride an electric bike, you are contributing to a greener environment by reducing your carbon footprint.

  • Healthy lifestyle: Electric cycling allows you to incorporate physical activity into your daily routine, helping you stay fit and active.

Embracing the electric bike lifestyle offers numerous advantages, from effortless hill climbing to a more environmentally friendly mode of transportation.

Experience the ease and enjoyment of electric cycling while reaping the benefits for your health and the environment.

Frequently Asked Questions

Can I convert any type of bike into an electric bike?

Yes, you can convert most types of bikes into electric bikes. However, there may be compatibility issues depending on the bike’s design. The conversion process involves adding a motor and battery to enhance the bike’s performance.

Advertisement

How much does an electric conversion kit typically cost?

An electric conversion kit typically costs between $400 and $1000, depending on various factors such as the quality of components, battery capacity, and additional features like regenerative braking or throttle control.

Do I need any specialized tools or equipment to complete the conversion?

To complete the conversion process, specialized tools and equipment are required. Common challenges include bike compatibility and the time required for the conversion. The cost may vary depending on the specific components needed.

What are the potential challenges or difficulties I may encounter during the installation process?

During the installation process of converting a bike into electric, potential safety risks include electrical shock, overheating of components, and injury from moving parts. Common mistakes include incorrect wiring, improper battery installation, and inadequate insulation.

How long does it typically take to convert a bike into an electric bike?

The installation time to convert a bike into an electric bike depends on various factors such as experience, tools, and the complexity of the project. It typically takes several hours to a few days. Necessary components include a motor, battery, controller, and wiring.

Conclusion

In conclusion, converting my bike into an electric one has been a game-changer. The process, although technical and detailed, was surprisingly enjoyable and relatable.

Advertisement

It allowed me to explore the world of electric cycling and experience the euphoria of effortless rides. With the right conversion kit and a little maintenance, my bike now offers a whole new level of convenience and efficiency.

So, hop on your own electric bike and discover the delightful world of pedal-assisted adventures!

Continue Reading

Electric Bike

How To Turn On Ancheer Electric Bike

Published

on

By

An image showcasing a person wearing a helmet, mounting their Ancheer Electric Bike, firmly holding the handlebars, effortlessly flipping the power switch, and confidently gliding away amidst a scenic backdrop

As I grip the smooth handlebars of my Ancheer electric bike, I feel a rush of excitement. With just a push of a button, I am whisked away into a realm of easy movement and exhilarating velocity.

In this article, I will guide you through the intricacies of turning on your own Ancheer electric bike. From checking the battery level to engaging the throttle, each step will be explained in detail, empowering you to embark on thrilling adventures with ease.

Let’s dive in and unlock the power of your Ancheer electric bike!

Key Takeaways

  • Press the power button to check the battery level.
  • Locate the power button on the Ancheer e-bike to turn it on.
  • Press and hold the power button to activate the bike’s power system and access additional features.
  • Check the battery indicator light on the handlebar console to determine the battery level.

Check the Battery Level

Check the battery level by pressing the power button on the Ancheer electric bike. This step is crucial to ensure that the bike has enough power for your ride.

Advertisement

The battery level is displayed on the bike’s control panel, indicating the percentage of charge remaining. If the battery level is low, you may need to charge it before starting your ride. Simply connect the charger to the battery and plug it into a power source.

In case the battery needs replacement, consult the user manual or contact Ancheer customer support for assistance.

Now that you have checked the battery level, let’s move on to the next step and locate the power button on the bike.

Locate the Power Button

Locating the power button on your Ancheer e-bike is easy. Once you have found it, you can perform various functions with it.

Here are three important things you can do with the power button:

Advertisement
  1. How to troubleshoot power button issues: If you encounter any problems with the power button, such as it not turning on or not functioning properly, check the connections and ensure that the battery is charged. If the issue persists, consult the user manual or contact Ancheer customer support for assistance.

  2. How to turn off the Ancheer electric bike: To turn off the bike, press and hold the power button for a few seconds until the display turns off. This will conserve battery power and ensure that the bike is completely powered down.

  3. How to turn on the Ancheer electric bike: To turn on the bike, simply press the power button once. You should see the display light up, indicating that the bike is ready to use.

Now that you know how to locate and operate the power button, let’s move on to the next step of pressing and holding the power button for other functions.

Press and Hold the Power Button

Press and hold the power button to access additional features and settings on your Ancheer e-bike. The power button is usually located on the handlebar or the control panel of the bike.

When you press and hold the power button, you activate the bike’s power system and turn it on. This allows you to start using the bike and take advantage of its electric assistance.

Advertisement

The power button is a crucial component of the bike, as it is responsible for turning the bike on and off. Once you have pressed and held the power button, you can then look for the battery indicator light, which will show you the current battery level of the bike.

This is important information to have, as it will let you know when it’s time to recharge the battery.

Look for the Battery Indicator Light

To find out the current battery level of your Ancheer e-bike, simply take a quick glance at the battery indicator light. It is located on the handlebar console and consists of a series of LED lights that indicate the remaining charge in your bike’s battery. The battery indicator light is an essential feature that allows you to monitor the battery level during your rides and plan your charging accordingly.

Here are some key points to keep in mind regarding the battery indicator light:

  • Green light: Indicates a full or almost full battery charge.
  • Yellow light: Indicates a partially depleted battery and suggests it may be time for a recharge.
  • Red light: Indicates a low battery level, and it is highly recommended to charge the battery as soon as possible.

Monitoring the battery indicator light is crucial for optimizing your riding experience and avoiding any unexpected power loss. Once you have checked the battery level, you can move on to the next step and listen for the motor to activate, indicating that your Ancheer e-bike is ready to go.

Listen for the Motor to Activate

Once you’ve checked the battery level, listen for the motor to activate, indicating that your e-bike is ready to go. Motor activation is a key step in troubleshooting any issues with your Ancheer electric bike.

Advertisement

When you turn on the bike, you should hear a distinct humming sound as the motor engages. If you don’t hear anything or if the motor sounds weak or irregular, there may be a problem with the motor or the electrical system. In such cases, it’s important to consult the user manual or contact customer support for further assistance.

Once the motor is activated and running smoothly, you can proceed to adjust the pedal assist level (if applicable) to enhance your riding experience.

Adjust the Pedal Assist Level (if applicable)

You can adjust the pedal assist level on your e-bike to enhance your riding experience. Here are four important things to know about adjusting the pedal assist level:

  1. Pedal resistance: The pedal assist level determines the amount of assistance you receive while pedaling. Higher levels provide more assistance, making it easier to pedal, while lower levels require more effort.

  2. Troubleshooting pedal assist problems: If you’re experiencing issues with the pedal assist, such as it not engaging or providing inconsistent assistance, try adjusting the level. Sometimes, a simple change in the assist level can solve the problem.

  3. Fine-tuning your ride: Adjusting the pedal assist level allows you to customize your ride to your preferences. You can increase the level when you need more assistance, like when climbing hills, or decrease it for a more challenging workout.

  4. Battery life preservation: Keep in mind that higher assist levels consume more battery power. If you want to extend your e-bike’s battery life, consider using lower assist levels when possible.

Now, let’s move on to the next section about engaging the throttle, if applicable, to further enhance your riding experience.

Engage the Throttle (if applicable)

When engaging the throttle, simply twist the handle to activate the motor. The throttle on the Ancheer electric bike is located on the handlebar, making it easily accessible while riding.

Advertisement

It is important to note that the throttle sensitivity can be adjusted according to your preference. If you find that the throttle is too sensitive or not responsive enough, you can make changes in the settings to suit your needs.

Additionally, if you encounter any issues with the throttle, such as it not working or being unresponsive, there are troubleshooting steps you can take. These may include checking the connections, ensuring the throttle is properly aligned, or consulting the user manual for further guidance.

Now, let’s move on to the next step and test the brakes and gears.

Test the Brakes and Gears

After engaging the throttle, it’s important to test the brakes and gears on your Ancheer electric bike to ensure they are in proper working order.

Start by squeezing the brake levers to check for any resistance or sticking. If the brakes feel loose or unresponsive, you may need to adjust the brake pads or replace them if they are worn out.

Advertisement

Next, shift through the gears to make sure they engage smoothly and without any skipping or grinding noises. Familiarize yourself with the different gear ratios and how they correspond to your riding style and terrain.

Proper brake maintenance and gear shifting techniques are essential for a safe and efficient ride.

Now, let’s move on to the next step and familiarize ourselves with the display panel.

Familiarize Yourself with the Display Panel

To get started, take a moment to familiarize yourself with the display panel on your Ancheer e-bike. The display panel serves as the control center for your bike, allowing you to easily navigate through various settings and modes. Here are a few key things to keep in mind:

  • Familiarize yourself with the motor settings: The display panel provides access to different motor settings, such as pedal assist levels and throttle control. Understanding these settings will help you customize your riding experience to suit your preferences.

  • Understand the different display modes: The display panel offers different modes, such as speed, distance, and battery level. Knowing how to switch between these modes will help you keep track of important information during your ride.

  • Monitor your battery level: The display panel provides a clear indication of your battery level, ensuring that you never run out of power during your ride.

  • Adjust your settings as needed: The display panel allows you to make adjustments to various settings, such as the backlight brightness and unit of measurement. Take the time to explore these options and personalize your biking experience.

Now that you are familiar with the display panel, it’s time to enjoy your ride!

Advertisement

Enjoy Your Ride!

Now that you’re familiar with the display panel on your Ancheer electric bike, it’s time to hit the road and enjoy your ride! As you embark on your journey, there are a few things you can do to improve battery life and ensure a safe and enjoyable experience.

First and foremost, it’s important to maintain a consistent speed and avoid sudden accelerations or decelerations. This will help conserve battery power and extend your riding range. Additionally, be mindful of the terrain you’re riding on. Uphill climbs and rough surfaces can put extra strain on the motor and drain the battery faster.

To further optimize battery life, make sure to keep your tires properly inflated and avoid excessive weight on the bike. Regularly check your brakes, lights, and other safety features to ensure they’re functioning correctly.

By following these safety tips and taking steps to improve battery life, you can have a smooth and enjoyable ride on your Ancheer electric bike. So, hop on, buckle up, and embrace the thrill of electric biking!

Frequently Asked Questions

How do I charge the battery of my Ancheer electric bike?

To charge the battery of my Ancheer electric bike, I first locate the charging port and connect the charger. I ensure the battery is properly inserted and wait for it to fully charge. If I encounter any issues, I troubleshoot by checking connections and contacting customer support.

Advertisement

Can I turn on the electric bike without using the power button?

When it comes to turning on an electric bike without using the power button, alternative methods and troubleshooting techniques can be used. However, it’s important to note that these methods may vary depending on the specific model and brand.

What should I do if the battery indicator light does not turn on?

If the battery indicator light on your Ancheer electric bike does not turn on, start troubleshooting by checking the power connection. Ensure that the battery is properly connected and securely attached.

How can I adjust the pedal assist level on my Ancheer electric bike?

To adjust the pedal assist level on my Ancheer electric bike, I can access the pedal assist settings on the control panel. By navigating through the menu, I can increase or decrease the level of assistance according to my preference.

Are there any safety precautions I should take before starting my ride on the electric bike?

It is important to wear a helmet while riding an electric bike for safety. To ensure a safe ride, proper maintenance is essential. Regularly check the brakes, tires, and battery, and keep the bike clean and lubricated.

Conclusion

And there you have it! Turning on your Ancheer electric bike is as easy as a breeze on a sunny day.

Advertisement

Just remember to check that battery level, locate the power button, and press and hold it until you see that battery indicator light.

Once you hear that motor purr to life, engage the throttle and feel the power at your fingertips.

Test the brakes and gears for a smooth ride, and take a moment to appreciate the display panel that keeps you informed.

Now, it’s time to hit the road and let the adventure begin!

Advertisement

Continue Reading

Electric Bike

How To Turn Mountain Bike Into Electric Bike

Published

on

By

An image showcasing a skilled cyclist effortlessly maneuvering through rugged mountain terrain on a modified electric bike

Converting your mountain bike into an electric powerhouse is an exciting project that will take your riding experience to the next level. With an electric bike conversion kit, you can easily tackle steep terrain and increase your riding range with ease.

In this comprehensive guide, we will walk you through the step-by-step process of turning your beloved mountain bike into an electrifying machine. Get ready to unlock a world of exhilaration and adventure as we delve into the intricacies of this electrifying transformation.

Key Takeaways

  • Assess frame design and consider compatibility with conversion kit components
  • Ensure sufficient space for battery pack and proper alignment of motor
  • Consider factors such as motor power, battery capacity, and overall weight when choosing a conversion kit
  • Properly remove existing bike components and keep track of small parts for smooth transition during installation

Assessing Your Mountain Bike’s Compatibility

Before you can turn your mountain bike into an electric bike, you’ll need to assess its compatibility. Start by examining your mountain bike for any specific modifications it may need for the electric bike conversion process.

Check the frame design, as some electric bike conversion kits require a certain frame type. Look for a suitable space to mount the battery pack, often located on the downtube or rear rack. Ensure that your bike has enough clearance for the motor, especially if you plan on using a hub motor. Consider the weight of the components and how it will affect your bike’s handling.

Advertisement

Once you’ve evaluated these factors, you can move on to choosing the right electric bike conversion kit, which will be discussed in the next section.

Choosing the Right Electric Bike Conversion Kit

First, you’ll want to select the appropriate conversion kit for your needs. When choosing an electric bike conversion kit, it’s important to consider the benefits and drawbacks.

On the positive side, conversion kits allow you to transform your mountain bike into an electric bike without having to buy a completely new one. This can save you money and allow you to keep using a bike you’re already familiar with.

However, there are some drawbacks to consider as well. Conversion kits can be quite expensive, especially if you opt for a high-quality kit. Additionally, the installation process can be challenging and time-consuming, requiring some technical skills.

Factors to consider when choosing an electric bike conversion kit include the motor power, battery capacity, and overall weight of the kit. You’ll want to ensure that the motor power is suitable for your desired level of assistance, whether you’re looking for a gentle boost or a more powerful ride. The battery capacity should be sufficient to meet your riding needs, and the overall weight of the kit shouldn’t make your bike too heavy or unbalanced.

Advertisement

Now that you have an understanding of the benefits and drawbacks of electric bike conversion kits and the factors to consider, it’s time to move on to gathering the necessary tools and equipment.

Gathering the Necessary Tools and Equipment

To gather all the tools and equipment you’ll need, start by checking what’s included in the electric bike conversion kit you’ve chosen. Most conversion kits will provide the necessary tools, such as wrenches, screwdrivers, and Allen keys, but it’s always a good idea to double-check.

In addition to the tools provided in the kit, you may also need some additional tools depending on your specific bike and the components you’ll be working with. Some common tools you might need include a torque wrench, a chain breaker tool, and cable cutters. Choosing the right tools is crucial to ensure proper installation and avoid any damage to your bike or the conversion kit.

Advertisement

Once you have gathered all the necessary tools, you can move on to the next step of removing the existing components.

Removing the Existing Components

Now, you’ll need to remove the components currently on your bike.

Before doing so, it’s important to assess the compatibility of your bike with an electric conversion kit. Look for a conversion kit that matches the specifications of your mountain bike, including the wheel size and frame type.

Once you have chosen the right conversion kit, you can begin the process of removing the existing components. Start by disconnecting the brakes, derailleurs, and chain from your bike. Use appropriate tools, such as a wrench or screwdriver, to carefully remove these components. Take your time and make sure to keep track of any small parts that you remove. This will ensure a smooth transition when installing the electric bike conversion kit later on.

With the existing components removed, you’re now ready to move on to installing the electric bike conversion kit.

Advertisement

Installing the Electric Bike Conversion Kit

Once you have removed the existing components, it’s time to begin installing the electric bike conversion kit. To ensure a smooth installation, follow these steps:

  • Carefully read the instructions provided with the kit.
  • Begin by installing the motor correctly on the frame. Make sure to align it properly and tighten all bolts securely.
  • Attach the motor controller to the frame, ensuring it is positioned in a way that allows for easy access and proper ventilation.
  • Connect the motor controller to the motor using the provided wiring harness, following the color-coding instructions.

Installing an electric bike conversion kit can sometimes present challenges. Troubleshooting common conversion issues such as motor alignment and wiring connectivity is crucial. Double-check all connections and consult the troubleshooting guide if any problems arise.

Now that the electric bike conversion kit is installed, it’s time to move on to connecting the battery and controller.

Connecting the Battery and Controller

Make sure you connect the battery and controller properly for the electric bike conversion kit to function correctly.

Advertisement

Begin by locating the battery and controller compartments on your mountain bike. Open the compartments and identify the positive and negative terminals on both the battery and controller.

Connect the positive terminal of the battery to the positive terminal of the controller, and the negative terminal of the battery to the negative terminal of the controller. Ensure the connections are secure and tight.

Once connected, double-check that the battery is fully charged and the controller is properly programmed. To maintain the battery, periodically check its voltage and charge it as needed.

Troubleshooting common issues such as loose connections or faulty wiring can help ensure the smooth operation of your electric bike.

With the battery and controller properly connected, you can now move on to mounting the motor and wiring.

Advertisement

Mounting the Motor and Wiring

To mount the motor and connect the wiring, you’ll need to locate the appropriate spots on your bike and secure the motor in place. Start by choosing a suitable location for the motor, typically near the bottom bracket or the rear wheel dropout. Ensure that the motor is aligned properly with the chain and sprocket. Use mounting brackets or clamps to secure the motor to the frame securely. Next, connect the wiring between the motor and the controller. Refer to the user manual or wiring diagram provided by the manufacturer for the correct connections. Make sure all connections are tight and insulated to prevent any electrical issues.

To engage the audience, here is a table with mounting techniques and wiring tips:

Mounting Techniques Wiring Tips
Choose a suitable location for the motor Refer to the wiring diagram for correct connections
Align the motor with the chain and sprocket Ensure all connections are tight and insulated
Secure the motor using mounting brackets or clamps Double-check all wiring connections before finalizing

Once you have successfully mounted the motor and connected the wiring, you can move on to adjusting the bike’s gearing system, improving the overall performance of your electric mountain bike.

Adjusting the Bike’s Gearing System

Now you can fine-tune the gearing system on your bike for optimal performance. Making the right gearing adjustments is crucial to ensure a smooth and efficient ride when converting your mountain bike into an electric bike.

One important aspect to consider is the gear ratio optimization. This involves finding the perfect balance between the motor’s power and your pedaling effort. Start by experimenting with different gear combinations to see which ones work best for your riding style and terrain. You may need to adjust the front and rear derailleurs to achieve the desired gear ratio.

Advertisement

Keep in mind that a lower gear ratio will provide more torque for climbing steep hills, while a higher gear ratio will give you more speed on flat roads.

Once you have fine-tuned the gearing system, you can move on to the next section about testing and fine-tuning the electric bike’s overall performance.

Testing and Fine-Tuning the Electric Bike

After adjusting the bike’s gearing system, it’s important to test and fine-tune the electric bike for optimal performance. Here are some fine-tuning techniques and troubleshooting common issues to help you with this process:

  1. Test the motor: Ensure that the motor engages smoothly and provides consistent power throughout the ride. Check for any unusual noises or vibrations.

  2. Adjust the pedal assist levels: Fine-tune the pedal assist settings to match your desired level of assistance. Test each level to ensure they’re functioning properly and providing the desired amount of assistance.

  3. Check the battery life: Monitor the battery’s performance by testing its capacity and range. Make sure it’s charging and discharging correctly and adjust any settings if needed.

  4. Troubleshoot common issues: Address any issues such as poor acceleration, uneven power delivery, or erratic behavior. Check the wiring connections, controller settings, and make necessary adjustments.

Once you have completed the testing and fine-tuning process, you can move on to ensuring safety and compliance with local regulations for your electric bike.

Ensuring Safety and Compliance

Make sure you prioritize safety and comply with local regulations when using your electric bike. Ensuring safety is crucial to prevent accidents and injuries. Additionally, meeting legal requirements will help you avoid fines and penalties. Before riding your electric bike, make sure to wear a helmet and other protective gear. Familiarize yourself with the bike’s features and controls, and always follow traffic laws and signals. It is also important to regularly inspect your bike for any damage or loose parts. Maintain a safe speed and be aware of your surroundings. To help you understand the importance of safety and compliance, consider the following table:

Advertisement
Safety Measures Legal Requirements Benefits
Wear protective gear Register your electric bike Prevent injuries
Follow traffic laws Obtain necessary permits Avoid fines
Regular inspections Install required lights Ensure bike’s safety

By ensuring safety and complying with legal requirements, you can enjoy a safe and trouble-free electric bike experience. Now let’s move on to maintaining and servicing your electric bike.

Maintaining and Servicing Your Electric Bike

Maintaining and servicing your e-bike is essential for its longevity and optimal performance. To maximize battery life and ensure smooth operation, follow these tips:

  • Keep your battery charged between 20% and 80% to avoid overcharging or deep discharging, which can shorten its lifespan.
  • Clean the battery terminals regularly with a soft cloth to prevent corrosion and ensure a good connection.
  • Store your e-bike in a cool and dry place, away from extreme temperatures and moisture, to prevent damage to the battery and electronic components.

Troubleshooting common issues can help you identify and fix problems quickly:

  • Check the connections and wiring for any loose or damaged parts.
  • Test the throttle, brakes, and motor to ensure they are functioning properly.
  • If you encounter any issues beyond your expertise, consult a professional e-bike technician for assistance.

By maintaining and troubleshooting your electric bike, you can enjoy its benefits for years to come.

Now, let’s explore how to upgrade and customize your e-bike.

Upgrading and Customizing Your Electric Bike

To enhance your riding experience, you can personalize and improve various aspects of your e-bike. There are a variety of customizing options available that allow you to make your electric bike unique to your preferences.

One way to upgrade your e-bike is by improving its performance. You can consider installing a more powerful motor or upgrading the battery for increased speed and range. Additionally, you can enhance the braking system by installing hydraulic disc brakes for better stopping power. Another option is to upgrade the suspension system to improve the bike’s handling and comfort on rough terrains.

Advertisement

Furthermore, you can customize the appearance of your electric bike by adding accessories such as fenders, lights, and racks. By making these performance enhancements and personalizing your e-bike, you can optimize your riding experience.

Now, let’s explore different riding modes and power levels.

Exploring Different Riding Modes and Power Levels

There are various riding modes and power levels available to choose from when using an e-bike. These options allow you to customize your riding experience and make the most out of your electric mountain bike.

When exploring different riding modes, you can select between modes such as pedal-assist, throttle-only, or a combination of both. Each mode offers a unique level of assistance and control, allowing you to adapt to different terrains and riding conditions.

Additionally, you can also adjust the power level of your e-bike, which determines the amount of assistance the motor provides. This is particularly useful when exploring battery life and finding the right balance between performance and range.

Advertisement

Comparing different motor options is also important, as each motor has different power outputs and efficiency levels. By understanding these factors, you can select the motor that best suits your riding style and needs.

With these various riding modes and power levels, you can truly customize your e-bike experience.

Now, let’s move on to some tips and tricks for maximizing performance.

Tips and Tricks for Maximizing Performance

Get the most out of your e-biking experience by implementing these tips and tricks to maximize performance. One of the key factors in maximizing performance is maximizing battery life. To do this, make sure to charge your battery fully before each ride and avoid overcharging. Additionally, try to ride in lower power levels whenever possible, as higher power levels drain the battery faster.

Troubleshooting common issues is also important for optimizing performance. If you notice a decrease in power or range, check for any loose connections or damaged wires. Clean the bike regularly to prevent dirt and debris from affecting the motor and battery.

Advertisement

To further enhance your e-biking experience, consider joining the electric bike community. This will allow you to connect with fellow e-bikers, share tips and tricks, and discover new trails.

Joining the Electric Bike Community

Joining the e-bike community allows you to connect with other riders, share tips, and discover new trails. When you become part of this community, you gain access to a wealth of knowledge and experience.

One of the first things you’ll notice is the wide variety of electric bike accessories available. From powerful batteries to comfortable saddles, these accessories can enhance your riding experience and make your electric bike even more efficient.

Additionally, being part of the e-bike community opens up a world of benefits. Electric biking not only provides a thrilling and exhilarating experience, but it also allows you to cover longer distances with ease. The electric assist feature helps you conquer challenging terrains and steep hills effortlessly.

Moreover, electric biking is an eco-friendly alternative to traditional modes of transportation, reducing your carbon footprint and contributing to a greener environment.

Advertisement

So, join the e-bike community today and start experiencing the numerous benefits of electric biking.

Frequently Asked Questions

Can I convert any type of mountain bike into an electric bike?

Yes, you can convert any type of mountain bike into an electric bike. The mountain bike conversion process involves adding an electric motor, battery, and controller to your existing bike.

By converting your mountain bike into an electric bike, you can enjoy the benefits of electric bike conversion, such as increased speed and range, easier uphill climbs, and reduced effort required while riding.

This conversion allows you to transform your regular mountain bike into a powerful and efficient electric bike.

How much does an electric bike conversion kit typically cost?

Converting your mountain bike into an electric bike with a conversion kit is a cost-effective option. The price for an electric bike conversion kit typically ranges from $200 to $1000, depending on the quality and features you desire.

Advertisement

There are various types of conversion kits available, such as front-wheel, rear-wheel, and mid-drive kits. Each type has its pros and cons, so it’s important to consider factors like ease of installation, power output, and battery life when choosing the right kit for you.

Are there any specific tools or equipment that I need to gather for the conversion process?

To successfully convert your mountain bike into an electric bike, there are a few essential tools and equipment you’ll need.

  • First, make sure to have a wrench set, screwdrivers, and pliers for disassembling and reassembling parts.

  • Additionally, an electric bike conversion kit, including a motor, battery, controller, and throttle, is crucial.

  • When choosing a battery, consider its capacity, voltage, and weight.

  • Avoid common mistakes like improper wiring or mismatched components.

  • Research extensively for the right battery that suits your conversion needs.

Is it possible to convert my mountain bike back to its original state after installing the electric bike conversion kit?

Yes, it’s possible to convert your mountain bike back to its original state after installing the electric bike conversion kit. This ensures that you have the flexibility to switch between an electric bike and a regular mountain bike whenever you desire.

The mountain bike conversion process offers numerous benefits. It includes increased speed and range, smoother rides, and the ability to tackle challenging terrains with ease. By installing the conversion kit, you can enjoy these advantages while still having the option to revert to your original bike.

Are there any legal requirements or regulations I should be aware of when converting my mountain bike into an electric bike?

When converting your mountain bike into an electric bike, it’s important to be aware of the legal requirements and regulations. Safety precautions should be a priority, such as wearing a helmet and following traffic laws.

Advertisement

Some advantages of converting include increased speed and assistance on uphill climbs. However, there are also disadvantages such as added weight and limited range.

It’s crucial to research and ensure your conversion complies with local laws to avoid any legal issues.

Conclusion

Congratulations on successfully transforming your mountain bike into an electric bike! By following the step-by-step process outlined in this article, you have joined a growing community of electric bike enthusiasts.

Did you know that the sale of electric bikes has been steadily increasing over the past few years? In fact, in 2020 alone, the global sales of electric bikes reached a staggering 40 million units! So, not only have you made a smart and eco-friendly choice, but you’ve also become part of a global trend.

Get out there and enjoy your new electric bike adventure!

Advertisement

Continue Reading
Advertisement

Affiliate disclaimer

As an affiliate, we may earn a commission from qualifying purchases. We get commissions for purchases made through links on this website from Amazon and other third parties.

About us

We are a passionate team driven by the belief that cycling is a fantastic and accessible way to stay active while enjoying the beauty of the outdoors. Our mission is to share our love for cycling with as many people as possible. We provide a welcoming environment for individuals of all ages, abilities, and backgrounds to come together and ride bikes. With Ralf’s visionary leadership, Zane’s expertise in cycling adventures, and Olivia’s dedication to community building, we strive to create a vibrant space where everyone can experience the joy of cycling. Through group rides, workshops, and inclusive events, we inspire and empower individuals to embrace an active lifestyle. Join us in our quest to pedal together, embrace the joy of cycling, and foster connections that last a lifetime.

Advertisement

Trending