

Were you aware that more than 85% of electric bike riders find it difficult to tell if their battery is completely charged?
In this article, I will guide you through the precise and technical process of determining whether your electric bike battery is fully charged or not.
By following these simple steps, you will be able to confidently monitor your battery’s charge level, ensuring a smooth and enjoyable ride every time.
Let’s dive in and unlock the secrets of electric bike battery charging!
Key Takeaways
- Look for a full battery icon on the battery indicator
- Use the BMS indicator to check if the battery is fully charged (green light)
- Avoid overcharging by monitoring the charging time and following manufacturer’s instructions
- Regularly monitor the battery capacity display for information about battery health

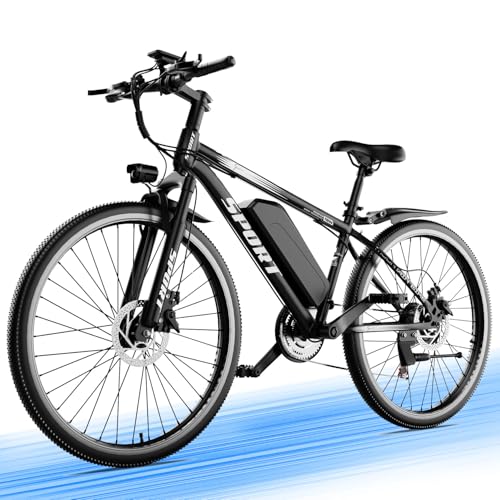
TST Electric Bike for Adults, 1500W Peak Motor 60 Miles Fat Tire E Bike 48V 15Ah Removable Battery 20" Electric Bike with Full Suspension SGS UL 2849 Certification Black
【Excellent Motor Performance】This electric bike is equipped with a high-performance 750W motor(1500W peak power) with 2 to 3...
As an affiliate, we earn on qualifying purchases.
Check the Battery Indicator
To check if your electric bike battery is fully charged, look at the battery indicator and see if it shows a full battery icon. The battery indicator is a crucial component that provides valuable information about the battery level. It allows you to determine whether the battery requires charging or if it is already fully charged. The indicator usually consists of a series of LED lights or a digital display.
When you examine the battery indicator, you should look for a clear indication of a full battery. This can be in the form of a solid, unblinking icon or a display showing 100% charge. It is important to note that different electric bike models may have variations in their battery indicator designs, so consult your bike’s manual for specific instructions.
Another useful method to ensure your battery is fully charged is to inspect the charging port. The charging port is where you connect the charger to replenish the battery’s energy. A fully charged battery will have a charging port that is not illuminated or showing any signs of active charging. If the charging port is still lit or flashing, it indicates that the battery is still in the charging process and not yet fully charged.
Once you have checked the battery indicator and examined the charging port, you can now move on to using a battery voltage meter to further confirm the battery’s charge level.
Misodo Electric Bike for Adults, 1500W Peak Mountain Ebike, 26" All-Terrain Electric Bicycle, 25 MPH 65 Miles Long Range, 48V 10.4Ah Removable Battery High-Step Commute E-Bike
👍1500W Peak Powerful Motor👍65-Mile Range👍25Mph Fast Speed👍350+ Lbs Load👍Dual Disc Brake👍ALL Terrain Riding👍Safer Bright Light👍LCD Display❤️36-month warranty❤️
As an affiliate, we earn on qualifying purchases.
Use a Battery Voltage Meter
Check the battery voltage meter to see if it’s showing a full charge. Using a battery voltage meter, you can accurately determine the charge level of your electric bike battery. Here are three steps to follow when using a battery voltage meter:
-
Connect the meter: Start by turning off your electric bike and locating the battery terminals. Connect the positive (red) probe of the meter to the positive terminal and the negative (black) probe to the negative terminal. Ensure a secure connection.
-
Read the voltage: Once the meter is connected, turn it on and observe the reading on the display. A fully charged battery typically has a voltage reading between 54.6 and 58.8 volts, depending on the specific battery model.
-
Interpret the results: Compare the voltage reading to the manufacturer’s specifications for your electric bike battery. If the reading falls within the specified range, your battery is likely fully charged. If the reading is significantly lower, it may indicate a need for charging.
By conducting a short ride test, you can verify if your electric bike battery is fully charged. This involves taking a brief ride to assess the battery’s performance and power output.
It is important to pay attention to charging time as well, as overcharging can damage the battery’s lifespan and performance.

PUJH 6000W Dual Motor Ebike for Adults, 60V 20Ah Fast Electric Bike,Up to 110 Miles,24" Fat Tire Full Suspension Electric Bike for Snow Off-Road Commuter Mountain E-Bike for Men Women (Black)
🚲 【Powerful Brushless Motors】 Equipped with 6000W peak out dual motors, this electric bike delivers exceptional power and...
As an affiliate, we earn on qualifying purchases.
Pay Attention to Charging Time
Paying attention to the charging time is crucial to avoid damaging the battery’s lifespan and performance. When it comes to charging your electric bike battery, it’s important to consider the battery charging speed and the optimal charging duration.
The charging speed refers to how quickly the battery can be charged, while the optimal charging duration is the amount of time it takes to fully charge the battery without overcharging it.
Different electric bike batteries have different charging speeds, ranging from a few hours to overnight. It’s important to consult the manufacturer’s instructions or user manual to determine the appropriate charging time for your specific battery. Overcharging the battery can lead to a decrease in its overall lifespan and performance, so it’s important to monitor the charging time closely.
One way to determine if your electric bike battery is fully charged is to look for a solid green light on the charger. This indicates that the battery is fully charged and ready to be disconnected from the charger. However, it’s essential to note that some chargers may have different indicators, so it’s always best to consult the manufacturer’s instructions for accurate information.

WEIZE Mountain Bike, 26 27.5 inch Outdoor Hybrid Bike,18-Speed/High-Carbon Steel/Dual Full Suspension, Adjustable Ergonomic Seat for Men Women Adult, MTB Bicycle with Suspension Fork,Sleek Colors
【Frame】: Durable steel dual suspension Mountain Bike frame. Featured with Front suspension fork and rear coil shock to...
As an affiliate, we earn on qualifying purchases.
Look for a Solid Green Light
You can determine when your battery is fully charged by looking for a solid green light on the charger. This green light indicates that the battery has reached its maximum capacity and is ready for use.
It is important to pay attention to the charging time and the battery charging speed to ensure efficient and effective charging. Different battery charging methods may have varying charging speeds, so it is essential to follow the manufacturer’s recommendations for the specific battery model you have.
Fast charging methods, such as using a higher voltage charger, may result in a quicker charging time. However, it is crucial to balance the charging speed with the longevity of the battery. Rapid charging can generate more heat, which can degrade the battery’s overall lifespan.
Monitor the Battery Capacity Display
The battery capacity display is a crucial tool for monitoring the battery charge level and assessing the battery’s health. It provides real-time information about the current status of the battery. Here’s a detailed breakdown of what the battery capacity display can tell you:
-
Battery charge level: The display shows the remaining charge in the battery, usually represented as a percentage. This allows you to know exactly how much juice is left in your electric bike’s battery.
-
Estimated range: Based on the current battery charge level, the display can calculate the estimated range you can travel before the battery is depleted. This information is valuable for planning your rides and ensuring you don’t run out of power unexpectedly.
-
Battery health assessment: The display may also provide information about the overall health of the battery. It can indicate if the battery has degraded over time or if there are any issues that need attention.
By regularly monitoring the battery capacity display, you can stay informed about your battery’s charge level and health. This knowledge is important for maintaining optimal performance and maximizing the lifespan of your electric bike’s battery.
Now, let’s move on to checking the battery management system (BMS) indicator to further assess your battery’s condition.
Check the Battery Management System (BMS) Indicator
Moving on from monitoring the battery capacity display, another useful method to check if your electric bike battery is fully charged is by checking the Battery Management System (BMS) indicator. The BMS is a critical component that ensures the safe and efficient operation of the battery. It monitors the battery’s voltage, current, temperature, and overall health. By understanding the BMS indicator, you can gain valuable insights into your battery’s state of charge and health.
To check the BMS indicator, locate it on your electric bike’s display or control panel. The indicator may vary depending on the manufacturer, but it typically consists of a set of LED lights or a digital display. When the battery is fully charged, the BMS indicator will show a green light, indicating that the battery is at optimal capacity.
In addition to checking the BMS indicator, it is crucial to understand battery maintenance to ensure its longevity. Regularly check battery health by inspecting for any signs of damage or corrosion. Keep the battery clean and dry, and avoid extreme temperatures that could affect its performance. Follow the manufacturer’s guidelines for charging and storage, as improper practices can lead to decreased battery life.
Now that we have explored various methods to determine if your electric bike battery is fully charged, let’s move on to the next step of using a multimeter to measure voltage.
Use a Multimeter to Measure Voltage
To measure voltage on your electric bike battery, grab a multimeter and carefully connect the probes to the positive and negative terminals. Using a voltmeter for accurate measurements is crucial in determining the battery’s charge level. A multimeter allows you to measure the voltage in volts (V) and provides accurate readings.
Here are some tips for maintaining battery life:
-
Regularly check the voltage: Keeping an eye on your battery’s voltage is essential for optimal performance. Use the multimeter to measure the voltage at regular intervals and ensure it remains within the recommended range.
-
Charge the battery fully: It is important to fully charge your battery to maximize its lifespan. A fully charged battery typically reads around 100% on the voltmeter, indicating that it is ready for use.
-
Avoid overcharging or discharging: Overcharging or discharging your battery can significantly reduce its lifespan. Monitor the voltage regularly and avoid letting it drop too low or exceed the recommended voltage for charging.
Observe the Battery Temperature
After measuring the voltage of the electric bike battery, it’s important to consider the battery temperature as another factor to determine if it is fully charged. The battery temperature plays a crucial role in battery charging speed and overall battery health.
When observing the battery temperature, keep in mind the following:
- Heat Dissipation: Ensure that the battery is not overheating during the charging process. Excessive heat can lead to degradation and reduced battery life.
- Ideal Temperature Range: The battery should be charging within a specific temperature range, typically between 10°C to 40°C (50°F to 104°F). Charging outside this range can affect the battery’s capacity and longevity.
- Temperature Monitoring: It’s essential to have a temperature monitoring system in place to accurately measure the battery’s temperature during charging. This can be done through built-in sensors or external temperature probes.
- Thermal Management: Consider using a battery charger with thermal management capabilities. These chargers adjust the charging current and voltage based on the battery temperature, ensuring a safe and optimal charging process.
Proper battery temperature management is crucial for maintaining the health and longevity of your electric bike battery. By ensuring the battery is charging within the ideal temperature range and implementing thermal management techniques, you can maximize the overall performance and lifespan of your battery.
Moving forward, let’s explore another method to determine if your electric bike battery is fully charged: listening for audible cues.
Listen for Audible Cues
Take a moment to listen for any audible cues that indicate your battery is fully charged.
As part of regular electric bike maintenance, troubleshooting battery issues is crucial to ensure optimal performance.
When your battery is nearing its full charge, you might hear a distinct click or a slight change in the motor’s sound. This is a result of the controller cutting off power supply to the battery once it reaches its maximum capacity.
It is important to pay attention to these audible cues as they can signify that your battery is fully charged and ready for use.
Listening for these audible cues can help you avoid overcharging your battery, which can lead to reduced battery life and potential damage. Overcharging can cause excessive heat and stress on the battery cells, which can degrade their performance over time.
By being attentive to these cues, you can prevent unnecessary wear and tear on your battery and prolong its overall lifespan.
Now that you are aware of how to listen for audible cues indicating a fully charged battery, the next step is to test the battery on a short ride.
Test the Battery on a Short Ride
Hop on your e-bike and go for a quick ride to test the battery. It’s important to regularly check the battery health of your electric bike to ensure its optimal performance and longevity. Here are a few things to keep in mind when testing your battery:
-
Battery Voltage: Measure the voltage of your battery before and after the ride. A fully charged battery should have a voltage reading close to its maximum capacity. A significant drop in voltage indicates that the battery may not be holding a charge well, which could be a sign of diminished battery health.
-
Battery Capacity: Pay attention to the available capacity of your battery during the ride. Many e-bike displays show the remaining capacity as a percentage. If the battery drains quickly or the capacity drops significantly, it could indicate a need for maintenance or even a declining battery lifespan.
-
Power Output: Assess the power output of your e-bike during the ride. If you notice a decrease in power or a decrease in the speed at which the battery assists you, it might be a sign that your battery is not functioning optimally.
By evaluating these factors, you can gauge the health of your battery and take appropriate action if necessary.
Now that you have tested the battery, let’s consider the distance traveled and its impact on battery life.
Consider the Distance Traveled
As I ride my e-bike, I must consider the distance traveled and how it may impact the life of my battery. The battery life is a crucial aspect to evaluate the battery health and performance. When using an e-bike, it is important to be aware that the distance traveled directly affects the battery’s capacity and overall lifespan.
Every time I use the battery, it undergoes a certain level of wear and tear, which gradually reduces its ability to hold a charge. The more I ride, the more the battery is utilized, leading to a decrease in its long-term viability.
To effectively evaluate the battery health, it is essential to pay attention to the distance covered during each ride. By monitoring the distance traveled, I can estimate how much strain is being put on the battery and make necessary adjustments to prolong its lifespan. It is advisable to keep a record of the distance covered and regularly assess the battery’s performance over time.
Considering the distance traveled is just the first step in determining the battery’s health. Additionally, it is important to look for consistent performance.
Look for Consistent Performance
Monitoring the battery’s consistent performance is crucial in ensuring its long-term viability. One important aspect to consider is the battery charging speed. A battery that charges too quickly may indicate a problem, such as a faulty charger or battery. On the other hand, a battery that takes an unusually long time to charge may also signal an issue. It is important to consult the manufacturer’s instructions to determine the expected charging time for your specific battery model.
Another factor to consider when monitoring the battery’s performance is its lifespan. Over time, batteries naturally degrade and lose their capacity to hold a charge. By keeping track of the battery’s performance, you can get an idea of its current state and estimated remaining lifespan. Signs of a deteriorating battery may include decreased range, shorter battery life, and reduced power output.
To accurately monitor the battery’s consistent performance, it is essential to consult the manufacturer’s instructions. These instructions will provide detailed information on how to properly charge and maintain the battery. Following these guidelines will not only ensure the battery’s optimal performance but also extend its overall lifespan.
Consult the Manufacturer’s Instructions
Transition: Now that we have discussed the importance of consistent performance in determining if an electric bike battery is fully charged, it is crucial to consult the manufacturer’s instructions for specific guidelines on battery charging time and maintenance tips.
When it comes to charging your electric bike battery, following the manufacturer’s instructions is essential. Each battery model may have different requirements and it is important to adhere to them to ensure optimal performance and longevity. To help you understand the charging process, refer to the table below which highlights key points to consider:
| Battery Charging Time | Battery Maintenance Tips |
|---|---|
| Use the recommended charger | Avoid overcharging |
| Avoid charging in extreme temperatures | Store the battery in a cool, dry place |
| Charge the battery fully | Regularly inspect for damage |
| Avoid charging overnight | Clean the battery terminals |
Take Note of any Error Codes
When you encounter error codes on your electric bike’s display, it’s important to take note of them as they can provide valuable information about the status of your battery. Battery error codes are designed to help you troubleshoot any issues you may be experiencing with your battery. These codes can indicate problems such as low voltage, overcharging, or even a faulty battery. By understanding the meaning behind these error codes, you can take the necessary steps to address the issue and ensure the optimal performance of your electric bike.
To begin troubleshooting battery issues, you should consult the user manual or the manufacturer’s website to find a comprehensive list of error codes specific to your electric bike model. Each error code corresponds to a specific problem or condition that your battery may be experiencing. For example, an error code indicating low voltage could mean that your battery needs to be charged, while an error code indicating overcharging may require you to check the charging settings or replace the charger.
If you are unsure about the meaning of an error code or how to resolve the issue, it is always recommended to seek professional help. Electric bike batteries can be complex, and attempting to fix the problem yourself without proper knowledge or expertise can potentially cause further damage. By consulting a professional, you can ensure that your battery is properly diagnosed and repaired, if necessary, to get your electric bike back on the road.
Seek Professional Help if Unsure
Now that we have discussed the importance of taking note of any error codes, it is crucial to seek professional help if you are unsure about the condition of your electric bike battery. While error codes can provide some valuable information, sometimes they can be ambiguous or difficult to interpret accurately. In such cases, it is best to rely on the expertise of professionals who have extensive knowledge and experience in dealing with electric bike batteries.
When seeking advice about your electric bike battery, online forums can be a valuable resource. These virtual communities bring together electric bike enthusiasts, experts, and technicians who can offer guidance and solutions to various battery-related issues. Here are a few reasons why online forums can be helpful:
-
Diverse Perspectives: Online forums provide access to a wide range of individuals who have encountered similar battery problems. Their diverse perspectives can help you gain a comprehensive understanding of your specific situation.
-
Real-life Experiences: Forum members often share their personal experiences, detailing the steps they took to resolve battery issues. These firsthand accounts can offer valuable insights and practical suggestions.
-
Expert Recommendations: Many online forums have renowned experts who actively participate and provide professional advice. Their recommendations are based on years of experience and can be highly reliable.
Frequently Asked Questions
What are some common error codes that might indicate a problem with the electric bike battery?
Common error codes that may indicate battery problems include E01 (under voltage), E02 (over voltage), and E03 (over temperature). To troubleshoot, check battery connections, ensure proper charging, and follow battery maintenance tips for optimal performance.
How long does it typically take for an electric bike battery to fully charge?
The electric bike battery charging time varies depending on factors like battery capacity, charger output, and charging method. It typically takes around 4-6 hours for a full charge, but this can be longer or shorter depending on the specific circumstances.
Can using a battery voltage meter to check the battery’s charge level damage the battery?
Using a battery voltage meter accurately determines the charge level of an electric bike battery. Charging to full capacity doesn’t damage the battery if it’s designed for it.
What should I do if the battery indicator shows a full charge but the electric bike’s performance is inconsistent?
If the battery indicator shows a full charge but the electric bike’s performance is inconsistent, I would first check for loose connections and clean the battery terminals. If the issue persists, I would consider recalibrating the battery or seeking professional assistance for troubleshooting tips and battery maintenance.
Are there any specific audible cues or sounds that might indicate a fully charged electric bike battery?
Listen for a distinct click or beep from the battery charger, indicating a full charge. Additionally, some electric bikes may have a built-in indicator sound or light that signals a fully charged battery.
Conclusion
In conclusion, ensuring that your electric bike battery is fully charged is crucial for a smooth and efficient ride. By following the steps outlined in this article, you can guarantee optimal performance.
First, check the battery indicator to see how much charge is remaining. This will give you an idea of whether or not you need to charge your battery.
Next, use a battery voltage meter to get an accurate reading of the battery’s voltage. This will help you determine if the battery is fully charged or if it needs more time to charge.
Lastly, pay attention to the charging time. Different batteries may require different amounts of time to fully charge. Be sure to follow the manufacturer’s instructions for the specific charging time for your battery.
Remember, a fully charged battery is the lifeblood of your electric bike, like a well-oiled engine powering you towards your destination. So, take care of your battery and enjoy the ride!