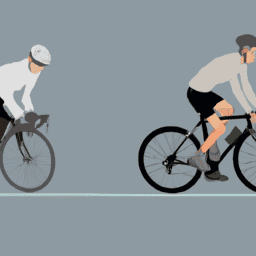
Tuning your bike brakes is a vital component of keeping your bicycle in safe and optimal working condition. Having your brakes properly calibrated means you’ll be able to halt swiftly and efficiently, a key aspect in preventing accidents and avoiding harm.
In this article, I will guide you through the process of adjusting both rim and disc brakes on your bike, step by step.
Before we get started, it’s important to understand the basics of brake adjustment. Brakes work by squeezing a pad against a rotating surface, either the rim or the rotor. As the pad makes contact, it creates friction that slows down or stops the wheel.
Adjusting your brakes involves adjusting the position of the pads so that they make proper contact with the rim or rotor, and ensuring that they are aligned correctly. With the right tools and a little bit of patience, anyone can learn how to adjust their bike brakes and keep them working safely and smoothly.
Key Takeaways
- Adjusting bicycle brakes is essential for both safety and performance.
- Proper alignment of brake pads and calipers is crucial for optimal stopping power.
- Different types of brakes and riding conditions require different adjustments and maintenance.
- Regularly testing and maintaining brakes is necessary for optimal performance and safety.
Understand the Basics of Brake Adjustment
You can’t ride safely with poorly adjusted brakes, so let’s dive into the basics of how to get your brakes working smoothly.
The first step in adjusting your brakes is understanding the basics of how they work. The brake system consists of two parts: the brake lever and the brake caliper. When you squeeze the brake lever, it pulls on a cable, which in turn pulls the brake caliper. The caliper then squeezes the brake pads against the rim of the wheel, creating friction and slowing down or stopping the bike.
Common mistakes that people make when adjusting their brakes include not tightening the cable enough, which can cause the brake pads to rub against the wheel even when the brakes aren’t being used, and tightening the cable too much, which can cause the brake pads to not fully release when you let go of the brake lever.
Troubleshooting tips include making sure the brake pads are properly aligned with the rim of the wheel, and checking to make sure the brake pads aren’t worn down and in need of replacement.
Now that you understand the basics of brake adjustment and some common mistakes to avoid, let’s move on to gathering the necessary tools.
Gather the Necessary Tools
First things first, make sure you’ve got all the gear you need to get those wheels stopping on a dime. As someone who’s been cycling for years, I know the importance of brake maintenance and how it can affect the overall performance of your bike.
Here are the tools you’ll need to gather before you start adjusting your brakes:
- Allen wrenches: These are necessary for loosening and tightening bolts.
- Cable cutters: These’ll help you trim the cables to the right length.
- Lubricant: This is essential for ensuring smooth operation of the brake system.
- A rag: You’ll need this to clean off any debris or dirt from the brake parts.
- Brake pads: If your brake pads are worn out, you’ll need to replace them.
Having the right tools on hand will make the process of adjusting your brakes much easier. With these tools, you’ll be able to adjust both rim and disc brakes.
Speaking of which, let’s move on to the next section and learn how to adjust rim brakes.
Remember, regular brake maintenance is key to ensuring that your bike is safe and performs well. Neglecting your brakes can lead to serious accidents and injuries.
So, let’s get started and make sure your bike’s in tip-top shape!
Adjusting Rim Brakes
Today, I’ll explain how to adjust rim brakes on a bicycle.
The three key points to focus on are centering the brakes, adjusting brake pads, and checking cable tension. To ensure optimal braking performance, it’s important to properly adjust these components.
Centering the Brakes
To properly center your brakes, start by squeezing the brake lever and examining the gap between the brake pads and the rim. If the gap is uneven, you’ll need to adjust the brake pad positioning.
To do this, loosen the brake pad fixing bolt and move the pad up or down until it’s in the correct position. Once you’ve adjusted the position of both brake pads, tighten the fixing bolts again.
Another factor to consider when centering your brakes is brake lever tension. If your brake lever feels too loose or too tight, it may affect the centering of the brakes. Adjust the tension by turning the barrel adjuster, which is located near the brake lever.
Experiment with different levels of tension until you find the right balance. With the brakes centered and the tension adjusted, you’re ready to move onto adjusting the brake pads for optimal braking performance.
Adjusting Brake Pads
Now it’s time for you to fine-tune your stopping power and feel confident in your ability to slow down quickly and smoothly by adjusting your brake pads. Brake pads are the rubber or metal blocks that come into contact with the wheel rim when the brake lever is squeezed.
Here are some things to consider when adjusting your brake pads:
- Brake pad materials: Different materials have varying levels of durability, stopping power, and noise. Common materials include rubber, cork, and metal.
- Choosing brake pads: Consider the type of riding you’ll be doing (e.g. road, mountain, commuting) and the weather conditions you’ll encounter when selecting brake pads.
- Positioning brake pads: Make sure that the brake pads are aligned with the wheel rim and that they make contact evenly.
- Adjusting brake pad height: The brake pads should hit the rim squarely, not at an angle. Adjust the height of the brake pads so that they hit the rim squarely.
- Checking brake pad wear: Regularly inspect your brake pads for wear and replace them when they become too worn down.
To ensure optimal brake performance, it’s important to check cable tension. By doing so, you’ll be able to ensure that the brake lever pull is smooth and that the brake pads hit the rim properly.
Checking Cable Tension
First, imagine yourself gripping the brake lever and feeling the resistance as you squeeze it. If the brake pads are properly adjusted but the brake lever still feels spongy or requires too much force to stop the bike, then it’s time to check the cable tension. A cable that is too loose will cause the brake pads to move too far away from the rim or rotor, reducing braking power. On the other hand, a cable that is too tight will keep the brake pads in constant contact with the rim or rotor, causing premature wear and tear.
To check the cable tension, start by inspecting the cable for signs of wear or fraying. If the cable is damaged, it needs to be replaced before adjusting the tension. If the cable is in good condition, then lubrication is the next step. Apply a small amount of lubricant to the cable and the cable housing to ensure smooth movement. Then, adjust the cable tension using the barrel adjuster located on the brake lever or caliper until the brake lever feels firm and the brake pads engage the rim or rotor properly. Don’t forget to recheck the brake pad alignment after adjusting cable tension. The importance of lubrication and signs of cable wear are crucial to keep in mind to ensure your brakes are functioning properly.
Transitioning to adjusting disc brakes, it’s important to note that disc brakes require a different approach as they use a hydraulic system to activate the brake pads.
Adjusting Disc Brakes
When it comes to adjusting disc brakes on my bicycle, there are three key points that I always keep in mind.
First, I need to make sure that the calipers are properly aligned with the rotor.
Second, I need to adjust the brake pads so that they make even contact with the rotor.
And finally, I need to regularly check for any signs of rotor wear and make adjustments as necessary.
By following these steps, I can ensure that my disc brakes are working at their best and providing me with the stopping power I need on any ride.
Aligning the Calipers
To align the calipers, you’ll want to squeeze the brake lever and observe the clearance between the brake pads and the rim. If the brake pads are rubbing against the rim, you’ll need to adjust the caliper by loosening the bolt that attaches the caliper to the frame or fork.
Once the bolt is loose, hold the brake lever down and wiggle the caliper until it’s centered over the rotor or rim. Then, tighten the bolt back up and release the brake lever to check that the caliper is properly aligned. This process may need to be repeated a few times until the caliper is perfectly centered.
It’s important to perform regular caliper maintenance to ensure that your brakes are functioning properly. This includes checking the brake pads for wear and replacing them when necessary. If the brake pads are worn unevenly, this can cause the calipers to become misaligned.
By keeping your brake pads in good condition, you can help prevent this issue and ensure that your brakes are always working at their best.
To adjust the brake pads, you’ll want to follow a similar process to aligning the calipers. By using an Allen wrench or similar tool, you can loosen the bolt that attaches the brake pad to the caliper. Then, you can adjust the pad so that it sits flush against the rim or rotor.
Tighten the bolt back up and repeat for the other brake pad. By taking the time to properly align your calipers and adjust your brake pads, you can ensure that your brakes are functioning at their best and provide optimal stopping power when you need it most.
Adjusting the Brake Pads
Proper maintenance of your bike’s braking system requires regular attention to the alignment and condition of the calipers and pads, ensuring they’re working at their best to provide optimal stopping power. When adjusting the brake pads, the first step is to check for brake pad wear. If they’re worn down to the metal, they need to be replaced immediately as worn brake pads can reduce stopping power and cause damage to the rotor.
Once you’ve determined the pads are in good condition, you can adjust their position. Different brake pad types require different techniques to adjust them properly. Some pads have adjustable nuts that can be used to move the pads closer or further away from the rim. Other pads require a specific tool to adjust them. It’s important to follow the manufacturer’s instructions for your specific type of brake pads to ensure they’re correctly positioned and aligned with the rim.
With the brake pads adjusted, the next step is to check the rotor wear.
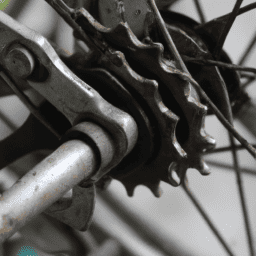
Checking Rotor Wear
You don’t want to risk your safety by neglecting to check the wear on your bike’s rotors. Inspecting rotors is an essential part of adjusting your bicycle brakes. In this step, you need to check your rotor’s thickness and ensure that it is not worn out beyond its limit. The thickness of the rotor is usually printed on it or can be found in the manufacturer’s manual. If the thickness is less than the manufacturer’s recommended minimum thickness, then you should replace the rotor.
To make things easier for you, here is a table that shows the recommended minimum thickness for different rotor sizes.
| Rotor Size | Minimum Thickness |
|---|---|
| 140mm | 1.5mm |
| 160mm | 1.8mm |
| 180mm | 1.8mm |
| 200mm | 1.8mm |
| 203mm | 1.8mm |
Replacing worn rotors is not only important for your safety but also for the performance of your brakes. Worn rotors can cause uneven brake pad wear, reduce braking power, and increase stopping distances. Therefore, it is essential to keep an eye on your rotors and replace them when necessary. Once you have inspected your rotors and ensured that they are not worn out, you can move on to the next step of testing your brakes and making final adjustments.
Test Your Brakes and Make Final Adjustments
Once you’ve got your brakes dialed in, it’s time to put them to the test and make sure they’re ready for any ride. Like a skilled archer testing the tension on their bowstring before taking aim, you want to be confident in your brakes before hitting the road.
Here are some steps to take to test your brakes and make final adjustments:
-
Find a safe spot to test your brakes, preferably on a flat surface.
-
Start riding at a slow speed and apply the brakes gently. Note how quickly you come to a stop and how much pressure you need to apply to the brake levers.
-
Gradually increase your speed and apply the brakes more forcefully. Again, note how quickly you come to a stop and how much pressure you need to apply.
-
If your brakes are not performing as desired, refer back to your brake maintenance and troubleshooting tips to identify and fix any issues.
Once you’ve completed these steps, you should feel confident in your brakes and ready to hit the road. Remember to regularly check and maintain your brakes to ensure optimal performance and safety on every ride.
Frequently Asked Questions
How do I know when it’s time to adjust my bicycle brakes?
As a cyclist, I know when it’s time to adjust my bicycle brakes by paying attention to signs of brake wear such as squeaking or reduced stopping power. I use DIY brake adjustment tips for optimal performance.
What should I do if my brakes are making a squeaking noise after adjustment?
If my brakes squeak after adjustment, I would check my brake pads for wear and contamination. I would also clean and lubricate my brake calipers and pivots with appropriate lubrication techniques as part of my regular bicycle brake maintenance routine.
Can I adjust my bicycle brakes without any special tools?
Yes, there are tools alternatives and DIY solutions to adjust bicycle brakes. A screwdriver, pliers, and an Allen wrench can be used. However, it’s important to follow proper adjustment procedures to ensure safety and effectiveness.
What are some common mistakes people make when adjusting their brakes?
Over tightening the brakes can cause the pads to rub against the wheel, creating friction and reducing speed. Incorrect alignment can also cause the brake pads to wear unevenly and decrease effectiveness. It’s important to avoid these mistakes when adjusting brakes.
Do different types of brake pads require different adjustment techniques?
Adjusting techniques may vary depending on brake pad compatibility. It’s important to ensure proper alignment and distance between the pads and the rim or rotor. Check for wear and tear regularly, and adjust as needed to maintain optimal performance.
Conclusion
In conclusion, adjusting your bicycle brakes may seem daunting at first, but it can be a straightforward process with the right tools and knowledge.
Understanding the basics of brake adjustment is crucial. This will allow you to identify any issues and determine the appropriate adjustments needed.
To begin, gather the necessary tools, including a wrench, pliers, and Allen keys.
For rim brakes, adjust the brake pads so they’re aligned with the rim and adjust the tension of the cable.
For disc brakes, adjust the pads so they’re evenly spaced from the rotor and adjust the cable tension or hydraulic system pressure as needed.
Remember to test your brakes and make any final adjustments before riding.
In summary, learning how to adjust your bicycle brakes is a vital skill for any cyclist. By following these steps and taking the time to make necessary adjustments, you can ensure your brakes are functioning properly and keep yourself safe on the road or trail.
So go ahead and give it a try – your bike (and your brakes) will thank you!