
Tuning the brakes on your bike is crucial for maintaining safety while cycling. Being a passionate cyclist, I consistently inspect my brakes to verify their optimal operation.
In this article, I will walk you through the step-by-step process of adjusting your brakes so that you can ride with confidence. Before we get started, it’s important to gather the necessary tools. You will need a set of Allen wrenches, a Phillips screwdriver, and a pair of pliers. You may also want to have a rag handy to clean the brake components.
With these tools in hand, we can begin inspecting and adjusting our brakes to ensure they are functioning as they should be. So grab your bike and let’s get started!
Key Takeaways
- Brake maintenance and adjustment is crucial for safety while cycling
- Proper alignment of brakes leads to effective braking and longer lifespan of pads
- Regular brake maintenance saves money in the long run
- Promptly addressing brake issues is crucial for safety while riding
Gather the Necessary Tools
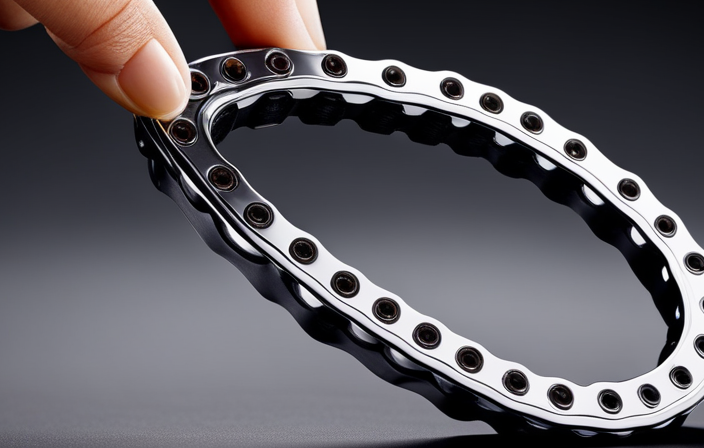
You’ll need to gather all the tools you’ll need before you can start adjusting your bike’s brakes. The most important tool is a set of hex wrenches, as most brake components are held together with hex bolts. You’ll also need a screwdriver, pliers, and a rag.
Before you start adjusting your brakes, it’s important to know what type of brakes your bike has and what common problems they may have. There are two main types of brakes: rim brakes and disc brakes. Rim brakes are the most common and can be identified by their brake pads which make contact with the rim of the wheel. Disc brakes, on the other hand, have brake pads that make contact with a rotor attached to the wheel hub.
Common brake problems include squeaking, rubbing, and not stopping properly.
Now that you have all the necessary tools and knowledge, it’s time to inspect your brake pads.
Inspect Your Brake Pads
Before adjusting my bike brakes, I always inspect my brake pads for wear and tear. If they’re worn out, it’s important to replace them immediately to ensure proper functioning of the brakes.
Additionally, I check for proper alignment of the brake pads with the rim of the wheel. This can greatly affect the efficiency of the braking system.
Check for Wear and Tear
Now, it’s important to quickly check for any wear and tear on your bike’s brakes before you hit the road. This step is crucial to ensure your brakes function optimally and prevent potential accidents.
As mentioned in the previous subtopic, replacing worn brake pads is necessary for maintaining good brake performance. However, there are other things you need to look out for.
Firstly, check the brake cables for any fraying or rusting. Frayed cables can cause the brakes to feel spongy or unresponsive. Rusting cables can also interfere with the brake’s performance.
Secondly, inspect the brake calipers for any signs of damage or corrosion. Damaged calipers can cause uneven braking and require immediate replacement.
Lastly, examine the brake rotors for any warping or deformation. Warped rotors can cause the brakes to pulsate or make a rubbing noise, indicating a need for replacement.
After checking for these potential issues, you can move on to the next step of adjusting your brakes.
To look for proper alignment, you need to ensure that the brake pads are hitting the rim evenly on both sides. This can be achieved by adjusting the brake calipers’ position and tightening the cable tension.
It’s important to note that proper alignment plays a significant role in how well your brakes work. Therefore, take the time to make sure your brakes are aligned correctly before going on your ride.
Look for Proper Alignment
To ensure optimal brake performance, it’s crucial to have even contact between the brake pads and the rim. This means that the brake pads need to be properly aligned.
Proper brake alignment ensures that the brake pads make even contact with the rim, which leads to effective braking and longer lifespan of the brake pads. Proper brake alignment is essential for effective braking. When the brake pads are aligned properly, they make even contact with the rim, resulting in optimal braking force.
This ensures that the rider can stop the bicycle quickly and safely. Additionally, proper brake alignment prevents premature wear and tear of the brake pads, saving the rider money in the long run.
Common brake alignment issues include misaligned brake pads, rubbing brakes, and uneven wear of the brake pads. These issues can be resolved by adjusting the brake pads, realigning the brakes, and replacing the brake pads as needed.
To adjust the brake cable tension, it is important to first ensure proper brake alignment.
Adjust the Brake Cable Tension
Typically, when adjusting brake cable tension on a bicycle, you’ll want to start by squeezing the brake lever to ensure the brake pads are in the correct position. Once you have confirmed this, you can move on to adjusting the cable tension. A common mistake people make when adjusting the tension is over-tightening the cable, which can result in the brakes not releasing properly and causing unnecessary wear on the brake pads. To avoid this, use the table below to troubleshoot any issues that may arise during the adjustment process.
| Problem | Solution |
|---|---|
| Brake lever pulls all the way to the handlebar | Loosen the cable tension |
| Brake pads rub against the rim even when the lever is not squeezed | Adjust the brake pad position |
| Brake lever feels spongy and doesn’t engage the brakes immediately | Tighten the cable tension |
| Brake pads don’t contact the rim at all | Adjust the brake pad position |
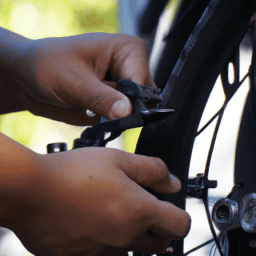
To align the brake pads, you’ll want to loosen the bolt that holds the brake pad in place and adjust its position so that it contacts the rim evenly when the brake is engaged. Once you have done this, you can tighten the bolt and test the brakes again.
Align the Brake Pads
Make sure the brake pads are aligned evenly with the rim by loosening the bolt and adjusting their position, ensuring a smooth and safe ride.
It’s important to check the brake pad alignment regularly, as uneven wear can cause the brake pads to lose effectiveness and potentially lead to accidents.
There are different brake pad materials and designs that can affect their alignment, so it’s important to understand how they work.
To align the brake pads, first loosen the bolt that holds them in place. Then, adjust the pads so that they are positioned evenly on either side of the rim. Use a ruler or your fingers to make sure they are equidistant from the rim.
Once you have adjusted the pads, tighten the bolt and test the brakes by squeezing the brake lever. If the brakes feel too loose or too tight, adjust the cable tension as needed.
Test your brakes before every ride to ensure they’re working properly and adjust as necessary.
Test Your Brakes
Now that you have aligned the brake pads, it’s time to test your brakes. Testing your brakes is crucial as it ensures that your brakes are functioning properly and are safe to use. If your brakes are not working correctly, it can lead to accidents and injuries. Therefore, it is essential to test your brakes before taking your bicycle out on the road.
To test your brakes, you need to take your bicycle for a test ride. While riding, squeeze the brake levers and observe how your brakes respond. If your brakes are not responsive, it could be due to several common brake issues such as worn brake pads, loose cables, or misaligned brake calipers. It is crucial to address these issues promptly as they can compromise your safety while riding. Regular brake maintenance is also essential to keep your brakes functioning correctly and prevent any potential issues from arising. In the table below, we have listed some common brake issues and their solutions to help you diagnose and fix any potential problems with your brakes.
| Common Brake Issues | Solutions |
|---|---|
| Spongy Brakes | Bleed the brakes, adjust the brake pads, or replace the brake cables. |
| Worn Brake Pads | Replace the brake pads. |
| Misaligned Brake Calipers | Adjust the brake calipers to align them with the rim. |
| Loose Brake Cables | Tighten the brake cables or replace them if they are worn. |
Remember, your brakes are crucial for your safety while riding. Therefore, it is essential to test your brakes regularly and address any issues promptly. By doing so, you can ensure that your brakes are functioning correctly and keep yourself safe while enjoying your rides.
Frequently Asked Questions
How often should I adjust my bike brakes?
I recommend adjusting my bike brakes every 6 months or 1000 kilometers, whichever comes first. Proper brake adjustment techniques include checking brake pad wear, cable tension, and caliper alignment. Regular maintenance can prevent accidents and prolong the life of my brakes.
Why are my brakes squeaking even though I just adjusted them?
I adjusted my bike brakes but they kept squeaking. I learned that the problem could be caused by improper alignment, worn brake pads, or contamination. By troubleshooting and avoiding common mistakes, I was able to fix the issue and enjoy a smooth ride.
What are some signs that my brake pads need to be replaced?
I must replace my brake pads if they are worn down to less than 1/8 inch or if the grooves have disappeared. The frequency of replacement depends on usage and signs of wear.
Can I adjust my disc brakes in the same way as my rim brakes?
Yes, disc brake adjustments are different from rim brake adjustments. Disc brakes require adjusting the brake pads and rotor alignment. Rim brakes only require adjusting the brake pads. Consult the manufacturer’s instructions for proper adjustment techniques.
How do I adjust my brake lever reach?
As a cyclist, I strive for optimal brake lever ergonomics. To achieve this, I adjust my brake lever reach. This ensures I can comfortably and safely operate my brakes, preventing hand fatigue and maximizing control on the road.
Conclusion
So there you have it, folks. Adjusting the brakes on your bicycle is not as daunting as it may seem. With the right tools and a little know-how, you can have your brakes working like new in no time. And the best part? You don’t have to be a professional mechanic to do it.
According to a study by the National Highway Traffic Safety Administration, 22% of all bicycle accidents involve brake failure. That’s a staggering number, and it highlights the importance of properly maintaining your brakes.
By following the steps outlined in this guide, you can help ensure that your brakes are working at their best, and that you’re able to stop quickly and safely when you need to.
So get out there, grab your tools, and get to work. Your brakes (and your safety) will thank you.