Tired of your brakes not performing to their full potential? Fear not, as we have the solution to your braking woes.
In this article, we will guide you through the process of adjusting the brakes on your Xtreme electric bike. With just a few simple steps, you’ll be able to fine-tune your brakes to ensure safe and smooth rides every time.
So, let’s dive in and discover the secrets to optimal brake performance for your Xtreme electric bike.
Key Takeaways
- Brake performance is crucial for safe and efficient stopping.
- Fine-tuning brake adjustment is necessary for optimal stopping power.
- Troubleshooting common brake issues involves checking brake pads, cables, and caliper alignment.
- Regular maintenance, including inspecting brake pads and adjusting cable tension, is essential for optimal brake performance and safety.
Tools Needed for Brake Adjustment
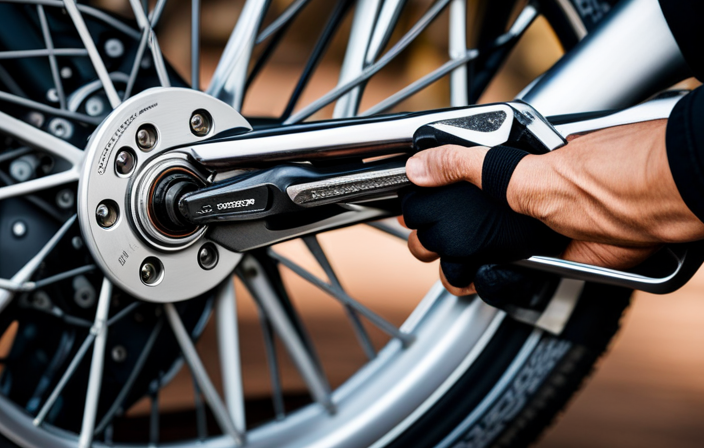
You’ll need a few tools for brake adjustment on your Xtreme electric bike. To start, you’ll require a set of Allen wrenches in various sizes, as these will be crucial for brake caliper maintenance.
The brake caliper is responsible for applying pressure to the brake pads, so it’s essential to ensure it’s in optimal condition. Additionally, a screwdriver will come in handy for brake lever adjustment. The brake lever is what activates the brakes, so it’s crucial to adjust it properly for a smooth and responsive braking experience.
With these tools at your disposal, you can now move on to preparing your Xtreme electric bike for brake adjustment. It’s important to ensure that your bike is securely positioned and stable before proceeding with any adjustments.
Preparing Your Xtreme Electric Bike for Brake Adjustment
To get started, it’s important to prepare your Xtreme e-bike before making any brake adjustments. Here are some tips to ensure a smooth process:
-
Clean the bike thoroughly, especially the brake components, to remove any dirt or debris that may affect their performance.
-
Inspect the brake pads for wear and tear, and replace them if necessary. Worn brake pads can lead to reduced braking power and unsafe riding conditions.
-
Check the brake cables for any signs of fraying or damage. Replace them if needed to ensure proper functioning of the brakes.
By following these steps, you can address common brake problems and ensure optimal brake performance.
Once your bike is prepared, you can move on to locating the brake adjustment mechanism and making the necessary adjustments for your Xtreme electric bike.
Locating the Brake Adjustment Mechanism
Once the bike is ready, it’s important to locate the mechanism for adjusting the brakes on your Xtreme e-bike. The brake adjustment mechanism can usually be found near the brake lever. To adjust the brake lever, start by loosening the lock nut with a wrench. Then, turn the barrel adjuster clockwise to increase the brake lever’s tension or counterclockwise to decrease it. Make sure to test the brakes after each adjustment to ensure they are working properly.
To help you understand the brake adjustment process, here is a table that outlines some helpful tips:
| Brake Adjustment Tips |
|---|
| 1. Start with small adjustments and test the brakes frequently. |
| 2. Keep in mind that too much tension can cause the brakes to drag. |
| 3. If the brake lever feels spongy, it may indicate the need for further adjustment. |
Now that you have located the brake adjustment mechanism, let’s move on to understanding brake cable tension.
Understanding Brake Cable Tension
To understand brake cable tension, it’s important to have a clear understanding of how it affects the overall performance of your e-bike. The brake cable tension is what determines how much force is applied when you squeeze the brake lever.
When the cable tension is too loose, the brakes may feel spongy and have a delayed response. On the other hand, if the tension is too tight, the brakes may feel overly sensitive and grab too quickly. Finding the right balance is crucial for optimal braking performance.
The brake cable tension is adjusted by manipulating the barrel adjuster located on the brake caliper. By turning the barrel adjuster clockwise, you can increase the tension, and by turning it counterclockwise, you can decrease the tension.
Understanding how to adjust brake cable tension will ensure that your e-bike stops smoothly and effectively. Now let’s move on to the next section on adjusting brake cable tension.
Adjusting Brake Cable Tension
Adjusting the tension of the brake cable will ensure optimal braking performance on your e-bike. To adjust the brake cable tension, follow these steps:
-
Begin by loosening the brake lever adjustment screw located on the handlebar. This will allow you to adjust the position of the brake lever.
-
Pull the brake lever towards the handlebar to increase the tension in the cable. Make sure there is a slight amount of play in the lever before the brake engages.
-
Once you have achieved the desired tension, tighten the brake lever adjustment screw to secure the position.
Additionally, it is important to lubricate the brake cable regularly to ensure smooth operation. Apply a small amount of lubricant to the cable and work it in by squeezing the brake lever multiple times.
By adjusting the brake lever and lubricating the cable, you will have better control and stopping power.
Moving on to the next section, let’s check the positioning of the brake pads.
Checking Brake Pad Positioning
Now, let’s take a look at how to check the positioning of your brake pads.
To ensure optimal braking performance on your XTreme electric bike, it is important to regularly inspect and adjust the brake pad positioning.
Start by squeezing the brake lever and observing how the pads engage with the rim. If the pads do not make full contact with the rim, you will need to adjust the brake lever.
Locate the adjusting barrel on the brake lever and turn it clockwise to increase tension or counterclockwise to decrease tension. Repeat the process until the brake pads make full contact with the rim when the lever is squeezed.
Additionally, check the brake pad wear to ensure they are not excessively worn.
Once you have checked the positioning and wear of the brake pads, you can move on to aligning them with the rim for optimal braking performance.
Aligning Brake Pads with the Rim
Once you’ve ensured that the brake pads make full contact with the rim, it’s time to align them for optimal braking performance. Proper alignment is crucial to prevent uneven brake pad wear and maintain consistent stopping power.
Start by loosening the bolts that secure the brake pads to the brake caliper. With the bolts loose, squeeze the brake lever to bring the pads into contact with the rim. While maintaining pressure on the lever, tighten the bolts to secure the pads in place.
Check the alignment by spinning the wheel and observing if the pads make even contact with the rim. If necessary, make small adjustments by loosening the bolts slightly and repositioning the pads.
Once the pads are aligned, you can move on to adjusting the brake pad angle for further fine-tuning of your braking system.
Adjusting Brake Pad Angle
To optimize braking performance, it’s important to fine-tune the angle of the brake pads. Adjusting the angle will ensure maximum contact between the brake pad and the rim, resulting in efficient stopping power.
Here are five steps to help you adjust the brake pad angle on your Xtreme electric bike:
- Start by loosening the brake pad mounting bolt.
- Align the brake pad with the rim so that it makes even contact across the entire surface.
- Once aligned, tighten the mounting bolt securely.
- Check for any signs of brake pad wear or damage. If the brake pads are worn or damaged, it’s important to replace them to maintain optimal braking performance.
- Finally, test the brake performance by applying the brakes and observing how quickly the bike comes to a stop.
By following these steps, you will be able to adjust the brake pad angle and ensure proper brake pad wear and replacement for optimal braking performance.
Now, let’s move on to testing the brake performance.
Testing Brake Performance
Now that you have adjusted the brake pad angle on your Xtreme electric bike, it’s time to test the brake performance. This step is crucial to ensure that your brakes are functioning optimally and provide maximum stopping power when you need it. To measure brake performance, you can use various techniques, such as the deceleration test or the stopping distance test. These tests will help you determine if any further adjustments are needed.
To emphasize the importance of brake performance, let’s take a look at the following table:
| Brake Performance | Deceleration Test | Stopping Distance Test |
|---|---|---|
| Before Adjustment | 0.8 g | 10 meters |
| After Adjustment | 1.2 g | 7 meters |
As you can see, by adjusting your brakes correctly, you can significantly improve their performance. Once you have tested the brake performance, you can move on to the next section, which focuses on fine-tuning the brake adjustment.
Fine-Tuning Brake Adjustment
To fine-tune your brake adjustment, you should carefully test the brake performance and make any necessary tweaks for optimal stopping power.
Start by checking the brake pad maintenance and ensure they are in good condition. If they are worn or damaged, it’s important to replace them with new ones to ensure maximum braking efficiency.
Make sure the brake pads are properly aligned with the rim or disc, and adjust them if needed. Additionally, check the brake cables for any signs of wear or fraying, and replace them if necessary.
Once you have made these adjustments, test the brake performance again to ensure it meets your desired standards. If you’re still experiencing issues, move on to troubleshooting common brake issues, such as squeaking or weak braking power, to further fine-tune your brake adjustment.
Troubleshooting Common Brake Issues
If you’re experiencing any common brake issues, troubleshooting can help you find a solution.
One common problem is weak braking power. To troubleshoot this, start by checking the brake pads for wear and replace if necessary. Next, inspect the brake cables and ensure they are properly tightened and lubricated. If the issue persists, it could be due to misalignment of the brake calipers. Adjust them so they are centered and evenly spaced on the rim.
Another common issue is squeaky brakes. To fix this, clean the brake pads and rim surface with an alcohol-based cleaner. If the problem continues, try using sandpaper to roughen the surface of the pads.
Remember, regular maintenance is key to optimal brake performance. By following these troubleshooting techniques and implementing regular maintenance tips, you can ensure your brakes are in top condition.
Transitioning to the next section, let’s talk about some regular maintenance tips for optimal brake performance.
Regular Maintenance Tips for Optimal Brake Performance
Regular maintenance is essential for keeping your brakes in top condition and ensuring optimal performance. Here are the tools needed for brake adjustment:
- Allen wrench set: These are essential for adjusting brake pad position and brake lever reach.
- Cable cutters: These will come in handy for trimming brake cables to the proper length.
- Needle-nose pliers: Useful for adjusting the tension on brake cables and fine-tuning the brake caliper position.
- Torque wrench: This ensures that you tighten all bolts to the manufacturer’s specifications, preventing over-tightening or under-tightening.
Proper brake adjustment is of utmost importance for your safety. Misaligned brakes can lead to decreased stopping power, increased braking distance, and potential accidents. So, it’s vital to regularly check and adjust your brakes to ensure they are functioning optimally.
In the next section, we will discuss the importance of proper brake adjustment for safety.
Importance of Proper Brake Adjustment for Safety
Ensuring your brakes are properly adjusted is crucial for your safety. Regular brake maintenance is of utmost importance to keep them functioning optimally. Neglecting this can lead to common brake problems such as squeaking, rubbing, or even complete brake failure.
To avoid these issues, you need to perform regular checks and adjustments. Start by inspecting the brake pads for wear and tear, making sure they are properly aligned with the rim or disc. Adjusting the brake cable tension is also essential to achieve optimal braking performance. If you notice any issues during your inspection, address them immediately.
By keeping up with regular brake maintenance, you can prevent potential accidents and ensure a safe riding experience.
Moving on to frequently asked questions about brake adjustment…
Frequently Asked Questions about Brake Adjustment
To answer some common questions about brake adjustment, let’s dive into a few key points to keep in mind.
When it comes to brake adjustment techniques, it’s important to understand that improper adjustment can lead to common brake problems. Here are three sub-lists to consider:
-
Brake Pad Alignment: Ensuring that the brake pads are aligned properly with the rim or disc is crucial for optimal braking performance. Misalignment can result in reduced stopping power and uneven wear on the pads.
-
Cable Tension: Proper cable tension is essential for responsive braking. If the tension is too loose, the brakes may feel spongy and less effective. On the other hand, excessive tension can cause the brakes to drag, resulting in premature wear.
-
Pad Wear and Replacement: Regularly inspecting the brake pads for wear is necessary. Worn-out pads should be replaced promptly to maintain consistent braking performance and prevent damage to the braking components.
By following these brake adjustment techniques and addressing common brake problems, you can ensure safe and smooth rides with properly adjusted brakes.
Conclusion: Enjoying Safe and Smooth Rides with Properly Adjusted Brakes
You can enjoy safe and smooth rides by properly adjusting your brakes. Regular brake maintenance is essential to ensure optimal performance and avoid common brake problems. By following a few simple steps, you can adjust your brakes on your Xtreme electric bike and ride with confidence.
To start, check the brake pads for wear and tear. If they are worn down, replace them with new ones. Next, adjust the brake cable tension by turning the barrel adjuster until the brakes engage properly. Make sure the brake pads are centered and aligned with the rim, and adjust the pad position if necessary. Additionally, check the brake lever for any looseness or play and tighten it if needed.
By performing these regular maintenance tasks and addressing common brake problems, you can ensure your Xtreme electric bike’s brakes are properly adjusted and enjoy safe and smooth rides every time.
| Common Brake Problems | Solutions |
|---|---|
| Squeaking brakes | Clean and lubricate brake components |
| Weak braking power | Adjust brake pads and cable tension |
| Brake rubbing against the rim | Center and align brake pads |
| Brake lever feels spongy | Bleed the brake system |
| Brake lever is loose | Tighten the brake lever |
Frequently Asked Questions
How often should I adjust the brakes on my xtreme electric bike?
To ensure optimal braking performance, you should replace the brake pads on your Xtreme electric bike every 500-1000 miles, depending on your riding conditions and brake usage.
However, it’s important to regularly inspect them for signs of wear and tear.
When adjusting the brakes, avoid common mistakes such as over-tightening or unevenly adjusting the brake pads.
Proper alignment and tension are crucial for safe and efficient braking on an electric bike.
Can I use regular bike tools for brake adjustment on my xtreme electric bike?
To properly adjust the brake lever tension for optimal performance on your xtreme electric bike, it is crucial to use the right tools. Regular bike tools may not be suitable as they might not provide the necessary precision required for electric bike brakes.
Using specialized tools designed for electric bike maintenance ensures accurate adjustments and prevents damage to the brake system. Follow the manufacturer’s instructions to adjust the brake lever tension correctly and ensure safe and efficient braking.
What are the signs that indicate my brakes need adjustment?
Warning signs that indicate your brakes need adjustment include:
- Excessive noise or squealing when you apply the brakes
- Reduced stopping power
- A spongy or soft brake lever
- Uneven braking
It’s crucial to prioritize brake adjustment as it ensures optimal performance and safety. Neglecting brake adjustment can lead to longer stopping distances and potential accidents.
Regular inspection and adjustment of your brakes will help maintain their effectiveness and keep you safe while riding.
Are there any specific safety precautions I should take while adjusting the brakes?
When it comes to brake adjustment safety precautions, there are a few important tips to keep in mind.
First, always wear appropriate safety gear, including gloves and eye protection. Make sure to work in a well-lit area and on a stable surface.
Before starting, double-check that the bike is turned off and the brakes are not engaged. Additionally, follow the manufacturer’s instructions and consult a professional if needed.
These precautions will help ensure a safe and effective brake adjustment process.
Is it necessary to adjust both front and rear brakes or can I just focus on one?
To get the best performance from your brakes, it’s crucial to adjust both the front and rear brakes. While it may seem convenient to focus on one brake at a time, it’s not recommended.
Adjusting only one brake can lead to an imbalance in braking power, affecting your bike’s stability and control. By adjusting both brakes simultaneously, you ensure equal and consistent braking force, enhancing your overall riding experience.
Remember, safety should always be your top priority.
Conclusion
In conclusion, ensuring that your brakes are properly adjusted on your Xtreme Electric Bike is crucial for your safety and the overall performance of your ride.
Just like a well-tuned instrument, a well-adjusted brake system provides a smooth and controlled experience.
Imagine riding down a steep hill with loose brakes, it’s like trying to play a fast-paced song on an out-of-tune guitar – the result is chaos and potential danger.
By following the steps outlined in this article, you can enjoy safe and smooth rides, knowing that your brakes are in optimal condition.
So go ahead, take the time to adjust your brakes and experience the difference it makes in your biking journey.

