Are your electric bike brakes not performing as well as they used to? Do you find yourself struggling to stop smoothly and safely? Don’t fret! In this step-by-step guide, we will show you how to adjust your electric bike brakes for optimal performance.
From understanding the different types of brakes to inspecting and cleaning the brake rotors, we’ve got you covered.
So, are you ready to take control of your braking system and ride with confidence? Let’s dive in!
Key Takeaways
- Brake caliper lubrication is an important step in adjusting electric bike brakes.
- Proper testing techniques, such as checking brake lever movement and return, evaluating stopping power, and confirming balance, are necessary for optimal brake performance.
- Troubleshooting tips should be used to address any brake problems promptly and maintain safety and performance.
- Regular maintenance, including inspecting brake pads, adjusting brake calipers, checking brake cables, and practicing safe braking techniques, is crucial for the longevity and safety of electric bike brakes.

Under Armour Squeeze Water Bottles, 32 oz Water Bottles, Sideline Sports Water Bottle with Quick-Shot Lid, Quick & Easy Hydration, Gym Water Bottles, Squeeze Bottle, 1 32oz Bottle
- Easy Hydration: Quick-shot lid and one-way valve
- On-the-Go Use: One-hand operation for active hydration
- Measurement Markings: Ounces and milliliters for tracking
As an affiliate, we earn on qualifying purchases.
Understanding the Different Types of Brakes on Electric Bikes
To understand the different types of brakes on electric bikes, you’ll need to know how they work and what makes them unique.
Electric bikes typically have three types of brake systems: mechanical, hydraulic, and regenerative.
Mechanical brakes are the most common type and are operated by a cable that connects the brake lever to the caliper. They are easy to adjust and maintain, but they can wear out quickly and require more effort to apply.
Hydraulic brakes, on the other hand, use fluid to transmit force from the brake lever to the caliper. They provide better stopping power and require less maintenance, but they can be more expensive and difficult to adjust.
Regenerative brakes are a unique feature of electric bikes and use the motor to slow down the bike while simultaneously recharging the battery. They offer the advantage of energy regeneration, but they may not provide as much stopping power as mechanical or hydraulic brakes.
Assessing the brake performance and identifying issues is crucial for maintaining the safety of your electric bike.
Assessing the Brake Performance and Identifying Issues
First, take a moment to evaluate how well your brakes are performing and see if there are any issues that need to be addressed. Common brake issues on electric bikes include squeaking or grinding noises, weak braking power, a spongy or unresponsive brake lever, or uneven braking.
Troubleshooting brake problems involves a systematic approach to identify and resolve the issues. Here are four steps to assess brake performance and identify any issues:
-
Check the brake pads: Inspect the brake pads for wear and tear. If they are worn down, replace them to ensure optimal braking performance.
-
Examine the brake cables: Look for any fraying, kinks, or loose connections in the brake cables. Adjust or replace them if necessary.
-
Evaluate the brake rotor: Inspect the brake rotor for any signs of damage or warping. If it is damaged, it may need to be replaced.
-
Test the brake lever: Squeeze the brake lever and assess its responsiveness. If it feels spongy or unresponsive, you may need to bleed the brake system.
Once you have assessed the brake performance and identified any issues, you can proceed to adjust the brake lever tension for optimal braking.
Adjusting the Brake Lever Tension
Next, make sure to find the appropriate tension for your brake lever to ensure optimal braking performance. Adjusting the brake lever reach is an essential step in customizing your electric bike’s brake system. To do this, follow these steps:
- Start by loosening the brake lever reach adjustment bolt located on the brake lever body.
- Slide the lever closer or farther away from the handlebar grip to achieve the desired position.
- Once you’ve found the ideal reach, tighten the adjustment bolt securely.
- Test the brake lever tension by squeezing it. It should feel comfortable and responsive, allowing you to modulate the braking force effectively.
By adjusting the brake lever reach, you can enhance your riding experience and improve your control over the electric bike. Additionally, troubleshooting brake noise can also be addressed during this process. Now, let’s move on to aligning the brake pads for proper contact.
Aligning the Brake Pads for Proper Contact
Once you have adjusted the tension of the brake lever, the next step is to align the brake pads for proper contact. Proper brake alignment is crucial for optimal braking performance and to avoid any potential issues.
Here is a step-by-step guide to aligning the brake pads:
- Loosen the brake pad mounting bolt on the caliper using an Allen wrench.
- Align the brake pad with the rim of the wheel, making sure it is centered and parallel to the rim surface.
- Hold the brake pad in place and tighten the mounting bolt securely.
- Repeat the process for the other brake pad.
Properly aligned brake pads ensure that the brake pads make even contact with the rim, allowing for effective braking. If you are experiencing any issues with your brakes, such as squeaking or poor stopping power, improper brake alignment could be the cause.
After aligning the brake pads, you can move on to checking and adjusting the brake cable tension.
Checking and Adjusting the Brake Cable Tension
To ensure optimal braking performance, it’s important to regularly check and adjust the tension of the brake cable.
Start by locating the brake lever on your electric bike. Then, squeeze the lever to see if it feels loose or tight.
If it feels loose, you’ll need to tighten the cable. Begin by locating the barrel adjuster near the brake lever. Turn it clockwise to increase tension or counterclockwise to decrease tension. Test the lever again to see if it feels more responsive.
If it still feels loose, you may need to troubleshoot other brake issues such as worn brake pads or a damaged cable.
Once you have adjusted the brake cable tension, you can move on to adjusting the brake caliper position to ensure proper contact with the wheel.
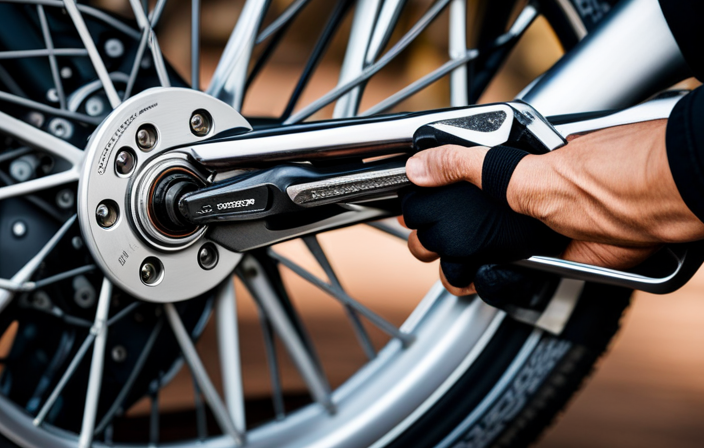
Adjusting the Brake Caliper Position
To ensure optimal brake performance on your electric bike, it is crucial to properly adjust the brake caliper position. This step is essential in maintaining the overall functionality of your brakes and troubleshooting any issues that may arise.
Follow these steps to adjust the brake caliper position:
- Loosen the mounting bolts on the brake caliper using a wrench.
- Align the caliper so that it is centered over the brake rotor.
- While holding the caliper in place, tighten the mounting bolts securely.
By adjusting the brake caliper position, you can ensure that the brake pads make proper contact with the rotor, resulting in efficient braking power.
Once you have completed this step, you can move on to inspecting and cleaning the brake rotors, which is essential for maintaining their longevity and performance.
Inspecting and Cleaning the Brake Rotors
Inspecting and cleaning the brake rotors is important for ensuring their longevity and performance.
To begin, locate the brake rotors on your electric bike. Look closely for any signs of wear, such as grooves or uneven surfaces. If you notice any damage or excessive wear, it may be necessary to replace the rotors.
Next, use a clean cloth or paper towel to remove any dirt or debris from the surface of the rotors. Be sure to clean both sides of the rotor thoroughly. For tough dirt or grime, you can use a mild degreaser or brake cleaner. Avoid using harsh chemicals or abrasive materials that could damage the rotor.
Once the rotors are clean, visually inspect them again to ensure they are free of any remaining debris.
Transitioning into the next section, lubricating the brake system is crucial for smooth operation and preventing common brake problems.
Lubricating the Brake System for Smooth Operation
Lubricating the brake system is essential for ensuring smooth operation and preventing common issues. It helps reduce friction and wear, allowing the brakes to function properly. Before lubricating, it’s important to select the right lubricant for your electric bike’s brakes. Look for a silicone-based lubricant that is specifically designed for bicycle brakes. Avoid using oil-based lubricants as they can cause the brake pads to become contaminated and reduce their effectiveness.
To lubricate the brake system, follow these steps:
- Start by cleaning the brake calipers and brake pads with a clean cloth to remove any dirt or debris.
- Apply a small amount of lubricant to the pivot points of the brake calipers and the brake pad retaining pins.
- Gently move the brake calipers back and forth to distribute the lubricant evenly.
- Wipe off any excess lubricant with a clean cloth.
Regularly lubricating your electric bike’s brake system will help maintain its performance and extend its lifespan. Once you have lubricated the brakes, you can proceed to the next step of testing the adjusted brakes for optimal performance.
Lubricating the brake system helps ensure smooth operation and prevents common issues such as brake pad wear. By selecting the right lubricant and following the step-by-step process, you can keep your electric bike’s brakes in top condition. After lubricating, it’s important to test the adjusted brakes for optimal performance.
Testing the Adjusted Brakes for Optimal Performance
To ensure the smooth operation of your electric bike’s brake system, it is crucial to test the adjusted brakes for optimal performance. By following these testing techniques and troubleshooting tips, you can guarantee that your brakes are functioning at their best:
-
Check the brake lever: Ensure that the lever moves smoothly and returns to its original position when released.
-
Test brake responsiveness: Squeeze the brake lever gently and then apply more pressure to test how quickly the brakes engage.
-
Assess stopping power: Find a safe area and gradually increase your speed, then apply the brakes to evaluate how effectively they bring you to a stop.
-
Confirm brake balance: Test both the front and rear brakes individually to ensure they are equally responsive.
By employing these testing techniques and troubleshooting tips, you can identify any potential issues with your electric bike’s brakes and address them promptly. This will help you maintain the safety and performance of your electric bike.
In the subsequent section, we will discuss regular maintenance and safety tips for electric bike brakes, ensuring that your brakes remain in excellent condition.
Regular Maintenance and Safety Tips for Electric Bike Brakes
Make sure you regularly maintain and follow safety tips to keep your electric bike brakes in excellent condition. Electric bike brake maintenance is crucial for optimal performance and safety. Here are some steps you can take to ensure your brakes are functioning properly:
-
Inspect brake pads: Check the brake pads for wear and tear. Replace them if they are worn down to the minimum thickness.
-
Adjust brake calipers: Ensure the brake calipers are properly aligned. Use a hex wrench to adjust them if needed.
-
Check brake cables: Inspect the brake cables for any signs of fraying or damage. Replace them if necessary.
-
Test brake responsiveness: Squeeze the brake levers to test the responsiveness of the brakes. Adjust the tension if they feel too loose or too tight.
-
Practice safe braking: When riding your electric bike, remember to apply gradual and even pressure to the brake levers. Avoid sudden, aggressive braking to prevent accidents.
By following these electric bike brake safety tips and performing regular maintenance, you can enjoy a smooth and safe riding experience. Remember, proper brake maintenance is essential for your overall biking experience.
Frequently Asked Questions
How do I know if my electric bike brakes need to be adjusted?
To determine if your electric bike brakes need adjustment, look for signs of worn-out brake pads such as decreased stopping power or squeaking. Common brake problems include misaligned calipers or loose cables, which can be fixed by adjusting caliper alignment or tightening the cables.
Can I adjust the brake lever tension if I have hand strength issues?
To accommodate individuals with hand strength limitations, you can adjust the brake lever tension on an electric bike. Alternatively, consider using alternative brake lever designs specifically designed for individuals with hand strength issues.
Is it possible to align the brake pads without removing the wheels on my electric bike?
To align the brake pads on your electric bike without removing the wheels, you’ll need a few tools: an Allen wrench, a flathead screwdriver, and a brake pad alignment tool. Follow these step-by-step instructions for precise brake adjustment.
How often should I check and adjust the brake cable tension on my electric bike?
To ensure optimal performance and safety, regularly check and adjust the brake cable tension on your electric bike. Every 2-3 months, follow these steps to properly adjust the brake cable tension on an electric bike.
What type of lubricant should I use for the brake system on my electric bike?
Regular brake maintenance is crucial for electric bikes. Common brake issues include squeaking, lack of stopping power, and dragging. To troubleshoot, check brake pads and rotors for wear, adjust cable tension, and lubricate the brake system with a silicone-based lubricant.
Conclusion
In conclusion, adjusting the brakes on your electric bike is a crucial step in ensuring your safety and optimal performance. By following the step-by-step guide outlined in this article, you can easily adjust your brake system and maintain it for smooth operation.
Just like maintaining the brakes of a car, neglecting the upkeep of your electric bike brakes can have serious consequences. Remember, a well-adjusted brake system is like a well-oiled machine, providing you with the control and confidence you need while riding.
So take the time to regularly inspect and adjust your electric bike brakes for a safe and enjoyable riding experience.