Tuning the back brakes of a bike might appear challenging, yet it becomes an easy and direct task with the proper equipment and instructions.
As someone who has worked on bicycles for years, I can confidently say that adjusting the rear brakes is a task that can be done by anyone with a bit of patience and attention to detail.
The rear brakes of a bicycle are an essential component that provide safety and control for the rider.
If your brakes are not adjusted properly, it can lead to decreased stopping power, reduced control, and even accidents.
In this article, I will walk you through the steps to adjust your rear brakes, from loosening the brake cable to testing the brakes.
By following these simple steps, you can ensure that your brakes are working properly and keep yourself safe while riding.
Key Takeaways
- Properly adjusted rear brakes are essential for safety and control while riding.
- Necessary tools for adjusting rear brakes include a multi-tool, pliers, cable cutter, clean rag, degreaser, and lubricating oil.
- Common brake problems include brakes that are too loose or too tight, which can be fixed by adjusting the cable tension and brake pad alignment.
- Regularly checking and maintaining brakes, including inspecting brake components, replacing worn parts, and cleaning and lubricating the bike, is crucial for safety and extending the bike’s lifespan.
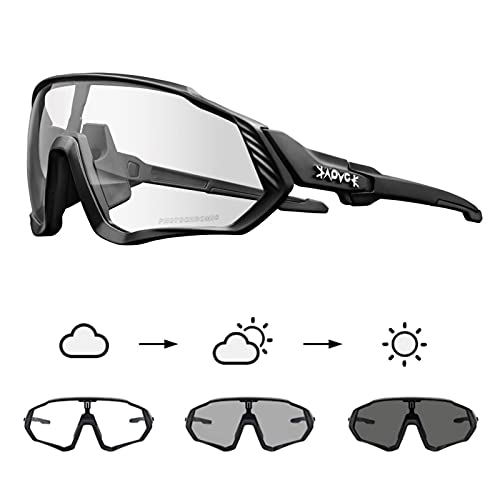
KAPVOE Photochromic Cycling Glasses Men Women Mountain Bike Sunglasses Clear MTB Bicycle Riding - K9408
【Photochromic Glasses】 Lenses will change from clear to dark gray in response to the intensity of the ultraviolet,...
As an affiliate, we earn on qualifying purchases.
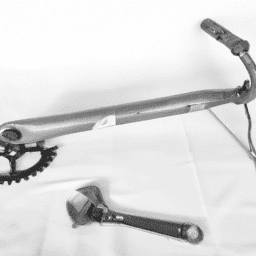
Gather the Necessary Tools
Before we dive into adjusting those pesky rear brakes, let’s gather all the necessary tools you’ll need to get the job done effortlessly.
First and foremost, you’ll need a set of bike-specific tools. A multi-tool with a 5mm and 6mm Allen key, a pair of pliers, and a cable cutter are the most commonly used tools for adjusting rear brakes. Other than the bike tools, you’ll also need a clean rag, a degreaser, and some lubricating oil.
Now, let’s talk about some common brake problems. Before you start adjusting your rear brakes, it’s important to identify the issue you’re facing.
The most common problem is when the brakes are too loose or too tight. If your brake lever is too tight, it means that the brake pads are constantly rubbing against the rim, causing a lot of friction and making it harder to ride. On the other hand, if the brakes are too loose, they won’t provide enough stopping power when you need it most.
As we move forward, we’ll learn how to loosen the brake cable and adjust the brake pads to fix these issues.

Schwinn Network 1 Hybrid Bike, 700c Mens and Womens Bike, 21-Speed Hybrid Bicycle, Aluminum Frame, Suspension Fork, Alloy Linear Pull Brakes, Adult Bicycle
HYBRID BICYCLE: Ride confidently on or off the pavement in the Network 1 by Schwinn. With 700c wheels,...
As an affiliate, we earn on qualifying purchases.
Loosen the Brake Cable
To ease the tension, simply release the cable by loosening the bolt that attaches it to the brake caliper. Once the bolt is loosened, the cable will become slack, allowing you to adjust its tightness.
Before tightening the cable, make sure to apply lubricant to any parts that require it. This’ll help prevent rust and ensure smooth operation of the brake system. Once the lubricant is applied, adjust the cable to the desired tightness and tighten the bolt.
Now that the cable is properly adjusted, it’s time to move on to adjusting the brake pads.

Schwinn GTX 1 Hybrid Bike, 700c Mens and Womens Bike, 21-Speed Hybrid Bicycle, Aluminum Dual-Sport Frame, Suspension Fork, Front and Rear Linear Pull Brakes, Adult Bicycle
DUAL SPORT HYBRID BICYCLE: Ride confidently on or off the pavement in the GTX 1 by Schwinn. With...
As an affiliate, we earn on qualifying purchases.
Adjust the Brake Pads
Now that the cable is loose and lubricated, it’s time to give your ride some serious stopping power with properly aligned brake pads.
There are two types of brake pads: rim and disc brake pads. Rim brake pads are generally made of rubber and come in various compounds for different weather conditions. Disc brake pads, on the other hand, can be made of organic or metallic compounds and are designed to withstand high temperatures.
To adjust the brake pads, first check for uneven wear. If one side of the brake pad is worn more than the other, then use an Allen wrench to adjust the position of the pad. Start by loosening the bolt that holds it in place and then aligning it with the rim or disc.
Next, adjust the distance between the brake pads and the rim or rotor. If the pads are too far away, then tighten the cable or adjust the barrel adjuster until the pads are closer to the rim or rotor. If the pads are too close, then loosen the cable or barrel adjuster until the pads are farther away.
Finally, make sure the pads are parallel to the rim or rotor. Once you have adjusted the brake pads, move on to testing the brakes.
As I move on to testing the brakes, it’s important to remember that properly adjusted brakes should allow the wheel to spin freely without touching the pads, but when the brake lever is squeezed, the wheel should stop immediately.
If the brake pads are too worn or damaged, then they should be replaced before attempting to adjust them. With properly adjusted brake pads, you can now enjoy a safe and confident ride.

AVASTA 26 Inch Hybrid Bike, Lightweight Step-Through Hi-Ten Steel Frame for City Commuting, 6 Speed Comfort Bicycle with Metal Basket in Elegant Black with Stylish Beige Tires for Woman Female
🚴♀️【Premium Frame & Effortless Assembly】The AVASTA Vela hybrid bike features a sturdy high tensile steel frame designed for...
As an affiliate, we earn on qualifying purchases.
Test the Brakes
Before taking your bike for a ride, it’s important to test the brakes to ensure they’re working properly. To do this, start by checking the brake lever for any looseness or unusual resistance.
Next, test the brakes on a flat surface by applying the brakes gradually and making sure the bike comes to a complete stop.
Finally, test the brakes on a hill to make sure they’re strong enough to slow down and stop the bike safely.
Check the Brake Lever
First, take a look at your brake lever and make sure it’s positioned correctly for easy access while riding. Inspect the brake cable to make sure it’s not frayed or worn out. If it is, replace the cable before adjusting the brakes.
Next, lubricate the brake lever pivot point with a light oil to ensure smooth movement. This will prevent any sticking or resistance in the lever, which can affect the brake’s performance.
Now that the brake lever is checked and lubricated, it’s time to move on to testing the brakes on a flat surface. This will ensure that the adjustment is correct and the brakes are working properly.
Test the Brakes on a Flat Surface
To properly test your braking ability, hop on your bike and ride on a flat surface to check if your brakes respond quickly and smoothly. Begin by squeezing the brake lever to check the brake responsiveness. If the brakes don’t respond promptly, you may need to adjust the brake tension.
To adjust the brake tension, turn the barrel adjuster on the brake caliper until the brake pads are properly aligned with the rim. You can also adjust the brake pads themselves by loosening the brake pad holder bolts and repositioning the pads closer to or farther from the rim.
Once you’ve made the necessary adjustments, ride your bike again on the flat surface to test the brakes once more. If the brakes still aren’t responding satisfactorily, you may need to seek the assistance of a professional mechanic.
Now, if you’re confident in your brakes’ performance on a flat surface, it’s time to test the brakes on a hill.
Test the Brakes on a Hill
Picture yourself flying down a steep hill on your bike, and suddenly realizing that it’s time to test your braking power. Testing your brakes on a hill descent is essential to ensure that they are working correctly. Not only can it save you from a potential accident, but it can also help you identify any brake maintenance that needs to be done.
To test your brakes on a hill, find a hill where you can safely ride down and come to a complete stop. Before you begin your descent, make sure you have control of your speed and position yourself in the appropriate gear. As you start to descend, apply your brakes gently to slow down. Use the chart below to gauge how much pressure you should apply to your brakes based on the steepness of the hill. Once you have come to a complete stop, check to see if your brakes are functioning correctly. If you notice any issues, it’s time to maintain your brakes.
| Hill Steepness | Brake Pressure |
|---|---|
| 0-5% | Light pressure |
| 6-10% | Moderate pressure |
| 11-15% | Firm pressure |
| 16-20% | Heavy pressure |
| 21%+ | Emergency stop |
Maintaining your brakes is crucial to ensure they are functioning correctly. In the next section, we will discuss how to maintain your brakes to keep them in top condition.
Maintain Your Brakes
As a cyclist, it’s essential to keep my brakes in good working condition at all times. Regularly checking my brakes is crucial to ensure they’re functioning correctly.
It’s also important to replace any worn brake parts immediately to avoid any potential safety hazards.
Lastly, keeping my bike clean and lubricated will help extend the life of my brakes and ensure they continue to work effectively.
Regularly Check Your Brakes
Make sure you always check your brakes regularly to ensure they’re working properly and safely. It’s important to maintain your brakes to avoid accidents or malfunctions while riding.
Here are four things to keep in mind when checking your brakes:
-
Look for signs of worn out brake pads. If you notice your brake pads are thinning out or have cracks on them, it’s time to replace them.
-
Check the tension of the brake cables. If they’re too loose or too tight, your brakes won’t work effectively.
-
Inspect the brake calipers for any damage or wear. If you notice any issues, replace them immediately.
-
Test your brakes before every ride. This will give you an idea of how well they’re working and if any adjustments need to be made.
By regularly checking your brakes, you can catch any issues before they become major problems. If you do notice any worn out parts, it’s important to replace them as soon as possible to ensure your safety on the road.
Replace Worn Parts
To keep your bike’s rear brakes functioning properly, it’s important to inspect brake components on a regular basis. If you notice any wear, it’s time to replace worn parts. This will ensure that your brakes operate at their best and help you to avoid any potential issues while riding.
When inspecting components, start by checking the brake pads. Look for signs of wear or damage, such as cracks or uneven wear. If the pads are worn down to less than 1/8 inch, replace them immediately.
Next, check the brake cables for fraying or kinks. If the cables are damaged, replace them as well. Finally, examine the brake calipers for any signs of damage or corrosion. Troubleshooting issues early on can prevent them from escalating into more serious problems down the road.
Keeping your bike clean and lubricated is crucial to maintaining its performance. Regularly cleaning and lubricating your bike will help to prevent any build-up of dirt or debris, which can cause the brakes to malfunction. It’s important to avoid using harsh chemicals or high-pressure water when cleaning your bike, as this can damage the brakes and other components. Instead, use a mild soap and water to gently clean your bike, and be sure to dry it thoroughly afterwards.
With proper maintenance, your bike’s brakes will remain in excellent condition for years to come.
Keep Your Bike Clean and Lubricated
Keeping your bike clean and lubricated is crucial for maintaining its performance and extending its lifespan. As a bike owner, you should know that a clean bike isn’t just aesthetically pleasing, but it also reduces friction between the moving parts.
Dirt and grime can accumulate on the chain, derailleur, and cassette, causing the bike to slow down and work harder. Regular cleaning helps to remove dirt and grime from these parts, reducing friction and improving the bike’s efficiency.
In addition to cleaning, lubrication is also essential for keeping your bike in top condition. Lubrication reduces friction between the moving parts, preventing wear and tear and extending the lifespan of your bike. It also helps to prevent rust and corrosion, which can damage your bike’s metal parts.
Therefore, it’s essential to lubricate the chain, derailleur, and other moving parts regularly. Proper lubrication also ensures that your bike operates smoothly and quietly.
Remember, the benefits of cleaning and lubrication go beyond just improving your bike’s performance; they also save you money in the long run by reducing wear and tear on your bike’s parts.
Frequently Asked Questions
How often should I adjust my rear bicycle brakes?
As a cyclist, it’s important that I regularly maintain my brakes to ensure my safety. Signs to look out for include squeaking, reduced stopping power, and uneven wear. I adjust my rear brakes as needed, typically every few months.
What should I do if my brake pads are worn down and need replacing?
Did you know that worn brake pads increase stopping distance by up to 50%? To replace them, choose a compatible type and follow manufacturer instructions. Regularly check and clean brake pads to extend their lifespan.
Can I adjust my rear brakes if I don’t have the necessary tools?
Adjusting bike brakes without tools is possible with DIY brake adjustment techniques. Use your hands to adjust brake pads and cable tension. Test the brakes before riding. However, having the right tools is recommended for proper adjustments.
How do I know if my brakes are properly adjusted?
When testing if my brakes are properly adjusted, I apply pressure to the lever and check the distance between the pads and rim. Troubleshooting tips include checking cable tension and pad wear.
What should I do if my brakes are still not working after following these steps?
If my brakes are still not working after following the steps, I should troubleshoot by checking for any loose connections or worn brake pads. If the issue persists, seeking professional help would be advisable.
Conclusion
In conclusion, adjusting your rear bicycle brakes may seem daunting, but with the right tools and a bit of patience, it can be easily done. It’s important to gather the necessary tools – a wrench, pliers, and a screwdriver – before beginning the process.
Loosening the brake cable and adjusting the brake pads are crucial steps to ensure your brakes are functioning properly. Once you have adjusted the brakes, it’s important to test them out to make sure they are working as they should.
Taking the time to maintain your brakes regularly will also help them last longer and prevent any potential accidents. Overall, by following these simple steps, you can feel confident in your ability to adjust your rear bicycle brakes and enjoy a safe and smooth ride.