Get ready to embark on a thrilling bike-building journey as we delve into the world of stealth electric fat bikes. This article will guide you through the step-by-step process of constructing your very own powerful and silent two-wheeler.
By following our expert tips and techniques, you’ll learn how to select the right components, assemble the frame, install the electric motor and battery, and personalize your ride.
So, gear up and get ready to experience the ultimate adventure on your self-built stealth electric fat bike.
Key Takeaways
- Determine your budget and goals before starting the build
- Choose the right frame and components based on weight, durability, and compatibility
- Follow proper assembly instructions and safety precautions
- Regularly maintain and care for your bike for optimal performance
Determine Your Budget and Goals
You’ll need to determine your budget and goals before you start building your stealth electric fat bike. Setting realistic expectations is crucial in this process.
Consider the type of terrain you’ll be riding on, the distance you want to cover, and the speed you desire. This will help you select the appropriate design for your electric fat bike.
If you plan on tackling rough off-road trails, a full-suspension design with wide tires would be ideal. On the other hand, if you primarily ride on smooth pavement, a hardtail design with narrower tires might be more suitable.
Additionally, consider the range you need and the power you desire from your electric motor.
With these factors in mind, you can now transition into the subsequent section where we will discuss how to choose the right frame and components for your stealth electric fat bike.
Choose the Right Frame and Components
To ensure the best performance, selecting the appropriate frame and components is crucial when building a stealth electric fat bike. When it comes to choosing the right frame, it is essential to consider factors such as weight, durability, and compatibility with electric components.
Additionally, selecting the perfect handlebar and saddle is important for comfort and control during rides. The handlebar should be ergonomic and easy to grip, while the saddle should provide adequate support and cushioning.
Another crucial aspect is picking the ideal drivetrain and gearing system. This will determine the bike’s ability to handle different terrains and provide the desired level of assistance from the electric motor.
By carefully considering these factors, you can ensure that your bike frame is assembled with the right components for optimal performance and enjoyment.
Moving on to the subsequent section, let’s discuss how to assemble the bike frame.
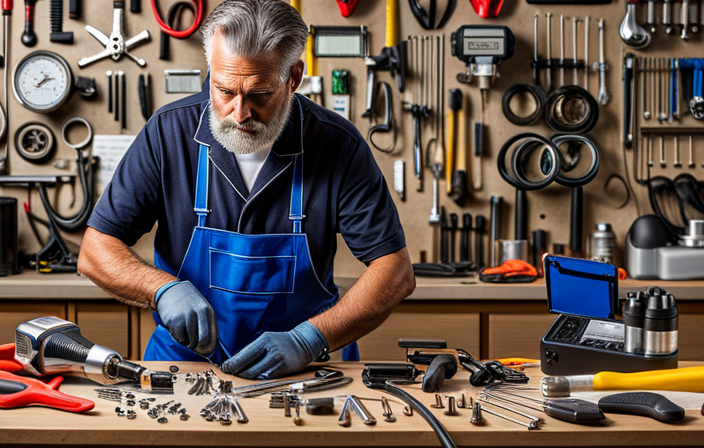
Assemble the Bike Frame
Start by assembling the various components of the bike frame together to create a sturdy and reliable foundation for your ride. To ensure a smooth process, it is crucial to choose the right tools for the job. A set of Allen wrenches, a torque wrench, and a rubber mallet will be essential.
As you begin, it is important to take safety precautions. Wear protective gloves and goggles to prevent any potential injuries. When assembling the bike frame, follow the instructions provided by the manufacturer carefully. Tighten all bolts and screws securely, but be cautious not to overtighten and damage the components.
Once the bike frame is assembled, you can seamlessly transition into the subsequent section about installing the electric motor and battery, further enhancing your stealth electric fat bike.
Install the Electric Motor and Battery
Once the bike frame is assembled, it’s time to install the electric motor and battery for added power and performance. Before starting, ensure that all necessary tools and equipment are readily available.
Begin by carefully mounting the electric motor to the designated area on the frame, ensuring a secure fit.
Next, connect the wiring from the motor to the battery, following the manufacturer’s instructions for proper wiring connections. It is crucial to double-check that the connections are secure and properly insulated to prevent any electrical issues.
Additionally, make sure to check the motor power requirements and adjust the battery accordingly to ensure optimal performance.
Once the motor and battery are installed and wired correctly, you can proceed to the next section about attaching the wheels, tires, and suspension, which will further enhance the bike’s capabilities.
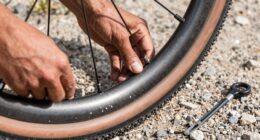
Attach the Wheels, Tires, and Suspension
After mounting the electric motor and battery, the next step is attaching the wheels, tires, and suspension. Installing the suspension system is crucial for a smooth and comfortable ride, especially when tackling rough terrains. Start by positioning the front and rear suspension forks onto the bike frame, ensuring they align properly with the wheel axles. Tighten the bolts securely to hold the suspension forks in place. Next, attach the wheels to the bike frame using the appropriate axle size and fasteners. Once the wheels are securely attached, it’s important to ensure proper tire pressure. Refer to the tire manufacturer’s recommendations and use a tire pressure gauge to achieve the desired pressure. This will optimize performance and prevent any mishaps while riding. After completing these steps, you are ready to connect the brakes and cables, ensuring a fully functional and safe electric fat bike.
Connect the Brakes and Cables
To connect the brakes and cables, you’ll need to ensure they are properly aligned and securely fastened to ensure safe and effective braking.
Start by attaching the brake calipers to the designated mounts on the bike frame. Make sure they are positioned correctly and the bolts are tightened to the recommended torque.
Next, connect the brake cables to the calipers. Begin by threading the cables through the cable housing and securing them to the caliper using the provided hardware.
Adjust the cable tension by turning the barrel adjuster until the brakes engage smoothly when the levers are squeezed. It’s important to find the right balance between too loose and too tight, as both can affect braking performance.
Once the cables are properly connected and tensioned, you can proceed to test and adjust the bike for optimal functionality and performance.
Test and Adjust the Bike
First, make sure to test and adjust the bike to ensure optimal functionality and performance. Start by checking the brakes for responsiveness and adjust them if needed. Test the gears to ensure smooth shifting and make adjustments as necessary. Next, take the bike for a test ride to evaluate its performance. Pay attention to the motor’s power and responsiveness, as well as the battery life. Record the test results and make note of any issues or areas that need improvement. Once the test ride is complete, it’s time to make the necessary bike adjustments based on the test results. This could involve fine-tuning the brakes, adjusting the gear alignment, or tweaking the motor settings. With the bike properly adjusted, you can now move on to the next step of adding accessories and personalizing it to your liking.
Add Accessories and Personalize
Once you have tested and adjusted the bike, you can proceed to add accessories and personalize it to your liking. Here are some accessorizing options and personalization ideas to enhance your stealth electric fat bike:
-
Upgraded Lighting System: Install powerful LED lights to improve visibility during night rides. Consider adding a headlight with different modes for various terrains.
-
Cargo Racks and Bags: Attach cargo racks and bags to carry your gear, groceries, or even a picnic lunch. Opt for waterproof options to protect your belongings in case of rain.
-
Custom Graphics and Decals: Add a personal touch by applying custom graphics and decals to the frame. Choose from a wide range of designs or create your own unique artwork.
Accessorizing your bike not only adds functionality but also lets you express your style. After adding accessories and personalizing your bike, it’s important to perform regular maintenance and care to ensure optimal performance.
Perform Regular Maintenance and Care
Make sure you regularly maintain and care for your bike to keep it in optimal condition. Regular maintenance tips include:
-
Cleaning your bike after each ride to remove dirt and debris that can damage the components. Use a mild soap and water solution to clean the frame, wheels, and other parts.
-
Inspecting the tires for any signs of wear and tear, and replacing them if necessary.
-
Lubricating the chain and other moving parts regularly to prevent rust and ensure smooth operation.
-
Checking the brakes and adjusting them if needed.
To prolong battery life, avoid overcharging and store the battery in a cool and dry place. It’s also recommended to charge the battery after every ride, even if it’s not fully depleted.
By following these maintenance tips, you can enjoy your stealth electric fat bike adventure without any worries about mechanical issues.
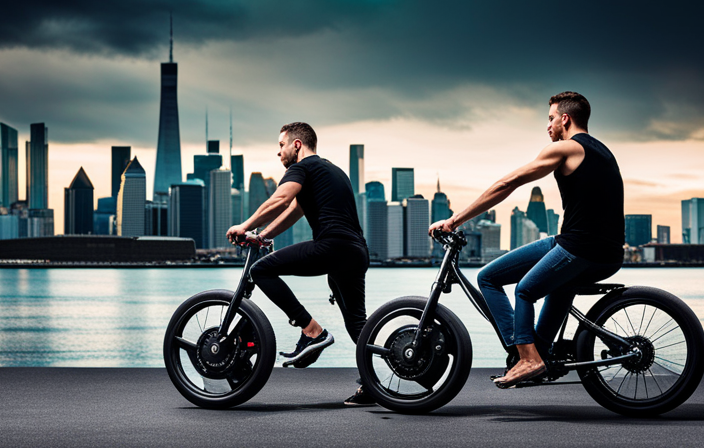
Enjoy Your Stealth Electric Fat Bike Adventure
Now that you have performed regular maintenance and care on your stealth electric fat bike, it’s time to hit the trails and enjoy the thrilling adventures that await you.
One of the many benefits of owning an electric fat bike is the ability to explore new terrains with ease. Whether you prefer cruising along sandy beaches or tackling rugged mountain trails, your electric fat bike will provide you with the power and stability to conquer any adventure.
When it comes to finding the best locations for fat bike adventures, consider areas with wide open spaces, such as national parks or nature reserves. These places offer stunning landscapes and diverse trails that are perfect for exploring on your electric fat bike.
So get out there and let your electric fat bike take you on an unforgettable adventure.
Frequently Asked Questions
How long does it take to assemble a stealth electric fat bike?
Assembling a stealth electric fat bike can take anywhere from 2-4 hours, depending on your familiarity with bikes and tools. To save time, ensure all parts are present, follow the instructions carefully, and refer to troubleshooting tips if needed.
Can I use any type of electric motor and battery for my bike?
Yes, you can use any type of electric motor and battery for your bike. However, it’s crucial to ensure compatibility with the bike’s design and power requirements to achieve optimal performance and prevent damage.
Are there any specific tools required for assembling a stealth electric fat bike?
To assemble a stealth electric fat bike, you’ll need specific tools like a torque wrench, cable cutters, and a bottom bracket tool. Customizing options allow you to personalize your bike, while troubleshooting common issues ensures optimal performance.
How much does a stealth electric fat bike typically weigh?
A stealth electric fat bike typically weighs around 50-60 pounds. Using a lightweight frame for a stealth electric fat bike has its pros and cons. While it improves maneuverability, it may compromise durability and stability. The weight of the bike also affects its performance and range, with lighter bikes generally offering better agility but sacrificing battery life.
Can I convert an existing fat bike into a stealth electric fat bike?
Yes, an existing fat bike can be converted into a stealth electric fat bike. The converting process involves adding an electric motor, battery, and controller. The advantages are increased speed and distance, while the disadvantages include added weight and cost.
Conclusion
Well, folks, that’s all there is to it! Building a stealth electric fat bike is a piece of cake.
Just determine your budget and goals, choose the right frame and components, assemble the bike frame, install the electric motor and battery, attach the wheels, tires, and suspension.
Test and adjust the bike, add accessories and personalize, perform regular maintenance and care, and voila! You’re ready to embark on your thrilling stealth electric fat bike adventure.
Just remember, don’t forget to wear your invisible cape while riding for that extra stealthy effect.
Happy biking!