
As an avid bike rider, I understand the significance of maintaining your bicycle in pristine condition. The brake system, in particular, stands out as a vital element that demands consistent care. Disc brakes, favored by many riders for their exceptional braking capabilities and dependability, are no exception. Nonetheless, to ensure their optimal performance, these mechanical components must be regularly serviced.
In this article, I will guide you through a step-by-step process on how to clean bicycle disc brakes to ensure optimal performance and longevity.
Before we dive into the cleaning process, it’s important to gather all the necessary supplies. You’ll need a clean cloth or rag, brake cleaner, a brush with soft bristles, and a set of Allen keys to remove the wheels. If you don’t have brake cleaner, rubbing alcohol or soapy water can be used as a substitute. It’s also recommended to wear gloves to protect your hands from any chemicals or dirt.
Once you have everything in place, we can begin with the cleaning process. Follow these steps, and your disc brakes will be as good as new.
Key Takeaways
- Regular cleaning is necessary for optimal performance and longevity of disc brakes.
- Necessary supplies for cleaning include clean cloth, brake cleaner, soft-bristled brush, and Allen keys.
- Proper cleaning techniques involve using isopropyl alcohol or specialized brake cleaner, and water should not be used.
- Signs of wear include decreased braking performance, squeaking or grinding noise, and visible wear on brake pad or rotor surface, and regular maintenance can help prevent buildup and maintain brake performance.

Schwinn Sporterra RX Gravel Bike, 700c Mens and Womens Bike, 14-Speed Drop Bar Gravel Bicycle, Mechanical Disc Brakes, Rigid Fork, Aerodynamic Riding Position, Quick Release Seat Post, Adult Bicycle
GRAVEL BICYCLE: Enjoy next level riding with the Sporterra RX by Schwinn. With 700c wheels, this mens and...
As an affiliate, we earn on qualifying purchases.
Gather Your Supplies
Before you start, make sure you’ve got everything you’ll need, so you don’t have to interrupt your cleaning process. Cleaning bicycle disc brakes is a crucial maintenance task all cyclists should be able to do. But, to do it effectively, you’ll need to have the right cleaning techniques and products.
Start by gathering the best cleaning products, such as brake cleaner, rubbing alcohol, and a clean rag. You’ll also need a torque wrench, a hex key set, and a stand to elevate the bike.
With these supplies, you’ll be able to remove the wheels and thoroughly clean the brake calipers and rotors. So, let’s move on to the next step and remove the wheels.

Mongoose Men's Elroy Adventure Bike 700C Wheel Bicycle, Blue, 54cm frame size
Versatile adventure touring bike features capable adventure bike geometry, a sleek alloy frame and steel fork for the...
As an affiliate, we earn on qualifying purchases.
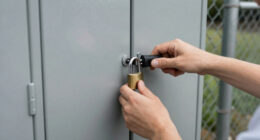
Remove the Wheels
Once you’ve got those wheels off, you’ll be able to tackle the next step with ease – like a well-oiled machine! Now it’s time to focus on wheel removal and hub maintenance. Here are the steps to follow:
-
Flip your bike over so that it rests on its handlebars and seat. This gives you better access to the wheels and makes it easier to remove them.
-
Locate the quick-release lever on each wheel. This lever should be on the opposite side of the disc brake rotor. If you have thru-axles, you’ll need to use a hex wrench to loosen and remove them.
-
Once you’ve released the wheel, gently pull it from the bike frame. Be sure not to damage the rotor or brake caliper as you do this.
-
Inspect the hub for any signs of wear or damage. If you notice any problems, it’s best to take your bike to a professional for repair.
With the wheels removed, it’s time to move on to the next step: cleaning the brake pads and rotors.

SAVADECK Carbon Gravel Bike - T800 Carbon Frame & Fork | Shimano U6000 11-Speed Groupset | Hydraulic Disc Brakes | 700CX40mm All-Terrain Tires | Men & Women Road/Off-Road Bicycle (Gray, 55cm)
【Ultralight T800 Carbon Performance】: Featuring a premium T800 R21 carbon fiber frame and fork weighing just 10.4kg (22.92...
As an affiliate, we earn on qualifying purchases.
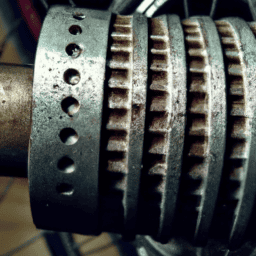
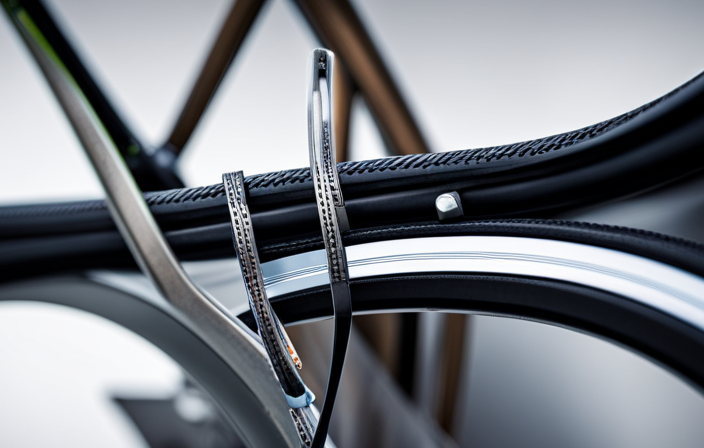
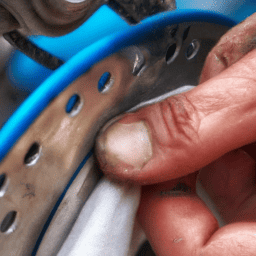
Clean the Brake Pads and Rotors
Now you can give those pesky brake pads and rotors a good scrubbing, so your ride can feel smoother than ever before! Cleaning your brake pads and rotors is essential to ensure optimal performance and safety. To properly clean your brake pads and rotors, you will need to use the appropriate cleaning techniques and tools.
When it comes to cleaning your brake pads and rotors, there are several techniques you can use. One popular method is to use isopropyl alcohol to clean the pads and rotors. Simply apply the alcohol to a clean rag and gently wipe the surface of the pads and rotors. This will help remove any dirt or debris that may have accumulated on them. Another technique is to use a specialized brake cleaner. This can be found at most bike shops and is specifically designed to clean brake components. To use, simply spray the cleaner onto the pads and rotors and wipe clean with a rag. It is important to note that you should never use water to clean your brake components as this can damage them.
To properly clean your brake pads and rotors, you will need the proper tools. This includes a clean rag, isopropyl alcohol or specialized brake cleaner, and possibly a small brush to help remove any stubborn dirt or debris. Once you have gathered your tools, you can begin cleaning your brake pads and rotors using the techniques mentioned above. Once they are clean, you can move on to reassembling your brakes.

AVASTA 700C Road Adult Step-Over Gravel Hybrid Bike Bicycle for Men Woman Male Female,Lightweight Aluminum Alloy Frame with 21-Speed Gearing for City Commuting,Dual Disc Brakes,19 inch Frame,White
🚴♂️【Durable Aluminum Alloy Frame】This lightweight yet strong frame is built to last, offering a perfect balance of durability...
As an affiliate, we earn on qualifying purchases.
Reassemble Your Brakes
Congratulations, you’ve officially completed the most thrilling puzzle of your life – putting your bike back together! Now, it’s time to reassemble your brakes.
Start by inserting the brake pads back into their respective slots and securing them in place with the retaining clip. Next, slide the rotor back into position and tighten the bolts securely. Be sure that the rotor is centered and not rubbing against the brake pads.
To ensure that your brakes are functioning properly, here are some troubleshooting issues to keep in mind:
-
If your brakes feel spongy, it could be a sign that there’s air in the brake lines. To fix this, bleed your brakes.
-
If your brakes are making a rubbing noise, it could be a sign that the rotor is warped or that the brake pads are not properly aligned. Adjust the caliper and rotor as needed.
-
If your brakes are not engaging, it could be a sign that the pads are worn out and need to be replaced. Check the pads and replace if necessary.
-
If your brakes are too tight, it could be a sign that the caliper is misaligned. Adjust the caliper position until the brake is properly aligned.
Now that your brakes are reassembled and ready to go, it’s important to remember to regularly maintain them to ensure optimal performance.
Regular Maintenance Tips
I want to share some regular maintenance tips for keeping your bike’s disc brakes in top condition.
First, it’s important to clean your brakes regularly to prevent buildup and maintain performance. Depending on your riding conditions, you may need to clean them every few weeks or after every ride.
Secondly, make sure to prevent future buildup by avoiding the use of degreasers or lubricants on your brake pads and rotors.
Finally, keep an eye on your brake pads and rotors and replace them when they start to wear down or become damaged.
By following these tips, you’ll be able to keep your bike’s disc brakes working smoothly and safely.
How Often to Clean Your Brakes
You’ll want to clean your brakes regularly to ensure optimal performance and safety while riding. Regular cleaning has many benefits, such as preventing brake squeal, extending the life of your brake pads, and ensuring that your brakes work effectively in all weather conditions. However, the frequency of cleaning depends on several factors, such as the type of riding you do, the weather conditions you ride in, and the terrain you ride on.
If you ride in wet and muddy conditions, you may need to clean your brakes more frequently than if you ride in dry conditions. Similarly, if you ride in hilly or mountainous terrain, you may need to clean your brakes more often than if you ride on flat terrain. Generally, it’s a good idea to clean your brakes every 200-300 miles or every few weeks, depending on your riding conditions.
Keeping your brakes clean will not only improve their performance but also prevent future buildup and damage to your bike. To prevent future buildup, you can try using a protective coating on your brake rotors and pads, avoiding riding in wet and muddy conditions, and regularly inspecting your bike for any signs of wear or damage.
By following these tips, you’ll be able to keep your brakes in top condition and enjoy a safe and enjoyable ride.
Tips for Preventing Future Buildup
To keep your ride smooth and worry-free, it’s important to shield your braking system from harmful elements and check for wear and tear regularly. Preventive measures can help to avoid buildup and keep your brakes functioning at their best. Here are some tips to help prevent future buildup:
- Clean your bike after every ride, especially in wet or muddy conditions.
- Use a rust prevention spray on your brake rotors and other metal components to prevent corrosion.
- Avoid using harsh cleaning chemicals on your brakes, as they can damage the rubber seals and other components.
- Consider upgrading to higher quality brake pads that are designed to resist buildup and last longer.
By following these tips, you can help prevent buildup on your disc brakes and maintain their performance over time. But even with proper maintenance, brake pads and rotors will eventually wear down and need to be replaced.
In the next section, we’ll discuss when to recognize the signs that it’s time to replace your brake pads or rotors.
When to Replace Your Brake Pads or Rotors
Now that we’ve discussed some tips for preventing future buildup on your bicycle disc brakes, it’s important to know when it’s time to replace your brake pads or rotors. Signs of wear can include a decrease in braking performance, a squeaking or grinding noise when you apply the brakes, or visible wear on the brake pad or rotor surface.
When it’s time to replace your brake pads or rotors, it’s important to choose replacements that are compatible with your bike’s specific brake system. There are different types of brake pads, such as organic, metallic, and ceramic, each with their own advantages and disadvantages.
It’s also important to consider the type of riding you will be doing, as certain brake pads may be better suited for different conditions. When replacing your rotors, you should also consider the size and thickness of the rotor to ensure proper compatibility with your brake system.
By choosing the right replacements and regularly checking for signs of wear, you can maintain the performance and safety of your bicycle disc brakes.
Frequently Asked Questions
How often should I clean my bicycle disc brakes?
I clean my bicycle disc brakes every few weeks. The frequency depends on how much I ride and in what conditions. It’s important to keep them clean to ensure optimal performance and prevent wear and tear.
Can I use any type of cleaner to clean my brake pads and rotors?
Choosing the right cleaner for brake pads and rotors is crucial. Comparing effectiveness is necessary for optimal results. Note that not all cleaners are suitable for all types of brakes.
What should I do if my brake pads are worn down and need to be replaced?
When replacing worn brake pads, proper installation is critical. I choose brake pad material based on my riding style and conditions. I ensure the caliper and rotor are clean before installing new pads.
Are there any specific safety precautions I should take when cleaning my disc brakes?
When handling chemicals, it is important to have proper equipment and take necessary safety precautions. This applies to cleaning disc brakes, where one should avoid direct contact with cleaning agents and ensure proper ventilation.
How do I know if my disc brakes need to be adjusted?
To troubleshoot common issues with disc brakes, check for rubbing, uneven wear or noise. To adjust, use the barrel adjuster or align the caliper. Do not overtighten or loosen the bolts.
Conclusion
To conclude, keeping bicycle disc brakes clean is an essential part of proper bike maintenance. Neglecting this task can lead to reduced stopping power, decreased performance, and even potential safety hazards. So, it’s important to regularly gather your supplies and clean your brake pads and rotors.
When it comes to regular maintenance, it’s important to keep an eye on your brake pads and rotors for signs of wear and tear. Additionally, checking and adjusting the brake caliper alignment, keeping the braking system free of debris, and regularly inspecting the brake cables are all crucial for maintaining optimal performance and safety.
Ultimately, taking the time to properly care for your bicycle disc brakes will not only prolong their lifespan but also enhance your riding experience.