As I prepared to go for a bicycle ride, I observed that my brakes seemed somewhat loose. Upon examining the brake cables, it became apparent they were frayed and required replacement.
If you’re experiencing a similar issue with your bike, don’t fret! In this article, I’ll guide you through the process of installing new brake cables on your bicycle.
Installing new brake cables can seem daunting, especially if you’re not familiar with bike mechanics. However, with the right tools and a bit of patience, it can be a relatively straightforward process.
In this guide, I’ll walk you through each step of the process, from gathering the necessary materials to testing the brakes and making any necessary adjustments. So, grab a cup of coffee and let’s get started!
Key Takeaways
- Proper cable tension and lubrication techniques are crucial for effective and safe brakes.
- Choosing appropriate cables and avoiding common adjustment mistakes can prevent problems with the braking system.
- Cutting cables to the wrong length or tightening them too much can cause issues with the brakes.
- Testing brakes in a safe and controlled environment after installation is important to ensure they are functioning properly.
Gather the Necessary Tools and Materials
Before you can begin installing your bicycle brake cables, you’ll need to gather a few essential tools and materials – don’t worry, it won’t take long!
The first step is to choose appropriate cables for your bike. Brake cables come in different sizes and shapes, and you need to ensure that the cables you pick fit your bike. Check your bike’s manual or consult a professional if you’re unsure.
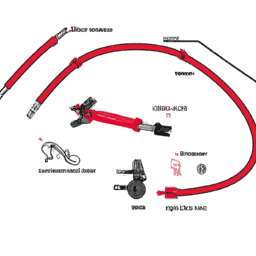
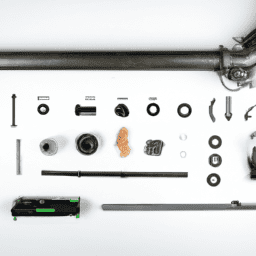
You’ll also need cable cutters, Allen wrenches, and a wrench to loosen the brake calipers. Additionally, grab a pair of pliers, a screwdriver, and a cable lubricant to make the installation process easier.
When you have all the necessary tools and materials, the next step is to identify common cable installation mistakes. One of the most common mistakes people make is not cutting the cable to the right length. If the cable is too long or too short, it can cause problems with your bike’s braking system.
Another mistake is not lubricating the cable before installation, which can cause the cable to become stiff and difficult to use. Finally, make sure you thread the cable through the correct channels and tighten all bolts and screws securely before testing the brakes.
Now that you have your tools and materials and are aware of common mistakes, it’s time to remove the old brake cables.
Remove the Old Brake Cables
First, you’ll want to take a closer look at the brake mechanism to see how the cable is connected and where it needs to be removed. Proper cable tension is important to ensure the brake works effectively, so it’s essential to know how the cable is routed through the mechanism. Additionally, avoiding cable fraying is crucial to prevent the cable from breaking or becoming unusable.
To remove the old brake cable, follow these steps:
-
Use a 5mm Allen wrench to loosen the bolt that secures the cable to the brake mechanism.
-
Pull the cable through the brake lever until it’s free from the housing.
-
Pull the cable out of the housing at the other end, near the brake caliper.
Now that the old brake cable has been removed, it’s time to install the new brake cables.
Install the New Brake Cables
Now that you’ve removed the old brake cables, let’s take a closer look at how the new ones can improve your cycling experience and provide smoother stopping power. Before we begin, it’s important to ensure that the new cables are the correct length and thickness for your bike.
Once you’ve confirmed this, we can proceed with installation. First, thread the new cable through the cable housing and attach it to the brake lever. Next, route the cable through the cable guides and adjust the brake calipers to the correct position.
Now, it’s time to adjust the proper cable tension. You’ll want to tighten the cable enough so that the brakes engage quickly and smoothly, but not so much that they rub against the rim when not in use. Finally, lubrication techniques are important to ensure that the new cables move freely and don’t become stuck or rusted over time. Apply a small amount of lubricant to the cable and housing, and work it in by squeezing the brake lever a few times.
With these steps completed, your new brake cables are now installed and ready to go. As you move on to test the brakes, keep in mind that it’s important to ensure that they are functioning properly before taking your bike out on the road.
With the new cables in place, give the brakes a few gentle squeezes to check for any friction or sticking. If everything feels good, take your bike for a test ride in a safe, controlled environment to make sure that your brakes are stopping you as smoothly and efficiently as possible.
Test the Brakes
To make sure you don’t go flying off your bike like a superhero, it’s crucial to test those brakes and make sure they stop on a dime. Once you’ve installed the new brake cables, it’s important to test them out before hitting the road.
Begin by squeezing the brake levers and observing how the brake pads engage with the rim. If there’s any resistance or if the brake pads don’t engage quickly enough, adjustments may need to be made. One adjustment technique is to adjust the tension on the brake cable. This can be done by turning the barrel adjuster, which is usually located on the brake lever or brake caliper.
Another important step is to ensure that the brake cable is properly lubricated. This’ll help to reduce friction and ensure that the brakes engage smoothly. Once you’ve made any necessary adjustments and lubricated the brake cable, test the brakes again to ensure that they’re working properly.
Make Any Necessary Adjustments
Adjustments may be necessary to ensure that the brakes engage smoothly and effectively, ensuring a safe ride. Some common mistakes that people make when adjusting brake cables include not properly tightening the cable or adjusting it too much, causing the brake pads to rub against the rim even when not engaged.
To avoid these mistakes, follow these adjustment techniques:
-
Loosen the cable fixing bolt and pull the cable taut with pliers, then re-tighten the bolt to secure the cable in place.
-
Use the barrel adjuster to fine-tune the cable tension. Turn it counterclockwise to loosen the cable, and clockwise to tighten it.
-
Check the brake pads’ alignment. They should be parallel to the rim, and the leading edge of the pad should touch the rim first when the brakes are engaged.
By following these adjustment techniques, you can ensure that your brakes are effective and safe to use.
Frequently Asked Questions
How do I determine the correct length of brake cable for my bicycle?
To determine the correct length of brake cable for my bicycle, I use the measuring technique by running the cable from the lever to the brake, leaving some slack and adjusting for cable tensioning. It ensures a smooth and responsive braking experience.
Is it necessary to replace the housing along with the brake cables?
Replacing brake housing depends on its age, condition, and usage. Old housing might fray or corrode, leading to decreased braking performance. It’s best to replace the housing simultaneously with brake cables to ensure optimal braking.
How often should I replace my bicycle brake cables?
I replace my bicycle brake cables every 1-2 years or when I notice signs of wear such as fraying or corrosion. Proper brake cable maintenance includes regularly lubricating the cables and checking for any damage during routine inspections.
Can I reuse the ferrules from the old brake cables on the new ones?
The old ferrules may not be compatible with the new brake cables due to differences in size or shape. It’s best to use new ferrules to ensure proper function and avoid any issues with installation.
How do I identify if my brake cables are compatible with my brake levers?
To determine brake lever compatibility, check for cable diameter variations. Different brake levers may require specific cable diameters, so it’s important to match the cables accordingly for optimal performance and safety.
Conclusion
To conclude, installing bicycle brake cables requires attention to detail and a steady hand. It’s a task that demands precision and patience, as the success of your efforts will depend on how well you follow the steps and handle the tools.
However, once you’ve completed the process, the feeling of accomplishment is akin to reaching the summit of a mountain.
As a cyclist, you know that brakes are a crucial aspect of your safety, and keeping them in top condition is non-negotiable. Installing new brake cables might seem like a daunting task, but with the right guidance and a bit of practice, it can become second nature.
Remember, taking the time to do it right will pay off in the long run, as you’ll have a reliable and responsive braking system that will keep you safe on the road.
So, grab your tools, and get ready to embark on a journey of mechanical mastery.
