In this step-by-step guide, I will walk you through the process of installing an electric bike conversion kit on your rear wheel derailer.
By following these detailed instructions and using the right tools, you’ll be able to transform your regular bike into an electric-powered machine.
From choosing the right conversion kit to attaching the hub motor and battery, I’ll cover all the necessary steps to ensure a successful installation.
Get ready to enjoy the thrill of riding your newly converted electric bike!
Key Takeaways
- Shift the chain onto the smallest rear cog and front chainring before installing the electric bike conversion kit rear wheel derailer.
- Use the barrel adjuster to align the jockey wheel with the smallest rear cog for proper functioning.
- Ensure the rear wheel and derailer are securely attached to prevent any issues during riding.
- Follow the manufacturer’s instructions and consult a professional if you encounter any difficulties during the installation process.
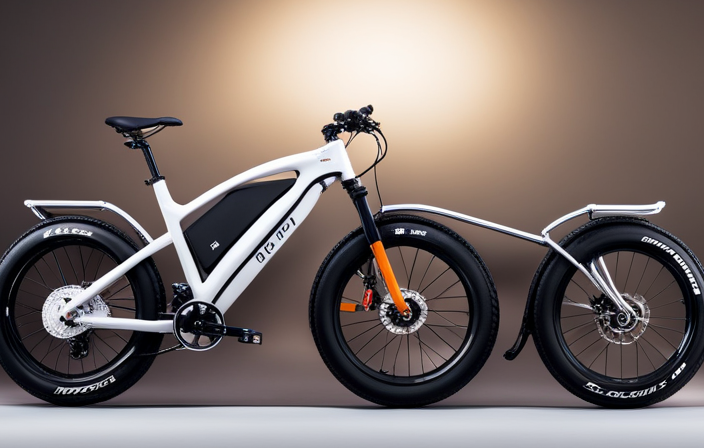
Choosing the Right Electric Bike Conversion Kit
You’ll want to make sure you choose the right electric bike conversion kit for your needs. When it comes to selecting the perfect kit, two important factors to consider are the battery and motor specifications.
First, let’s talk about the battery. It is crucial to choose a battery that suits your riding style and distance requirements. Look for a battery with a higher capacity if you plan on longer rides or if you need more power for uphill climbs. Additionally, consider the weight of the battery as it can affect the overall balance of your bike.
Next, understanding the motor specifications is essential. The motor power and torque rating will determine the performance of your electric bike. Higher power motors provide greater speed and acceleration, while higher torque motors offer better climbing ability. Consider your terrain and riding preferences when selecting the motor specifications.
By carefully considering the battery and motor specifications, you can choose the right electric bike conversion kit that perfectly suits your needs.
Gathering the Necessary Tools and Materials
First, gather all the tools and materials needed for the installation. To begin, you’ll need a set of Allen wrenches, a screwdriver, pliers, and a torque wrench. Additionally, make sure you have a spoke wrench, a chain whip, and a bottom bracket tool.
It’s important to assess the compatibility of the conversion kit with your bike before proceeding. Check the size of your rear wheel and make sure it matches the specifications of the kit. Also, consider the frame and dropout spacing to ensure a proper fit.
Take a close look at the derailer hanger and make sure it is compatible with the kit. Lastly, inspect the chainring and cassette to ensure they are compatible with the electric kit’s motor and derailer.
Gathering the necessary tools and assessing compatibility are crucial steps to ensure a successful installation of the electric bike conversion kit.
Preparing Your Bike for the Conversion
Before beginning the conversion process, it’s important to make sure your bicycle is ready for the transformation. Here are the necessary preparation steps and bike modifications you need to make:
-
Start by removing the rear wheel from your bike using a wrench or quick-release lever. This will allow you to access the derailleur and make the necessary modifications.
-
Next, detach the derailleur from the derailleur hanger using a hex key. This step is crucial as the electric bike conversion kit will come with its own rear wheel derailleur.
-
Once the old derailleur is removed, install the new derailleur provided in the conversion kit onto the derailleur hanger. Make sure it is securely fastened.
-
Check the alignment of the derailleur and adjust if necessary, ensuring that the chain runs smoothly and does not rub against the derailleur.
-
Finally, reattach the rear wheel to your bike and make sure it is properly aligned with the derailleur.
By following these preparation steps and bike modifications, you will ensure a smooth and successful installation of your electric bike conversion kit.
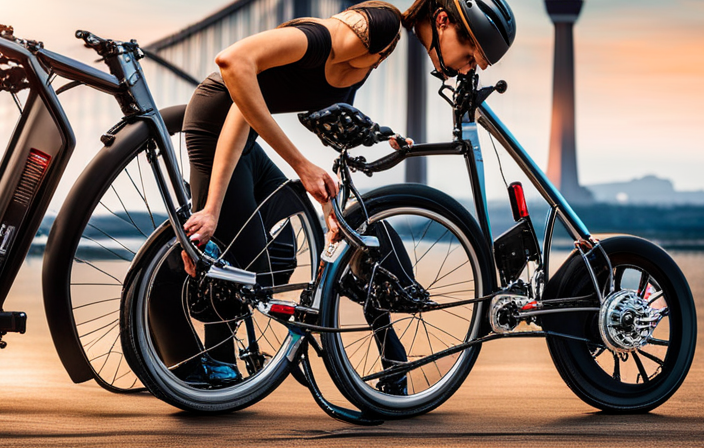
Removing the Rear Wheel and Derailer
To remove the rear wheel and derailleur, you’ll need to detach them using the appropriate tools. Start by shifting the gears to the smallest chainring and the smallest rear cog. This will relieve tension on the derailleur and make it easier to remove. Begin by loosening the quick-release lever on the rear wheel, or if you have a bolt-on axle, use a wrench to loosen and remove the nuts. Once the wheel is loose, lift it off the bike frame. Next, use a 5mm Allen wrench to remove the bolt that attaches the derailleur hanger to the derailleur. Carefully slide the derailleur off the hanger and set it aside. Now you can proceed with installing your electric bike conversion kit onto the rear wheel.
| Step | Action |
|---|---|
| 1 | Shift gears to smallest chainring and rear cog |
| 2 | Loosen quick-release lever or axle nuts |
| 3 | Lift rear wheel off the bike frame |
| 4 | Remove derailleur by loosening bolt and sliding it off the hanger |
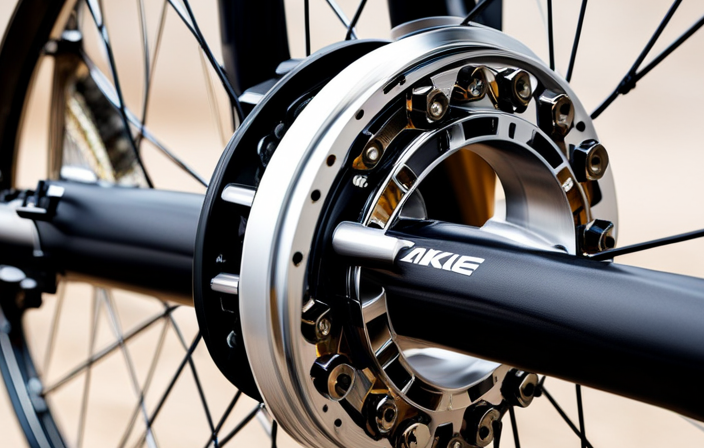
Installing the Electric Hub Motor
Once you have detached the rear wheel and derailleur, it’s time to install the hub motor onto your bike frame.
To begin, locate the motor controller, which is typically included in the electric bike conversion kit. Mount the motor controller securely onto the bike frame, ensuring it is in a position that allows easy access to the wiring connections.
Next, connect the throttle to the motor controller by plugging in the corresponding cables. Make sure the throttle is securely attached to the handlebars for easy access while riding.
Additionally, connect the brake sensors to the motor controller, ensuring that they are properly aligned with the brakes. This will allow the motor to cut off power when the brakes are engaged, enhancing safety.
Once all connections are secure, double-check that everything is properly installed before moving on to the next step.
Connecting the Motor to the Battery
Now that the hub motor is securely mounted on the bike frame, the next step is to connect it to the battery. This step is crucial in ensuring that the electric bike conversion kit operates smoothly and efficiently.
To begin, gather the necessary tools: wire cutters, wire strippers, electrical tape, and a soldering iron. Start by identifying the wiring connections on the motor and battery. The motor will have three wires: one for power, one for ground, and one for the throttle. The battery will also have three corresponding wires.
Carefully strip the ends of the wires, making sure to leave enough length for a secure connection. Next, match the colors of the wires and solder them together. Once the connections are secure, use electrical tape to insulate them. This step is crucial to prevent any short circuits.
Finally, test the connection by turning on the battery and checking if the motor responds. With the motor successfully connected to the battery, you can now enjoy the extended battery range and enhanced riding experience that an electric bike conversion kit provides.
Mounting the Battery and Controller
To mount the battery and controller, you’ll need to find a suitable location on your bike frame that provides easy access and sufficient space. Start by ensuring that the area you choose is free from any obstructions or cables that could interfere with the installation process.
One common mounting technique is to use Velcro straps or zip ties to secure the battery and controller to the frame. Make sure to position them in a way that allows for easy removal and reattachment when necessary.
If you’re facing any issues during the mounting process, here are some troubleshooting tips: double-check that the battery and controller are securely fastened, ensure that all connections are properly plugged in, and verify that the mounting location is sturdy enough to support the weight.
Reattaching the Rear Wheel and Derailer
Attach the rear wheel and derailer back onto your bike frame.
Start by aligning the axle of the rear wheel with the dropouts on the frame.
Slide the axle into the dropout slots, making sure it is fully seated.
Next, tighten the nuts or quick-release lever to secure the wheel in place.
Check that the wheel is centered and straight by spinning it and observing the alignment with the frame.
If needed, adjust the position of the wheel by loosening the nuts or quick-release lever and shifting the wheel slightly.
Once the rear wheel is securely attached, focus on the derailer alignment.
Begin by shifting the chain onto the smallest rear cog and the smallest front chainring.
Then, adjust the derailer by turning the barrel adjuster until the jockey wheel aligns with the smallest rear cog.
Test the shifting by running through the gears to ensure smooth operation.
Testing and Adjusting the Electric Bike Conversion
After reattaching the rear wheel and derailer, it’s time to test and adjust the electric bike conversion. Here are the steps to follow:
-
Start by turning on the electric bike conversion kit and ensuring that the motor is running smoothly.
-
Take the bike for a test ride on a flat surface to check the motor power settings. Adjust the motor power settings according to your preference and riding style.
-
Pay attention to any unusual noises or vibrations during the test ride. If you encounter any issues, stop and troubleshoot before continuing.
-
Check the brakes to ensure they are functioning properly. Adjust the brake pads if necessary to optimize stopping power.
-
Test the gears by shifting through each one while riding. Make any necessary adjustments to ensure smooth and accurate gear changes.
Remember to always follow the manufacturer’s instructions and consult a professional if you encounter any difficulties.
Adjusting the motor power settings and troubleshooting common conversion issues are crucial steps in ensuring a safe and efficient electric bike conversion.
Enjoying Your Newly Converted Electric Bike
Now that your electric bike is ready to ride, it’s time to enjoy the benefits of your newly converted ride. One of the main benefits of electric bike conversion is the added power and speed it provides. With the electric motor assisting your pedaling, you can effortlessly cruise through various terrains and cover longer distances in less time.
Additionally, the conversion kit allows you to customize your ride by choosing the level of assistance and speed that suits your preferences.
To ensure the longevity of your electric bike conversion, it is essential to follow some maintenance tips. Regularly inspect the battery and wiring connections to ensure they are secure and free from any damage. Clean the bike regularly, including the motor and drivetrain, to remove any dirt or debris that may hinder performance. Lubricate the chain and gears to reduce friction and extend their lifespan. Finally, keep an eye on the tire pressure and brake pads, as they are crucial for safety and optimal performance.
By taking care of your newly converted electric bike, you can enjoy the benefits it provides for a long time, while also ensuring a smooth and enjoyable riding experience.
Frequently Asked Questions
How long does it typically take to install an electric bike conversion kit rear wheel derailer?
Typically, it takes me around 2-3 hours to troubleshoot common issues with an electric bike conversion kit rear wheel derailer. To maximize performance, I recommend checking the alignment, adjusting the tension, and lubricating the chain regularly.
Can I install an electric bike conversion kit rear wheel derailer on any type of bike?
Yes, an electric bike conversion kit rear wheel derailer can be installed on most types of bikes. The compatibility of the kit with your bike depends on factors such as frame size and dropout design. Using an electric bike conversion kit offers numerous advantages, including increased speed and range.
Do I need any previous mechanical experience to install an electric bike conversion kit rear wheel derailer?
No, previous mechanical experience is not necessary to install an electric bike conversion kit rear wheel derailleur. The tools needed include wrenches, pliers, and a screwdriver. Common installation mistakes include improper alignment and incorrect cable tension.
Can I still use my bike’s gears with the electric bike conversion kit rear wheel derailer?
Yes, you can still use your bike’s gears with the electric bike conversion kit rear wheel derailer. Using gears with the kit allows for better control, easier pedaling, and efficient power transfer, enhancing your overall riding experience.
Are there any additional maintenance or care instructions for the electric bike conversion kit rear wheel derailer?
Maintenance tips for the electric bike conversion kit rear wheel derailer include regularly cleaning and lubricating the chain, checking for loose bolts or screws, and adjusting the derailer if gears are not shifting properly. Troubleshooting common issues can prevent major problems down the road.
Conclusion
Well, congratulations! You’ve successfully transformed your ordinary bike into a powerful electric machine. Now you can zoom past everyone effortlessly and feel like a superhero on two wheels.
So go ahead, enjoy the thrill of the electric bike conversion you just accomplished. But remember, with great power comes great responsibility, so always ride safely and responsibly.
And hey, maybe now you can even give Lance Armstrong a run for his money! Happy riding!