I understand what you’re thinking – why create a gravel bike when you can simply purchase one?
Well, the answer is simple: creating your own gravel bike allows you to customize it to your exact preferences and save some money in the process.
In this article, I’ll guide you through the step-by-step process of making your own gravel bike. From understanding its purpose to selecting the right components and performing regular maintenance, get ready to embark on an exciting DIY adventure that will result in a bike tailored specifically for your riding needs.
Key Takeaways
- Gravel bikes are designed for off-road adventures and offer stability and control on unpredictable surfaces.
- When gathering tools and materials, it is important to consider the suitable frame, fork, components, wheels, tires, handlebars, stem, and seatpost for optimal performance, comfort, and control.
- When choosing a frame, fork, and components, factors such as material options, durability, weight, functionality, and compatibility should be considered.
- The selection of wheels, tires, and handlebars should take into account the choice between tubeless and tubed tires, tire pressure for different terrains, and the adjustment of handlebars for comfort and control.
Understand the Purpose of a Gravel Bike
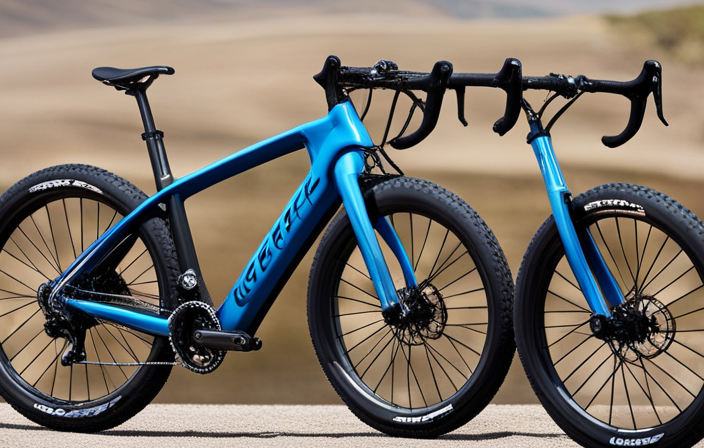
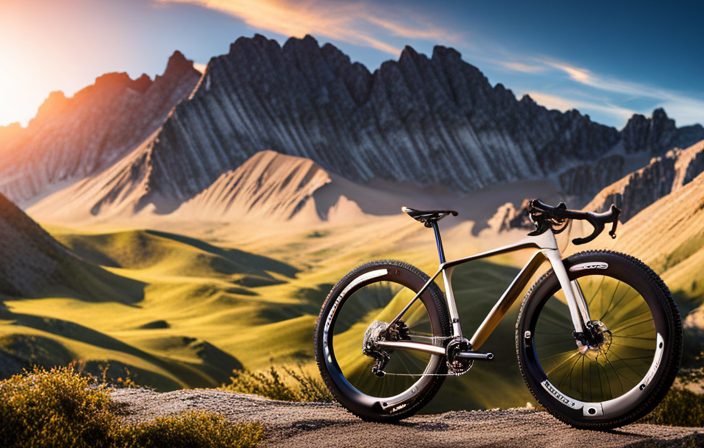
To make a gravel bike, you need to understand why it is designed specifically for off-road adventures. Gravel bikes are versatile machines that offer numerous benefits for riders who enjoy exploring rough terrains. They are built to handle a variety of surfaces, from gravel roads to dirt trails, making them perfect for off-road enthusiasts.
One of the key advantages of riding a gravel bike is its ability to provide stability and control on unpredictable surfaces. The wider tires and lower tire pressure contribute to better traction and shock absorption, allowing riders to navigate through loose gravel or uneven terrain with ease. Furthermore, the relaxed geometry of a gravel bike ensures a comfortable riding position over long distances.
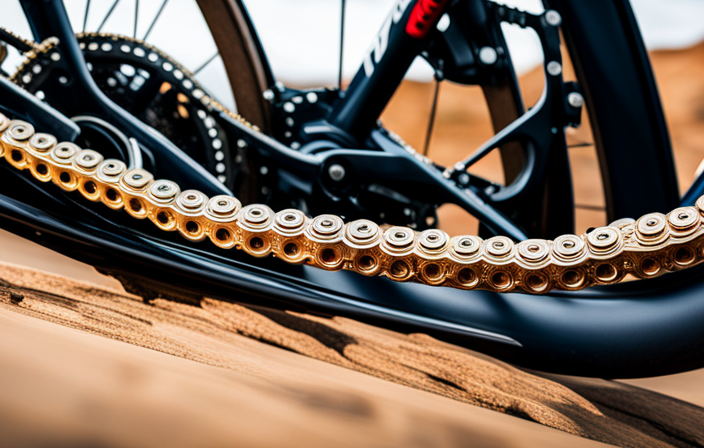
Choosing the right tires for your gravel bike is crucial. Opting for wider tires with knobby treads will provide increased grip and traction on loose surfaces. These tires can withstand the demands of off-road adventures while still offering low rolling resistance on smoother roads.
Now that you understand the purpose of a gravel bike and have knowledge about choosing appropriate tires, let’s move on to gathering the necessary tools and materials for building your own gravel bike.
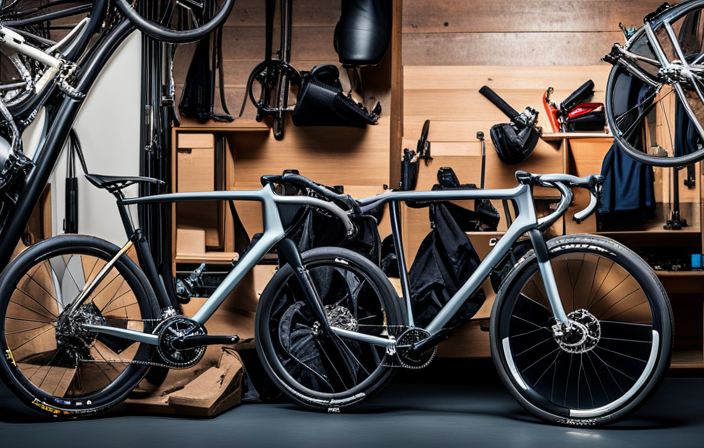
Gather the Necessary Tools and Materials
Before starting to build a gravel bike, it’s important to gather all the necessary tools and materials.
This includes acquiring a suitable frame and fork that can handle the demands of off-road riding.
Additionally, components and groupset, such as gears, brakes, and drivetrain, should be carefully chosen to ensure optimal performance on different terrains.
Lastly, selecting the right wheels and tires for enhanced stability and traction is crucial.
Attention should also be given to handlebars, stem, and seatpost for comfort and control during long rides.
Frame and Fork
The first step in making a gravel bike is choosing a frame and fork. This decision is crucial as it will determine the overall performance and durability of your bike. When selecting a frame, it’s important to choose the right material that suits your riding style and budget. Options include aluminum, steel, carbon fiber, and titanium. Each material has its own advantages in terms of weight, stiffness, and comfort.
Next, compare different fork options available such as rigid forks or suspension forks. Consider factors like terrain you’ll be riding on and personal preference for comfort versus efficiency.
Once you’ve made these decisions, you can move on to the next section about components and groupset seamlessly.
Components and Groupset
Choosing the right components and groupset is essential for optimizing the performance of your gravel bike.
When it comes to components selection, you need to consider factors such as durability, weight, and functionality. Look for high-quality components that can withstand the rough conditions of gravel riding.
Additionally, it’s crucial to ensure compatibility between the groupset and other components on your bike. This includes checking that the crankset matches the bottom bracket type and that the cassette is compatible with your rear derailleur. Proper groupset compatibility ensures smooth shifting and efficient power transfer while riding.
Now, let’s move on to discussing another important aspect of building a gravel bike – wheels and tires – which play a significant role in handling different terrains with ease.
Wheels and Tires
When it comes to optimizing the performance of your ride, you’ll want to consider the right wheels and tires for handling different terrains with ease. The choice between tubeless and tubed tires is an important one. Tubeless tires offer a lower risk of punctures and allow you to run lower tire pressures for increased traction on rough surfaces. On the other hand, tubed tires are more affordable and easier to install.
Next, let’s talk about tire pressure. For gravel riding, a lower tire pressure is generally preferred as it provides better grip on loose surfaces. However, if you’re riding on smoother or paved roads, higher tire pressures will reduce rolling resistance and increase efficiency.
Now that we’ve covered wheels and tires, let’s move on to handlebars, stem, and seatpost.
Handlebars, Stem, and Seatpost
To optimize your ride, it’s important to consider the handlebars, stem, and seatpost.
The handlebars play a crucial role in your bike’s comfort and control. Adjusting their position can greatly affect your riding experience. Start by loosening the bolts on the stem and sliding the handlebars forward or backward to find the most comfortable reach. Once you’ve found the sweet spot, tighten the bolts securely.
Next, let’s talk about choosing the right seatpost height. This is essential for proper leg extension while pedaling and preventing knee strain. Begin by standing over your bike with both feet flat on the ground. Lift one leg up so that it is parallel to the floor and measure from your heel to the top of your saddle. For optimal performance, aim for a slight bend in your knee when your foot is at its lowest point in the pedal stroke.
Now that we have covered handlebars, stem, and seatpost adjustments, let’s move on to choosing the right frame size and geometry to further optimize your gravel bike setup…
Choose the Right Frame Size and Geometry
Start by determining your ideal frame size and geometry for your gravel bike. Choosing the right frame size and geometry is crucial for a comfortable and efficient riding experience. Bike fit plays a significant role in preventing injuries, maximizing power transfer, and enhancing overall performance. When selecting the frame size, consider factors such as your height, inseam length, arm reach, and flexibility. These measurements will help you find the appropriate frame size that provides a balanced riding position.
Additionally, frame geometry affects how the bike handles different terrains. Gravel bikes typically have a more relaxed geometry compared to road bikes, with slacker head tube angles and longer wheelbases for stability on rough surfaces. The stack and reach measurements determine the bike’s vertical and horizontal dimensions respectively, affecting its overall fit.
Once you’ve determined the right frame size and geometry for your gravel bike, it’s time to move on to assembling the frame and fork without compromising any components’ integrity or function.
Assemble the Frame and Fork
Once you have determined the right frame size and geometry, it’s important to assemble the frame and fork correctly to ensure the integrity and functionality of all components. Here are some tips for choosing the right gravel bike frame and assembling the fork and headset:
-
Consider the material: Gravel bike frames can be made from various materials such as aluminum, steel, or carbon fiber. Each material has its own advantages in terms of weight, stiffness, and durability. Choose a frame material that suits your riding style and preferences.
-
Check for compatibility: Ensure that the fork you choose is compatible with your frame’s head tube dimensions. This includes considering factors like steerer tube diameter, axle type (thru-axle or quick-release), and brake mounting options (disc or rim).
-
Properly install the headset: The headset is essential for smooth steering and stability. Follow manufacturer instructions to accurately install the bearings, crown race, spacers, stem cap, and stem. Tighten everything securely but avoid over-tightening.
Choosing the right gravel bike frame sets a solid foundation for your custom build. Once you have assembled the frame and fork properly, you can move on to installing other crucial components like wheels, drivetrain, brakes, etc., which we will cover in detail next.
Install the Components and Groupset
When installing the components and groupset, make sure to ensure proper alignment and secure attachment for optimal performance. Attach the brakes to the frame using the provided mounting points, ensuring they are centered and aligned with the wheel rims.
Next, install the derailleurs onto their respective hangers or braze-ons on the frame, paying attention to the correct positioning and cable routing.
Once everything is securely attached, it’s time to fine-tune the shifting and braking. Start by adjusting the derailleur limits and cable tension for smooth shifting between gears. Use a combination of barrel adjusters and Allen wrenches to make precise adjustments. Test each gear to ensure accurate shifting.
Moving on to braking, adjust the brake pads so that they contact the rim evenly when engaged. Use an Allen wrench to position them correctly and tighten them securely in place.
Now that your components are installed and properly adjusted, you can transition into adjusting your bike for comfort and fit without delay. This step will help optimize your riding experience by ensuring that your bike fits you perfectly so you can ride comfortably for long distances without any discomfort or strain.
Adjust the Bike for Comfort and Fit
To ensure a comfortable ride, it’s important to make adjustments to your bike for optimal fit and comfort. Proper bike fit is crucial to prevent discomfort and injury, especially during long rides. Here are some ergonomic adjustments you can make to customize your gravel bike:
-
Saddle Position: Adjust the height of your saddle so that your legs have a slight bend at the bottom of the pedal stroke. You can also move the saddle forward or backward to find the right position that aligns with your knee over the pedal spindle.
-
Handlebar Height: Experiment with different stem lengths and angles to find a handlebar height that allows you to maintain a relaxed and neutral riding position. This will help reduce strain on your neck, shoulders, and lower back.
-
Reach Adjustment: Fine-tune the reach by adjusting the stem length or using spacers below or above it. The goal is to find a position where you can comfortably grip the handlebars without feeling stretched or cramped.
By making these bike fit adjustments, you can optimize your riding experience on your gravel bike. Once you’ve dialed in the perfect fit, it’s time to move onto testing and tuning your bike for peak performance.
Incorporate these keywords when writing about Current Subtopic: bike fit, ergonomic adjustments
Test and Tune the Bike
When testing and tuning the bike, it is crucial to check the brakes and shifting system to ensure they’re functioning properly. This involves inspecting brake pads for wear, adjusting cable tension if necessary, and ensuring smooth shifting through all gears.
Additionally, aligning the wheels and truing the spokes is essential for optimal performance and stability.
Lastly, inflating the tires to the recommended pressure ensures proper grip, handling, and overall ride quality.
Check the Brakes and Shifting
First, make sure to check the brakes and shifting on your gravel bike. Properly functioning brakes and smooth shifting are essential for a safe and enjoyable riding experience. To ensure optimal performance, start by checking the brake pad wear. Inspect the pads for any signs of excessive wear or damage, such as uneven surfaces or thinning. Replace worn-out pads promptly to maintain good stopping power.
Next, adjust the derailleurs to ensure precise shifting. Start by checking if the derailleur hanger is aligned correctly. If not, use a derailleur alignment tool to straighten it out. Then, follow the manufacturer’s instructions to fine-tune the cable tension and limit screws for both front and rear derailleurs.
By taking these steps to check the brakes and shifting, you’ll be able to ride with confidence knowing that your bike is in top condition. Now let’s move on to aligning the wheels and truing the spokes.
[//]: # (transition: Next, we’ll move on to aligning…)Align the Wheels and True the Spokes
Now, you’ll want to align your wheels and true the spokes for optimal performance.
Proper wheel alignment ensures that your bike tracks straight and handles well on gravel terrain.
Start by checking the alignment of the front wheel. Loosen the axle nuts or quick-release skewer, then slowly tighten them back while making sure the wheel is centered between the fork legs.
Use a ruler or tape measure to check that the distance between each fork leg and rim is equal.
Next, true the spokes by adjusting their tension using a spoke wrench. Spin the wheel slowly and look for any wobbles or hops.
Tighten or loosen individual spokes as needed until the wheel runs true without any noticeable deviation.
With aligned wheels and properly tensioned spokes, your gravel bike will be ready for its next adventure on rough terrains!
Now, let’s move on to inflating the tires to the recommended pressure…
Inflate the Tires to the Recommended Pressure
To ensure optimal performance, it is important to inflate the tires of your gravel bike to the recommended pressure. Tire pressure maintenance is crucial for a smooth and efficient ride on various terrains. The table below provides a guide for the recommended tire pressures based on rider weight and tire size:
| Rider Weight (lbs) | Tire Size (inches) | Recommended Pressure (psi) |
|---|---|---|
| 100-150 | 27.5 | 30-35 |
| 100-150 | 29 | 25-30 |
| 150-200 | 27.5 | 35-40 |
| 150-200 | 29 | 30-35 |
Maintaining proper inflation ensures better traction, control, and reduces the risk of flats or pinch punctures. It also improves efficiency by reducing rolling resistance. Always use a reliable pressure gauge to accurately measure the tire pressure and adjust accordingly. Additionally, check the manufacturer’s recommendations as they may vary depending on specific tire models. Once you have inflated the tires to the recommended pressure, it’s time to add accessories and extras that enhance your gravel biking experience.
Now let’s move on to adding accessories and extras for an enhanced gravel biking experience.
Add Accessories and Extras
You can enhance your gravel bike by adding accessories and extras. There are numerous bike accessories available in the market that can help improve your riding experience and give your bike a personalized touch. Bike customization allows you to tailor your gravel bike according to your needs and preferences.
One of the essential accessories for a gravel bike is a good quality bike computer or GPS device. This will help you track your speed, distance, and navigation while exploring new routes. Additionally, installing fenders on your bike can protect you from mud and water splashes during wet rides. Another useful accessory is a saddlebag, which provides extra storage space for carrying essentials like tools, spare tubes, and snacks.
To increase safety on the road, consider adding front and rear lights to make yourself more visible to other vehicles. Investing in a sturdy lock is also crucial when parking your gravel bike in public areas. Other optional extras include bottle cages for hydration on long rides, handlebar tape or grips for added comfort, and even a bell to alert pedestrians.
Incorporating these accessories will not only enhance the functionality of your gravel bike but also make it more enjoyable to ride. Once you have gathered all the necessary accessories, it’s important to perform regular maintenance on your gravel bike to ensure optimal performance on every ride.
Perform Regular Maintenance
When performing regular maintenance on my gravel bike, I make sure to clean and lubricate the drivetrain. This involves removing any dirt or grime from the chain, cassette, and derailleurs, and then applying a suitable lubricant to ensure smooth operation.
Additionally, I always check and inflate the tires to their recommended pressure to optimize performance and prevent flats.
Lastly, I inspect and tighten all bolts and screws on the bike, including those on the stem, handlebars, seatpost, and pedals, to ensure they are secure and safe for riding.
Clean and Lubricate the Drivetrain
Start by cleaning and lubricating the drivetrain to ensure smooth and efficient performance. Proper cleaning techniques are essential for removing dirt, grime, and debris that can accumulate on the chain, cassette, and derailleur. Use a degreaser to break down stubborn grease and oil, then scrub with a brush or rag. Rinse thoroughly with water and dry completely before moving on to lubrication.
Choosing the right lubricant is crucial for optimal drivetrain function. Look for a bicycle-specific lube that is designed to withstand various weather conditions and provide long-lasting protection against wear. Apply the lubricant generously to each link of the chain, as well as other moving parts of the drivetrain like pulleys and jockey wheels.
With a clean and well-lubricated drivetrain, you’ll experience smoother shifting and increased efficiency on your gravel bike.
Now let’s move on to checking and inflating the tires for an overall improved riding experience.
Check and Inflate the Tires
After ensuring a clean and well-lubricated drivetrain, it is crucial to check and inflate the tires properly. Checking tire condition is essential for optimal performance and safety on gravel roads. Start by examining the tread pattern, looking for any signs of wear or damage that could compromise traction or puncture resistance. Additionally, inspect the sidewalls for cuts, bulges, or cracks that might indicate potential blowouts.
Once satisfied with the tire’s condition, it’s time to focus on tire pressure. Using the correct tire pressure is vital for achieving maximum comfort and efficiency while riding on gravel surfaces. Consult the manufacturer’s guidelines or recommended pressure range stamped on the tire sidewall. Remember that higher pressures offer less rolling resistance but sacrifice some grip and shock absorption.
Now that we have ensured our tires are in top shape with proper inflation, let’s move on to inspecting and tightening bolts and screws without compromising your bike’s integrity.
Inspect and Tighten Bolts and Screws
Before moving on to inspecting and tightening bolts and screws, it’s important to ensure that the tires are in top shape with proper inflation. Once the tires are checked and inflated correctly, it’s time to focus on other crucial components of your gravel bike.
Here are a few key points to consider when inspecting and tightening bolts and screws:
-
Proper torque specifications: It’s essential to use a torque wrench to tighten bolts according to the manufacturer’s recommendations. This ensures that you don’t over-tighten or under-tighten, which can lead to component failure or damage.
-
Importance of regular inspections: Bolts and screws can loosen over time due to vibrations from riding on rough terrain. Regularly inspecting and tightening them helps prevent potential accidents or parts falling off during your rides.
-
Check all critical areas: Pay close attention to areas where bolts secure vital components such as the stem, handlebars, seatpost, crankset, pedals, and derailleur hanger.
-
Use thread-locking compounds if necessary: For certain components prone to loosening, like cleat bolts or saddle clamps, applying a thread-locking compound can provide added security by preventing unwanted movement.
By thoroughly inspecting and properly tightening bolts and screws at regular intervals, you’ll ensure the safety of your gravel bike while enjoying worry-free adventures in various terrains.
Stay Safe and Enjoy Your Gravel Bike
To ensure your safety while riding your gravel bike, always wear a helmet and follow traffic laws. Safety precautions are essential when exploring new terrains with your gravel bike.
One of the most important safety measures is wearing a sturdy helmet that fits properly to protect your head in case of falls or accidents. Additionally, it is crucial to obey all traffic laws when riding on public roads, including signaling turns and stopping at intersections.
When venturing into unfamiliar terrains, it is advisable to ride with a group or inform someone about your route and estimated time of return. This way, if any unforeseen circumstances arise, help can be sent promptly. It’s also important to carry essential items such as a repair kit, extra water, snacks, and a map or GPS device in case you get lost.
Furthermore, being aware of potential hazards on the trail is vital for safe riding. Look out for loose gravel, potholes, rocks, branches, or other obstacles that may cause you to lose control of your bike. Always maintain a safe distance from other riders and give clear signals when passing or slowing down.
By following these safety precautions and staying alert while enjoying your gravel bike rides on new terrains, you can have an exhilarating experience while minimizing risks and ensuring your overall well-being.
Frequently Asked Questions
How do I choose the right saddle for my gravel bike?
When choosing the right saddle for your gravel bike, it’s important to consider the balance between comfort and performance.
To properly measure sit bone width for saddle selection, you can use a measuring device or visit a local bike shop that offers this service.
Comfort should be prioritized to ensure an enjoyable riding experience, while performance considerations may include factors such as weight and aerodynamics.
Finding the right saddle will greatly enhance your overall cycling experience.
What are the best tires for a gravel bike?
When it comes to choosing the best tires for a gravel bike, there are two main options: tubeless and clincher tires. Tubeless tires provide better puncture resistance and lower rolling resistance compared to clincher tires.
As for tire pressure, it varies depending on the gravel conditions. For loose or muddy terrain, lower tire pressure (around 30-40 psi) provides better traction. On hard-packed or smoother surfaces, higher tire pressure (around 45-55 psi) reduces rolling resistance for faster rides.
How often should I replace the chain on my gravel bike?
The chain replacement frequency for a gravel bike depends on usage and maintenance. Generally, it’s recommended to replace the chain every 1,000-2,000 miles or when signs of wear appear. These signs include increased noise while pedaling, difficulty shifting gears smoothly, and visible elongation of the chain.
Regularly cleaning and lubricating the chain can extend its lifespan. Regular inspections and measuring with a chain wear tool can help determine when it’s time for a replacement.
Can I use a mountain bike helmet for gravel biking?
Oh, the eternal debate of what helmet to wear while gravel biking!
While some may argue that a mountain bike helmet is suitable for this daring adventure on uneven terrain, I must advocate for the benefits of using a gravel-specific helmet.
Sure, you could use a road bike helmet, but why not opt for one specifically designed to withstand the rigors of gravel riding?
With enhanced protection and ventilation tailored to off-road conditions, a gravel helmet is the perfect choice for those seeking ultimate safety and comfort in their gravel escapades.
How do I clean and maintain the disc brakes on my gravel bike?
To clean and maintain the disc brakes on my gravel bike, I follow these steps.
First, I remove the wheel and inspect the brake pads for wear or contamination. If needed, I replace or clean them with isopropyl alcohol.
Next, I wipe the rotor with a clean cloth to remove any dirt or debris. I also check for any loose bolts or caliper alignment issues.
Finally, I test the brakes for noise by gently applying pressure and listen for any abnormal sounds.
Conclusion
In conclusion, making your own gravel bike can be a rewarding and fulfilling experience. By understanding the purpose of a gravel bike and gathering the necessary tools and materials, you can create a customized ride that suits your needs.
Choosing the right frame size and geometry is crucial for comfort and performance. Assembling the frame and fork, installing components and groupset, testing and tuning the bike, adding accessories, performing regular maintenance – these are all important steps to ensure a smooth ride.
Did you know that according to recent statistics, the popularity of gravel biking has been steadily increasing? More and more cyclists are discovering the joy of exploring off-road trails on their versatile gravel bikes. So why not join this growing trend by building your own gravel bike?
Not only will it provide endless adventure possibilities, but it will also give you a sense of accomplishment knowing that you created your very own two-wheeled companion.
So go ahead, grab those tools, gather those materials, and start building your dream gravel bike today!