Imagine cruising down the streets on a bike you built from scratch, a powerful electric machine that effortlessly glides through traffic.
In this guide, I’ll walk you through the step-by-step process of creating your very own electric bike. From gathering the tools and materials to fine-tuning its performance, we’ll cover every intricate detail.
Get ready to embark on an exciting journey of DIY engineering, where innovation meets the open road.
Let’s dive in and make your electric bike dreams a reality.
Key Takeaways
- Upgrading the bike’s performance and comfort with a high-quality suspension system
- Adding features for navigation and convenience with GPS navigation designed for electric bikes
- Increasing carrying capacity and functionality with a sturdy rear rack and panniers
- Ensuring safety and compliance with regulations by familiarizing yourself with local traffic laws and wearing appropriate protective gear
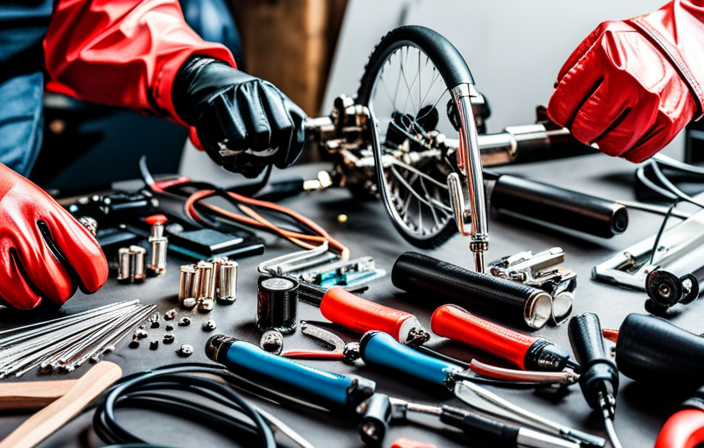
Gather the Necessary Tools and Materials
To make an electric bike from scratch, you’ll need to gather all the necessary tools and materials.
The first step is choosing the right battery. This is crucial as it will determine the overall performance and range of your electric bike. Look for a high-quality lithium-ion battery with a suitable voltage and capacity for your needs.
Next, you’ll need to select the appropriate motor. Consider factors such as power output, efficiency, and compatibility with your chosen battery. Look for a brushless DC motor with a decent power rating to ensure a smooth and efficient ride.
Once you have these essential components, you can transition into the next section about choosing the right bicycle for conversion, where we’ll discuss finding the perfect base for your electric bike project.
Choose the Right Bicycle for Conversion
Selecting the appropriate bicycle is crucial when converting it into an electric one. To ensure a successful conversion, I must carefully consider the following factors:
- Frame: Look for a sturdy bike frame that can support the added weight and vibrations of the electric components.
- Brakes: Opt for high-quality brakes that can handle the increased speed and stopping power of an electric bike.
- Gearing: Choose a bike with a wide range of gears to accommodate the different speeds and terrains you’ll encounter.
- Wheel Size: Consider the wheel size that suits your riding preferences and the type of terrain you’ll be navigating.
When choosing the right bicycle, I must also consider selecting the appropriate motor and battery. These components will determine the power and range of my electric bike. Once I’ve made these important decisions, I can move on to the next step of removing the existing components.
Remove the Existing Components
When removing the existing components, you’ll need to start by disconnecting the wires and cables attached to them. Carefully trace each wire to its source and use a wire cutter to detach it.
Next, remove any screws or bolts holding the component in place. It’s important to keep track of these fasteners as you’ll need them later.
Once all the wires and screws are removed, gently pull the component away from the bike frame. Take your time and be cautious not to damage any surrounding parts.
As you remove the components, take a moment to assess their condition. Some parts may be salvaged and repurposed for your electric bike. For example, the handlebar grips or pedals may still be in good shape and can be reused.
With the existing components removed, it’s time to move on to the next step: installing the electric motor and battery.
Install the Electric Motor and Battery
Now that you’ve removed the existing components, it’s time to install the electric motor and battery.
Choosing the right motor and battery is crucial for the performance and efficiency of your electric bike. Consider factors such as power output, voltage, and weight capacity to ensure compatibility with your bike’s frame and intended use.
Start by mounting the motor onto the frame securely, following the manufacturer’s instructions. Then, connect the motor to the battery using appropriate gauge wires and connectors. Make sure to properly wire the electrical components, ensuring that all connections are tight and secure. This will prevent any electrical issues or malfunctions.
Once the motor and battery are installed, you can move on to the next step: connecting the electrical system seamlessly to complete your electric bike.
Connect the Electrical System
Once the motor and battery are securely installed, it’s time to connect the electrical system to complete your electric bike. This step is crucial for ensuring that all components work together seamlessly to provide optimal performance. Here are some key tasks to consider:
-
Connect the motor controller to the battery: This is the brain of your electric bike and controls the power flow. Make sure the connections are secure and follow the manufacturer’s instructions.
-
Attach the throttle: The throttle allows you to control the speed of your electric bike. Connect it to the motor controller and ensure it functions smoothly.
-
Connect the brake levers: Connecting the brake levers to the motor controller will enable regenerative braking, which helps optimize power efficiency and extends the battery life.
-
Troubleshoot common issues: Check for loose connections, faulty wiring, or any other potential problems that may affect the electrical system’s functionality.
Test the Electric Bike’s Functionality
To test the functionality of your electric bike, you should start by turning on the power and checking if all the components are working properly. Here are some testing techniques and troubleshooting tips to ensure your bike is in top shape:
| Component | Testing Technique |
|---|---|
| Battery | Connect the battery to the bike and check if it powers on. If not, charge or replace the battery. |
| Motor | Engage the motor and observe if it runs smoothly without any unusual noises or vibrations. If not, check the wiring and connections. |
| Controller | Test the controller by operating the throttle and observing if it responds accurately. If not, inspect the wiring and adjust the settings if necessary. |
Make Adjustments and Fine-Tune the Performance
After completing the testing process, you can adjust and fine-tune the performance of your electric bike for an optimal riding experience. Performance optimization is crucial to ensure your bike operates at its best.
To begin, check the tire pressure and ensure it is within the recommended range, as this can affect the bike’s handling and efficiency.
Next, inspect the brakes and make any necessary adjustments to ensure they are responsive and effective. Troubleshooting tips include checking the battery connections and ensuring they are secure, as well as inspecting the wiring for any signs of damage or loose connections.
Additionally, adjusting the pedal-assist settings and throttle sensitivity can enhance the bike’s performance. By carefully fine-tuning these aspects, you can achieve a smooth and efficient ride.
Now, let’s move on to installing additional features and accessories to further customize your electric bike.
Install Additional Features and Accessories
Now that you’ve fine-tuned the performance of your electric bike, it’s time to install additional features and accessories to personalize your riding experience. Here are three essential upgrades to consider:
-
Upgrading the suspension: Enhance your bike’s comfort and handling by investing in a high-quality suspension system. Look for adjustable forks and rear shocks that can handle various terrains and provide optimal performance.
-
Adding a GPS navigation system: Stay on track and explore new routes with a GPS navigation system designed specifically for electric bikes. Look for one that offers turn-by-turn directions, real-time speed and distance tracking, and the ability to connect to your smartphone for additional features.
-
Installing a rear rack and panniers: Increase your bike’s carrying capacity by adding a sturdy rear rack and panniers. These accessories are perfect for transporting groceries, commuting essentials, or even camping gear.
By incorporating these upgrades, you can take your electric bike to the next level of functionality and convenience.
Now, let’s move on to ensuring safety and compliance with regulations.
Ensure Safety and Compliance with Regulations
To ensure your safety and comply with regulations, it’s important to familiarize yourself with the local traffic laws and wear appropriate protective gear while riding your electric bike. Understanding the importance of safety precautions is essential when it comes to enjoying your DIY electric bike.
Before you hit the road, make sure to check the regulations specific to electric bikes in your area. Some places may require registration, licensing, or age restrictions. Additionally, ensure that your bike meets the necessary safety standards, such as having functional brakes, lights, and reflectors.
It’s also crucial to wear a helmet and other protective gear, such as knee and elbow pads. By complying with local regulations and taking necessary safety precautions, you can enjoy your DIY electric bike with peace of mind.
Enjoy Your DIY Electric Bike!
Take a moment to fully embrace the thrill and freedom of riding your homemade electric bike. It’s an exhilarating experience that combines the convenience of a bicycle with the power of an electric motor.
Here are some key benefits and tips to enhance your enjoyment:
-
Benefits of Electric Bikes:
-
Increased speed and efficiency: The electric motor provides an extra boost, allowing you to reach higher speeds with less effort.
-
Eco-friendly transportation: Electric bikes produce zero emissions, making them a sustainable mode of transportation.
-
Popular Electric Bike Conversion Kits:
-
Bafang BBS02B: This conversion kit is known for its power and reliability, offering a seamless integration with your existing bike.
-
Swytch: With its lightweight design and easy installation, the Swytch conversion kit is a popular choice for DIY enthusiasts.
By embracing the benefits of electric bikes and using popular conversion kits, you can enjoy the thrill of riding your DIY electric bike while reducing your carbon footprint.
Frequently Asked Questions
How much does it cost to make an electric bike from scratch?
Making an electric bike from scratch can cost anywhere from $500 to $2000, depending on the quality of components and accessories chosen. Electric bike conversion kits and DIY electric bike tutorials are helpful resources for this project.
Can I use any type of bicycle for conversion?
Can any bicycle be used for conversion? It depends on the bicycle’s compatibility with the motor. Factors such as frame design, wheel size, and brake type should be considered to ensure a successful electric bike conversion.
How long does it take to convert a regular bicycle into an electric bike?
The conversion time to turn a regular bicycle into an electric bike depends on various factors. It typically takes around 2-4 hours, depending on the individual’s experience and familiarity with the necessary tools and components required for the conversion process.
Are there any specific regulations I need to comply with when building an electric bike?
When building an electric bike, it is important to comply with specific regulations and safety precautions. These may vary depending on your location, but commonly include restrictions on speed, power output, and the use of proper safety equipment.
What additional features and accessories can be installed on an electric bike?
When customizing an electric bike, there are numerous accessories to consider. Some top options include a rear rack for carrying items, fenders to protect from splashes, lights for safety, and a comfortable saddle for enhanced riding experience.
Conclusion
In conclusion, creating an electric bike from scratch has been a fulfilling and rewarding experience.
By carefully gathering the necessary tools and materials, selecting the right bicycle for conversion, and meticulously installing the electric motor and battery, I have successfully transformed a regular bike into a powerful electric vehicle.
Connecting the electrical system, making adjustments, and fine-tuning the performance has ensured optimal functionality.
Adding additional features and accessories has enhanced the overall experience.
With safety and compliance in mind, I am now ready to enjoy the fruits of my labor and embark on thrilling rides with my DIY electric bike.