
Taking off a rear sprocket from a bike wheel might appear challenging, however, with the appropriate tools and some knowledge, it turns into a fairly simple task. Whether your goal is to switch out a used sprocket or just to give your bike’s drivetrain a thorough cleaning, getting the rear sprocket removed is an essential part of the procedure.
In this article, I will guide you through the steps of removing a rear sprocket from a bicycle wheel, from gathering the required tools to reassembling the wheel once the sprocket has been removed.
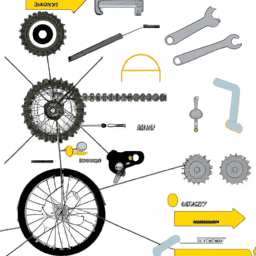
Before we dive into the process of removing the rear sprocket, it’s important to note that this task requires some basic mechanical knowledge and the right tools. You’ll need a chain whip, a cassette lockring tool, and a wrench or adjustable spanner. If you’re unsure of what these tools are or how to use them, it may be best to seek the assistance of a professional bike mechanic.
But if you feel confident in your skills, follow along as I walk you through the steps of removing a rear sprocket from a bicycle wheel.
Key Takeaways
- Proper maintenance of the sprockets is crucial for smooth and efficient performance of the bike.
- The removal of a rear sprocket requires basic mechanical knowledge and specific tools such as a chain whip, cassette lockring tool, wrench or adjustable spanner.
- The cassette should be aligned correctly with the wheel hub, and the retaining ring should be tightened to the manufacturer’s specifications.
- Safety precautions and proper technique are essential when handling bicycle parts, and seeking the assistance of a professional bike mechanic is recommended if unsure of what tools to use or how to use them.
Gather the Required Tools
You’ll need a few tools to get started, like a socket wrench, chain whip, and a pair of pliers. Before you begin, take a look at the type of sprocket your bike has. There are different types of sprockets, each requiring a different removal process. For instance, freewheel sprockets need a different tool than cassette sprockets. It’s important to determine the type of sprocket you have before you start working on it to ensure that you have the right tools.
Proper maintenance of your bike’s sprockets is essential for smooth and efficient performance. Neglecting to maintain them can lead to unnecessary wear and tear, which can cause the chain to slip or even break. By regularly removing, cleaning, and lubricating your sprockets, you can extend their lifespan and save yourself from costly repairs.
With the right tools and proper maintenance, removing a rear sprocket can be a simple task. Now, let’s move on to the next section and learn how to remove the rear wheel.
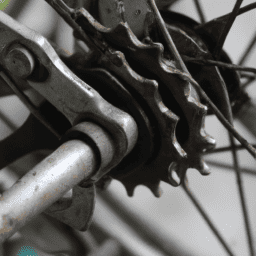
Remove the Rear Wheel
As you get ready to free your trusty steed from its resting place, imagine yourself releasing the anchor that’s been weighing it down. The first step in removing the rear sprocket from your bicycle wheel is to remove the rear wheel itself.
Before beginning, make sure you have the proper tools and safety gear. This will include a wrench, pliers, and gloves.
To remove the rear wheel, first flip the bike over so that it’s resting on the handlebars and seat. Use the wrench to loosen the nuts or quick release lever that secures the wheel to the frame. Once the nuts or lever are loose, gently lift the wheel from the frame. Be sure to keep your fingers clear of the chain and sprocket to avoid injury.
Proper technique and safety precautions are key when handling bicycle parts. So take your time and be mindful of your surroundings.
Once the wheel is removed, the next step is to secure the cassette.
Secure the Cassette
Now that the wheel is safely out of the way, it’s time to ensure the cassette is securely fastened to the hub. This is an important step to ensuring stability and avoiding damage during the removal of the sprocket.
Using a chain whip, hold the cassette in place while using a cassette lockring tool to tighten the lockring. Make sure it’s securely tightened to avoid any movement during the sprocket removal process.
It’s important to note that the cassette lockring is typically tightened in a clockwise direction. Be sure to double-check the direction before tightening to avoid any damage to the cassette or hub.
Once the lockring is securely fastened, you can move on to the next step of removing the sprocket.
Remove the Sprocket
After securing the cassette, it’s time to take off the gear by loosening the bolt with a wrench and giving it a good tug until it pops off like a hot potato. Here are the steps to remove the sprocket from your bicycle wheel:
-
Remove the retaining ring: After taking off the gear, it’s time to remove the retaining ring. This is the small metal piece that holds the sprocket in place. Use a flathead screwdriver to pry it off carefully. Be sure to keep it in a safe place so you don’t lose it.
-
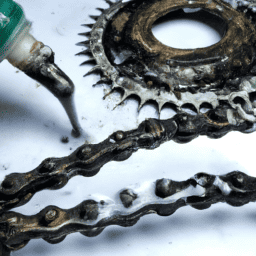
Clean the sprocket: Once the retaining ring is off, you can remove the sprocket from the wheel. Before installing a new sprocket, take some time to clean the old one. Use a degreaser and a brush to scrub away any dirt or grime that has accumulated. This will ensure that your new sprocket runs smoothly and lasts longer.
-
Lubricate the chain: While you’re at it, take a moment to lubricate your chain. This will help it run smoothly and prevent wear and tear. Use a high-quality lubricant and apply it generously to each link. Be sure to wipe off any excess so it doesn’t attract dirt and debris.
Now that you’ve removed the sprocket, it’s time to reassemble the wheel.
Reassemble the Wheel
To put your bike back together, you’ll need to slide the cassette onto the wheel and secure it with the retaining ring. Make sure to align the cassette correctly with the wheel hub to avoid any issues with shifting. Once the cassette is in place, tighten the retaining ring to the manufacturer’s specifications.
Now it’s time to check the wheel alignment and spoke tension. Place the wheel back onto the bike frame and check that it spins smoothly without any wobbles. Adjust the spoke tension as needed to ensure that the wheel is true and balanced. It’s important to get the tension just right to prevent any future issues with the wheel.
Once you’ve checked and adjusted the alignment and spoke tension, your bike is ready to ride again!
Frequently Asked Questions
How do I know when it’s time to replace my rear sprocket?
I can determine if my rear sprocket needs replacement by inspecting for signs of wear, such as teeth that are worn down or bent. Regular maintenance can prolong the lifespan of a sprocket. It’s important to understand the difference between a worn sprocket and a damaged one, as a damaged sprocket can cause chain skipping or slipping.
Can I remove my rear sprocket without removing the cassette?
Did you know that the average lifespan of a rear sprocket is around 2000-3000 miles? Regarding the current question, it’s possible to remove the rear sprocket without removing the cassette, but it depends on cassette compatibility and using alternative tools.
How do I determine the correct size rear sprocket for my bike?
To determine the correct size rear sprocket for my bike, I need to consider various factors affecting sprocket selection, such as my riding style, terrain, and gear range. Additionally, I must measure the rear hub spacing for sprocket compatibility.
Should I replace my chain at the same time as my rear sprocket?
Yes, it’s recommended to replace the chain when replacing the rear sprocket. Chain wear indicators can help determine if it’s necessary. Upgrading both the chain and sprocket together provides better performance and longevity.
Is it possible to remove the rear sprocket without a chain whip tool?
Alternative methods to remove a rear sprocket without a chain whip tool include using pliers or a vise grip. Pros include saving money and time. Cons include potential damage to the sprocket or chain.
Conclusion
Well, that was easy. Removing the rear sprocket from my bicycle wheel was a piece of cake! All I needed were a few tools, some patience, and a little bit of elbow grease.
Who knew that all those hours spent tinkering with my bike would finally pay off? Of course, I couldn’t have done it without the help of this handy guide. Thanks to the step-by-step instructions and detailed illustrations, I was able to remove the sprocket with ease.
It’s amazing how simple things can seem once you have the right tools and knowledge. Now, I can’t wait to get back on the road and put my newly-repaired bike to the test.
But wait a minute…did I just say ‘easy’? Who am I kidding? Removing the rear sprocket was anything but easy. It took me hours of frustration, sweat, and tears (okay, maybe not tears, but you get the idea) to get the job done.
And let’s not forget the countless curse words I muttered under my breath as I struggled to loosen those stubborn bolts.
In all seriousness, removing a rear sprocket is no easy feat. It requires patience, skill, and a lot of determination. But with the right tools and a little bit of guidance, anyone can do it.
So don’t be intimidated by the task at hand. Just roll up your sleeves, grab your wrenches, and get to work. Who knows, you might just surprise yourself.
Related Posts:


Ralf is a devoted husband and father who loves spending time with his family. He enjoys riding his bicycle as much as possible, and takes every opportunity he can to get out on the open road. Ralf is a kind and gentle person who wants only the best for those around him.