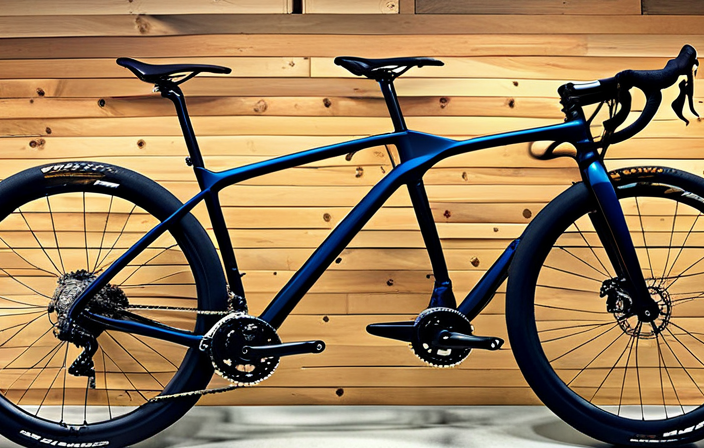
If you’re gearing up for a cross-country move or embarking on a nationwide bike tour, you might be pondering the best way to transport your bicycle from your starting location to your destination. Sending your bike across the nation can be an affordable and practical option, yet it demands careful planning and focus on details to guarantee that your bicycle reaches its destination safely and in excellent shape.
In this article, we’ll guide you through the process of shipping your bike across the country, from choosing the right shipping method to packing and labeling your bike for safe transport.
Whether you’re a seasoned cyclist or a casual rider, our tips and tricks will help you get your bike where it needs to go without any hassle or stress.
So, let’s get started and learn how to ship your bike like a pro!
Key Takeaways
- Properly disassemble and label bike components for safe transport.
- Choose a sturdy and durable box, and use sufficient padding and bubble wrap to cushion the bike.
- Follow manufacturer’s instructions and use proper tools for assembly after shipping.
- Thoroughly inspect the bike for damage upon arrival and take necessary steps for filing a claim if damage is found.
![LISEN Bike Phone Holder, [Super Easy Install] Motorcycle Phone Mount Ebike Accessories Bicycle Handlebar Holder Mount Gifts for Adults Kids Men Mountain Mini Bike Scooter Gear Accessories, Black](https://m.media-amazon.com/images/I/41kyUJisVOL._SL500_.jpg)
LISEN Bike Phone Holder, [Super Easy Install] Motorcycle Phone Mount Ebike Accessories Bicycle Handlebar Holder Mount Gifts for Adults Kids Men Mountain Mini Bike Scooter Gear Accessories, Black
- Secure Phone Hold: Keeps phone stable on rough rides
- Easy Installation: No tools needed, quick setup in seconds
- Shockproof Protection: Silicone wrap absorbs shocks and prevents scratches
As an affiliate, we earn on qualifying purchases.
Choose the Right Shipping Method
Choosing the right shipping method can be tricky, but it’s important to consider your budget and time frame before making a decision. To start, compare costs between different shipping companies and methods.
Some popular options include using a freight service, a bike-specific shipping company, or even a standard courier service. Keep in mind that the costs of shipping will vary depending on the distance traveled and the size and weight of your bike.
In addition to costs, evaluate timing when choosing a shipping method. If you’re on a tight schedule, you may want to opt for a faster shipping option, such as express shipping or air freight. However, if time isn’t a concern, slower and cheaper options, such as ground shipping, may be a better fit for your budget.
Once you’ve decided on the right shipping method for you, it’s time to prepare your bike for shipping.
Prepare Your Bike for Shipping
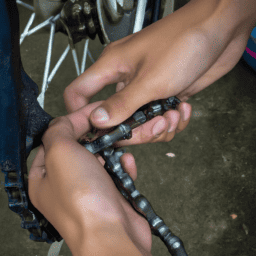
Before you pack up your trusty ride, make sure you’re ready to say goodbye for a while. Inspecting components, removing pedals, disassembling handlebars, seatpost, and wheels are crucial steps to ensure your bike arrives safely at its destination.
To prepare your bike for shipping, start by inspecting the components. Check the chain, brakes, and gears to make sure they’re in good condition. Then, remove the pedals, wrap them separately, and store them in a bag. Disassemble the handlebars, seatpost, and wheels, and wrap them with bubble wrap and packing tape. Finally, label all the parts, so you know where they go when it’s time to reassemble your bike. With these steps done, you’re ready to pack your bike properly and ensure it arrives safely at its destination.
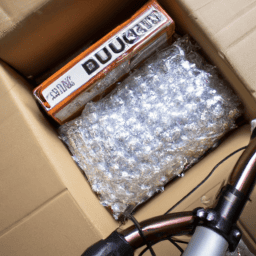
Pack Your Bike Properly
When packing your bike for shipping, there are three key points to keep in mind. Firstly, choose the right box – one that’s sturdy and large enough to fit your bike, with enough room for padding.
Secondly, use plenty of padding and bubble wrap to protect your bike during transit.
Finally, make sure to securely fasten all parts of your bike, including the wheels and handlebars, to prevent any damage during shipping.
By following these steps, you can ensure that your bike arrives safely at its destination.
Choose the Right Box
To find the perfect box for your bike, you’ll want to consider the dimensions carefully. As mentioned earlier, a standard bike box is typically 54’x 8’x 28′.
It’s important to measure your bike and choose a box that is just the right size. You don’t want a box that is too big, as this can lead to your bike shifting around during transit. On the other hand, a box that is too small may not provide enough protection for your bike.
When it comes to materials, you’ll want to choose a sturdy and durable box. Look for a box made of double-walled cardboard or corrugated material. These options provide ample protection for your bike during transit. Avoid using boxes that are too thin or flimsy, as they may not hold up during transport.
Once you have the perfect box, you can move on to the next step – using padding and bubble wrap to keep your bike safe and secure.
Use Padding and Bubble Wrap
Make sure your bike stays safe and secure during transport by using plenty of padding and bubble wrap to cushion it inside the box. Although professional packing services are available, you can also pack your bike yourself with a few DIY tips.
Here are some benefits of professional packing and some tips for DIY packing:
-
Benefits of professional packing:
-
Experienced professionals know how to pack bikes for safe transport.
-
They have access to high-quality packing materials and equipment that you may not have.
-
DIY packing tips:
-
Use soft, lightweight materials like foam tubing, pipe insulation, or old towels to wrap around the frame, wheels, and other parts of the bike.
-
Place bubble wrap or packing peanuts around the bike in the box to prevent it from shifting during transport.
By taking the time to properly pad and wrap your bike, you can help ensure that it arrives at its destination in the same condition it left. Once you’ve cushioned your bike, you can move on to securely fastening it in the box.
Securely Fasten Your Bike
Now that you have properly padded your bike, it’s time to securely fasten it in the box to prevent any damage during transport. To do so, you will need proper tools such as a box cutter, scissors, pliers, and a wrench. Before starting, make sure to take safety precautions by wearing gloves and eye protection to avoid any injuries.
There are two options when it comes to securing your bike: professional bike shop services or DIY methods. If you choose to go to a professional bike shop, they will have the expertise and tools needed to secure your bike properly. However, if you decide to do it yourself, make sure to follow the manufacturer’s instructions for disassembling your bike and securely fastening it in the box. Use the table below as a guide to help you in the process.
| Part | Method |
|---|---|
| Handlebars | Loosen stem bolt and rotate handlebars parallel to the frame. |
| Pedals | Remove pedals with a wrench and place in a plastic bag. |
| Wheels | Remove both wheels and deflate tires slightly. |
| Seatpost | Loosen seatpost clamp and remove the seat and seatpost. |
Now that your bike is securely fastened, it’s time to label it for shipping.
Label Your Bike for Shipping
Labeling your bike is like giving it a passport for its journey across the country. The right label placement and shipping label design can ensure that your bike arrives at its destination safely.
When labeling your bike, make sure to place the label on a visible and secure location, such as the frame or the seat post. This will prevent the label from falling off during transit and make it easier for the shipping carrier to identify your bike.
When designing your shipping label, include important information such as your name, address, and phone number, as well as the recipient’s information. You can also add additional details about your bike, such as the make and model, to help the shipping carrier handle it with care.
Additionally, make sure to include any special handling instructions, such as ‘fragile’ or ‘do not lay flat,’ to ensure that your bike is handled properly during transit.
With your bike securely labeled and ready for shipping, the next step is to receive and unpack your bike at its destination.
Receive and Unpack Your Bike
Once your bike has arrived at its destination, it’s time to eagerly anticipate the thrill of unpacking and assembling it. However, before you dive right into the process, inspect your bike for any damage that may have occurred during shipping. Look out for any scratches, dents, or broken parts that may have been caused by rough handling or improper packing. If you do find any damage, take photos and notify the shipping company immediately to file a claim.
Assuming your bike has arrived in pristine condition, it’s now time to assemble it after shipping. First, gather all the necessary tools and equipment, including a bike stand, wrenches, screwdrivers, and lubricants. Then, carefully unpack each component and lay them out in an organized manner.
Start by attaching the handlebars, followed by the wheels, pedals, and seat. Be sure to follow the manufacturer’s instructions and pay attention to details such as torque settings and alignment. Once you’ve completed the assembly, give the bike a thorough inspection to ensure that everything is properly secured and functioning.
With your bike now fully assembled, you can finally get back on the road and enjoy your ride!
Frequently Asked Questions
Can I ship my bike internationally?
Yes, you can ship your bike internationally, but you must comply with shipping regulations and pay customs fees. Be sure to research the specific requirements of your destination country and choose a reliable shipping company to ensure a smooth process.
What is the average cost of shipping a bike across country?
When shipping a bike across the country, costs vary depending on shipping options and packaging requirements. You’ll need to ensure your bike is properly packaged to avoid damage during transit. Expect to pay around $50 to $150 for shipping.
Is it necessary to disassemble my bike before shipping?
To ensure safe shipping, it’s recommended to disassemble your bike. Pros include less chance of damage and easier packing. Cons include extra time and effort. Properly packing a disassembled bike involves wrapping each part individually and securing them in a box.
How do I insure my bike during shipping?
To insure your bike during shipping, you may want to consider purchasing bike insurance coverage from your shipping company or a third-party insurer. Check with your shipping company for recommendations on insurance options that best suit your needs.
Can I track my bike’s shipment progress?
Tracking your bike’s shipment progress is possible when using a bike shipping service. Benefit from the peace of mind that comes with knowing where your bike is during transit. Properly package your bike to avoid damage.
Conclusion
Congratulations! You’ve successfully shipped your bike across the country. It may have been a nerve-wracking experience, but you did it!
You carefully chose the right shipping method, prepared and packed your bike with precision, and labeled it clearly for shipping. You were able to receive and unpack your bike without any issues.
As you reflect on this experience, you may feel a sense of pride and accomplishment. You conquered the challenge of shipping your beloved bike thousands of miles away. You faced the unknown and emerged victorious. This experience may have even pushed you to step out of your comfort zone and take on new adventures.
Remember, the journey is not just about the destination. It’s about the experiences and lessons learned along the way. You may have encountered obstacles, but you overcame them with determination and persistence.
Keep this mindset as you tackle future challenges. You’ve proven to yourself that you can do anything you set your mind to. So go ahead, take on the world, and keep pedaling forward.