If you’re aiming to refresh the appearance of your bike, starting with the frame by giving it a new paint job is a fantastic option. You have the chance to select a shade that truly represents your individual style, and a new layer of paint can also safeguard your bicycle against corrosion and additional damage.
Repainting a bicycle frame may seem like a daunting task, but with the right supplies and a bit of patience, it’s a project that anyone can tackle.
Before you get started, it’s important to gather all of your supplies. You’ll need sandpaper, paint stripper, a primer, a paint of your choice, and clear coat. You’ll also need a workspace that’s well-ventilated and free of any debris that could get stuck in the paint.
Once you have everything you need, it’s time to get to work. In the following sections, we’ll guide you through the process of removing the old paint, applying the new paint, and adding finishing touches to your newly painted frame.
Key Takeaways
- The necessary supplies for repainting a bicycle frame include sandpaper, paint stripper, primer, paint, and clear coat.
- Properly removing old paint through sanding or stripping chemicals and cleaning the surface is crucial before applying new paint.
- When applying new paint, it is recommended to use thin, even coats through spray or brush techniques.
- Finishing touches such as choosing complementary colors, adding finishes like clear coat or matte, and adding decals or pinstripes can enhance the overall look of the repainted bicycle frame.

WEIZE Road Bike, 700C Wheel City Commuter Bicycle, 14 Speed Drop Bar, Racing Adult Bike with Caliper Brakes, High-Carbon Steel Hybrid Bikes, Urban Adult Bicycle for Men and Women,Black
Caliper brake system: The road bike adopts a dual caliper brake design, which is lighter in overall weight...
As an affiliate, we earn on qualifying purchases.
Gather Your Supplies
Now, you’ll need to gather all your supplies before starting the repainting process. Begin by selecting your desired color options and purchase the appropriate spray paint from a local hardware or bike shop. You’ll also need a bike stand or a workbench to hold the bike frame in place during the painting process.
Aside from the spray paint, you’ll need to purchase sandpaper, masking tape, cleaning solutions, and gloves. If you already have these items on hand, then the cost estimation for repainting a bicycle frame will be significantly lower.
Once you have all the necessary supplies, you can move on to removing the old paint.

YITAHOME 700C Road Bike, 21 Speed Commuter Bicycle for Men Women, Lightweight Aluminum Frame Racing Bike, Adult Bicycle with Dual Disc Brake
All-Terrain 700 x 28C Wheels: Go further with less energy thanks to the road bike's large wheels; Enjoy...
As an affiliate, we earn on qualifying purchases.
Remove the Old Paint
Now that you’ve gathered your supplies, it’s time to remove the old paint from your bicycle frame. There are several techniques you can use to achieve this.
You can use sanding, which involves using a rough grit sandpaper to manually remove the paint. Alternatively, you can use stripping chemicals, which can dissolve the paint for easier removal.
Once the paint is removed, it’s important to thoroughly clean the surface to ensure a smooth and even coat of new paint.
Sanding Techniques
Using a fine-grit sandpaper, you’ll want to gently sand the entire surface of the bicycle frame to ensure a smooth and even base for the new coat of paint.
Start by using a sandpaper grit of 220 to remove any remaining paint or rough spots on the frame.
Then, move on to a sandpaper grit of 320 to create a smoother surface.
Finally, finish off with a sandpaper grit of 400 to produce a polished finish.
To make the sanding process more efficient, use a sanding block to evenly distribute the pressure across the frame.
This’ll prevent any uneven spots or scratches from forming on the surface.
When sanding, make sure to pay extra attention to the hard-to-reach areas such as the bottom bracket, dropouts, and fork crown.
These areas are often overlooked but can greatly affect the overall appearance of the finished product.
Once you’ve completed the sanding process, it’s time to move on to the next step of applying the stripping chemicals.
This’ll remove any remaining paint or residue that was missed during the sanding process.
Stripping Chemicals
You’ll want to apply the stripping chemicals to the surface of your bike to dissolve any remaining residue, revealing a clean and smooth base for your new coat of paint. But before you do, it’s important to prioritize chemical safety.
Make sure to wear protective gloves and goggles to avoid any contact with the chemicals, and work in a well-ventilated area to prevent inhaling any fumes.
Once you have taken the necessary safety precautions, apply the stripping chemicals to the surface of your bike. Be sure to follow the instructions on the label and apply the chemicals evenly to ensure that all of the old paint and residue is removed.
After allowing the chemicals to sit for the recommended time, use a scraper or steel wool to remove any remaining residue. Now that your bike’s surface has been stripped and properly prepared, it’s time to move on to cleaning the surface.
Cleaning the Surface
Funny thing is, even though you’ve just stripped your bike with all those chemicals, it’s not actually clean yet. Surface preparation is key to a successful paint job. Here are some steps to follow:
- Use a degreaser to remove any oil or grime on the surface.
- Sand the frame with a fine-grit sandpaper to create a rough surface for the new paint to adhere to.
- Use a rust remover if there are any areas of rust on the frame.
- Wipe the frame down with a clean cloth to remove any dust or debris from sanding.
- Use a tack cloth to ensure the surface is completely clean.
Once your frame is prepped and ready to go, it’s time to apply the new paint.

Schwinn Phocus 1400 Road Bike, 700c Bike for Men and Women, 14-Speed Drop Bar Road Bicycle, Lightweight Aluminum Frame, RigidFork, Caliper Brakes, Aerodynamic Riding Position, Bikes for Adults
ROAD BICYCLE: Max out your mileage with the Phocus by Schwinn. With 700c wheels, this road bike for...
As an affiliate, we earn on qualifying purchases.
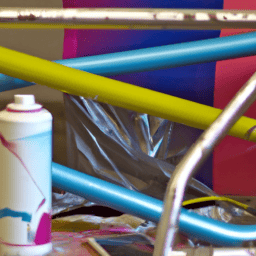
Apply the New Paint
Now it’s time to get your hands dirty and start applying the fresh coat of paint to your bicycle frame. Before you begin, make sure you have all the necessary tools such as sandpaper, masking tape, primer, and your chosen paint colors.
You also need to decide whether you will be using spray or brush techniques to apply the paint. If you opt for spray painting, make sure to do it in a well-ventilated area and wear a respirator to avoid inhaling the fumes. Apply thin, even coats of paint, allowing each coat to dry completely before applying the next one.
On the other hand, if you choose to use a brush, make sure to use high-quality paintbrushes to avoid streaks and brush marks. Apply a thin coat of primer to the frame before painting it with your desired color.
Now that you have applied the new paint to your bicycle frame, it’s time to add finishing touches to make it look even more polished and professional.

INSDRGN 14" Folding Electric Bike for Adults, Peak 1500W Motor,20MPH Max Speed,48V 16Ah Removable Battery Electric Bike, 35/62Miles Max Range, UL 2849 Certified E Bike
🔋48V 16Ah Removable Battery: This adult electric bicycle features a high-capacity 48V 16AH removable lithium battery. Charging takes...
As an affiliate, we earn on qualifying purchases.
Add Finishing Touches
As you put the final touches on your masterpiece, the small details will symbolize your dedication and attention to detail.
Choosing colors that complement your bike’s style and personality is crucial. You can either stick to the original color scheme or experiment with something new. It’s best to use a high-quality paint that’s designed for bicycles and can withstand the elements.
Next, consider the types of finishes you can use to add a glossy or matte effect to your paint job. A clear coat will protect the paint from chipping and fading, while a matte finish will give your bike a more unique look.
Additionally, adding decals or pinstripes can enhance the overall appearance of your bike and make it stand out even more. Finally, inspect your bike thoroughly to ensure that all areas are covered with an even coat of paint.
When you’re satisfied with your work, it’s time to reassemble your bike and hit the road.
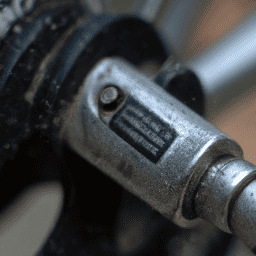
Reassemble Your Bike
To put your beloved bike back together, you’ll need to grab your tools and get ready to feel a sense of accomplishment as you bring your creation to life.
Start by reattaching the handlebars to the front fork, making sure they’re straight and securely tightened.
Next, install the wheels back onto the frame, ensuring they’re properly aligned and that the quick-release skewers or nuts are tightened to the correct torque.
Once the wheels are in place, reattach the brake calipers and adjust the brake pads to the correct position. Don’t forget to check the brake cable tension and adjust if necessary.
Now it’s time to tighten all of the bolts and screws on the frame, including the stem, seat post, and pedals. Double check that everything is tightened to the correct torque specs and that all components are properly aligned.
With a few final adjustments, your bike should be ready to ride!
Frequently Asked Questions
How long does the repainted bicycle frame need to dry before it can be ridden?
Did you know that a freshly painted bicycle frame takes an average of 24-48 hours to completely dry? Before riding, ensure all safety precautions have been taken, and check for any remaining wet spots.
Can I use regular spray paint for repainting my bicycle frame?
Yes, you can use regular spray paint for repainting your bicycle frame. However, proper surface preparation techniques must be followed to ensure good adhesion. Allow the paint to dry completely before handling or riding the bike.
Is it necessary to remove all the old paint before applying the new paint?
When repainting a bicycle frame, removing paint partially is acceptable as long as the surface is clean and smooth. Sandblasting options can be used for a more complete removal of the old paint.
Can I repaint a carbon fiber bicycle frame?
Yes, you can repaint a carbon fiber bicycle frame, but it requires expertise in carbon fiber repair and knowledge of paint compatibility with the frame material. It’s recommended to seek professional repainting services for the best results.
What should I do if the new paint starts to chip or peel off?
If your new paint chips or peels, it’s like a knife to the heart. But fear not, touch up options exist. Prevention is key, so ensure proper prep and application. Use clear coat for added protection.
Conclusion
Congratulations! You’ve successfully repainted your bicycle frame, becoming an expert in the art of bike restoration. You can now add ‘bike painter’ to your list of skills alongside ‘professional napper’ and ‘excellent procrastinator.’
As you take a step back and admire your handiwork, don’t be surprised if your neighbors start knocking on your door asking for a custom paint job on their own ride. After all, who wouldn’t want their bike to look like a shining beacon of beauty and sophistication, just like yours?
So go ahead, take a victory lap on your newly painted bike. And when you inevitably crash because you were too busy admiring your own work, don’t worry – you now have the skills to fix it up again in no time. Happy biking!