
Picture yourself on a dusty trail, ready to kickstart your dirt bike and hit the open road. But what if I told you there’s an easier way? With the electric start system, starting your dirt bike becomes a breeze.
In this article, I’ll guide you through the steps to effectively use the electric start on your dirt bike. From understanding the system to troubleshooting common issues, you’ll be confident and ready to rev that engine in no time.
Let’s get started!
Key Takeaways
- Troubleshoot the electric start system by checking the battery charge and inspecting wiring connections.
- Start the engine by paying attention to the engine sound, a smooth and consistent start indicates a healthy engine.
- Release the clutch lever gradually using the feathering technique for better acceleration and maneuverability.
- Adjust the choke if necessary by engaging it in cold weather and disengaging it in warm weather for optimal fuel delivery.

Under Armour Squeeze Water Bottles, 32 oz Water Bottles, Sideline Sports Water Bottle with Quick-Shot Lid, Quick & Easy Hydration, Gym Water Bottles, Squeeze Bottle, 1 32oz Bottle
- Easy Hydration: Quick-shot lid and one-way valve
- On-the-Go Use: One-hand operation for active hydration
- Measurement Markings: Ounces and milliliters for tracking
As an affiliate, we earn on qualifying purchases.
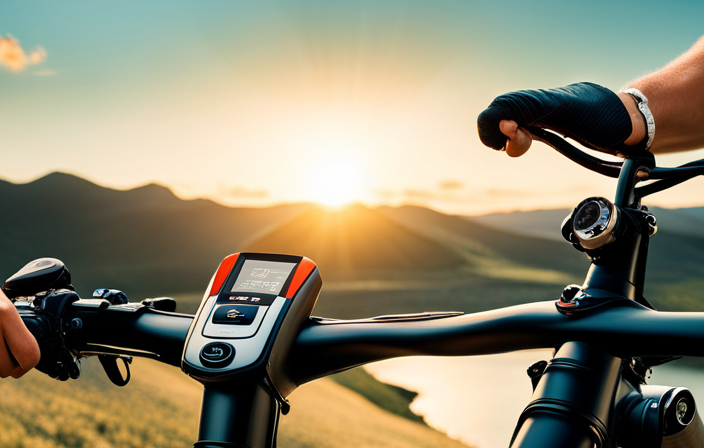
Understanding the Electric Start System
To understand how the electric start system on your dirt bike works, you’ll need to familiarize yourself with its components. The main parts of the system include the battery, starter motor, solenoid, and ignition switch.
The battery provides the electrical power needed to start the engine. If you encounter any issues with the electric start system, there are a few troubleshooting steps you can take.
First, check the battery connections to ensure they are secure and free from corrosion. Next, inspect the starter motor and solenoid for any signs of damage or wear.
Regular maintenance is crucial for keeping the electric start system in good working condition. Make sure to clean the battery terminals regularly and keep them free from dirt and grime. Additionally, it’s important to periodically check the battery’s charge to ensure it has enough power to start the engine.
Checking the Battery and Charging
Make sure you check the battery and charge it before attempting to use the electric start on your dirt bike. Proper battery maintenance is crucial for the smooth functioning of the electric start system.
Here are some troubleshooting techniques to ensure your battery is in optimal condition:
-
Inspect the battery for any signs of damage, such as leaks or corrosion.
-
Measure the voltage using a multimeter to verify if it is within the recommended range.
-
If the battery is low on charge, connect it to a suitable charger and let it charge fully.
By following these steps, you can identify any potential issues with the battery and take appropriate action.
Once the battery is checked and charged, you can move on to properly positioning the bike for a successful electric start.
Properly Positioning the Bike
Position yourself behind the bike, ensuring that your feet are firmly planted on the ground and your body is balanced. Proper bike positioning and correct body posture are crucial for a safe and comfortable ride. To achieve this, follow these steps:
| Proper Bike Positioning | Correct Body Posture |
|---|---|
| Align the bike’s handlebars with your body | Keep your back straight and shoulders relaxed |
| Sit on the bike with your knees bent and feet on the foot pegs | Position your elbows slightly bent and close to your sides |
| Hold the handlebars with a firm grip, but avoid excessive tension | Keep your head up, looking forward |
| Distribute your weight evenly on the bike | Engage your core muscles for stability |
Engaging the Ignition Switch
Once you’ve found the ignition switch, simply turn it on to start your ride. Engaging the ignition switch is a crucial step in getting your dirt bike up and running. Here’s how to do it:
- Locate the ignition switch: It is usually located near the handlebars or on the side of the bike.
- Insert the key: If your dirt bike has a key-operated ignition switch, insert the key into the switch.
- Turn the key: Rotate the key clockwise to engage the ignition switch and activate the electrical system.
Troubleshooting ignition problems can be frustrating, but there are a few things you can check if your bike doesn’t start. Ensure the battery is charged and properly connected, check the spark plug for any signs of damage or wear, and inspect the wiring for any loose connections.
Now that your ignition switch is engaged, let’s move on to activating the kill switch for safety purposes.
Activating the Kill Switch
Activating the kill switch is a simple step to ensure safety while riding. The kill switch is a vital component of a dirt bike, as it allows the rider to quickly shut off the engine in case of an emergency or any potential issues.
Troubleshooting the kill switch is crucial to ensure that it is functioning properly. To troubleshoot, you can check the wiring connections, inspect the switch for any damage or debris, and test the switch using a multimeter. It is important to regularly inspect and maintain the kill switch to prevent any accidents or malfunctions.
By utilizing the kill switch, riders can quickly and easily shut off the engine, preventing any further damage or harm.
Now, let’s move on to ensuring the bike is in neutral before starting it.
Ensuring the Bike is in Neutral
To make sure you don’t accidentally start the engine, check if the gear lever is in the neutral position. This is an important step in troubleshooting starting problems on a dirt bike.
Checking the gear position ensures that the bike is not in gear, which could cause the engine to engage and lurch forward when starting. To check if the bike is in neutral, simply tap the gear lever up or down until it is in the middle position. You should see an indicator on the bike’s dashboard confirming that it is in neutral.
Once you have confirmed that the bike is in neutral, you can proceed to the next step of holding the clutch lever. By holding the clutch lever, you disengage the transmission, allowing for a smooth and controlled start.
Holding the Clutch Lever
Make sure you’re holding the clutch lever to disengage the transmission and ensure a smooth start. Proper clutch technique is crucial for successfully starting a dirt bike with an electric start. Here are the benefits of using the clutch lever:
-
Improved control: By holding the clutch lever, you have better control over the bike’s power delivery, allowing for a more controlled and gradual start.
-
Reduced strain on the engine: Engaging the clutch lever reduces the load on the engine, preventing any sudden jerks or stalls, which can potentially damage the bike.
-
Enhanced safety: Holding the clutch lever enables you to quickly disengage the transmission, providing a safety buffer in case of any unexpected situations or emergencies.
-
Smooth gear engagement: Using the clutch lever helps in smoothly shifting gears, making your ride more enjoyable and seamless.
Now, with the clutch lever engaged, we can move on to the next step of pressing the electric start button.
Pressing the Electric Start Button
Press the button with your thumb to initiate the electric start system on your dirt bike.
The electric start is a convenient feature that provides several benefits. Firstly, it eliminates the need for kickstarting, which can be physically demanding and sometimes frustrating.
Secondly, it ensures a consistent and reliable engine start, especially in cold weather conditions. If you encounter any issues with the electric start, troubleshooting may be necessary.
Common problems include a dead battery, faulty wiring, or a malfunctioning starter motor. To troubleshoot, check the battery charge, inspect the wiring connections, and test the starter motor.
Once you press the electric start button, listen for the engine to start, indicating that the system is functioning properly and you are ready to ride.
Listening for the Engine to Start
As you listen closely, you’ll hear the engine roar to life, indicating that you’re ready to hit the trails on your dirt bike. Listening techniques play a crucial role in troubleshooting any issues that may arise during the electric start process.
When you press the electric start button, pay attention to the sound produced by the engine. A healthy engine will start smoothly, with a strong and consistent roar. If you hear any unusual noises, such as clicking or grinding sounds, it may indicate a problem with the starter motor or the battery. In such cases, it is important to consult the troubleshooting tips provided in your bike’s manual to diagnose and resolve the issue.
Now, as the engine comes to life, it’s time to move on to the next step: releasing the clutch lever gradually.
Releasing the Clutch Lever Gradually
Now, as you slowly release the clutch lever, you’ll feel the power of the engine transferring to the wheels, allowing you to smoothly accelerate and navigate the trails with control. Releasing the clutch is a crucial step in finding the balance between power and control on your dirt bike. Here are three key aspects to keep in mind:
-
Gradual release: As you release the clutch lever, do it slowly and progressively. This allows for a smooth transfer of power from the engine to the wheels, preventing sudden jerks or stalling.
-
Feathering technique: To achieve a seamless transition, use the feathering technique. This involves slightly modulating the clutch lever while simultaneously applying throttle, finding the sweet spot where the power engages without overwhelming the bike.
-
Practice makes perfect: Releasing the clutch smoothly requires practice. Start in a controlled environment and gradually increase your speed and complexity of maneuvers to develop muscle memory and finesse.
By mastering the art of releasing the clutch, you’ll have better control over your dirt bike’s acceleration and be ready to tackle any terrain with confidence.
Now, let’s move on to adjusting the choke if necessary.
Adjusting the Choke if Necessary
If you’re experiencing difficulty starting the engine, you might need to adjust the choke. The choke is a device that controls the air-fuel mixture in the engine, making it easier to start in cold weather.
To troubleshoot the choke, you should first locate the choke lever or knob on your dirt bike. Once you’ve found it, check if it is in the correct position. If the engine is cold, the choke should be fully engaged or closed. However, if the engine is warm, the choke should be fully disengaged or open.
Adjusting the choke accordingly can help ensure proper fuel delivery and improve starting performance.
Now that the choke is adjusted, let’s move on to giving the engine time to warm up, allowing it to reach optimal operating temperature.
Giving the Engine Time to Warm Up
After adjusting the choke if necessary, it is crucial to give the engine time to warm up before taking off on your dirt bike. This allows the engine oil to circulate and reach all the vital components, reducing engine wear and ensuring optimal performance.
One of the most important aspects of engine warm-up is to avoid revving the engine excessively during this period. Revving the engine when it’s cold can cause unnecessary strain on the internal components, leading to increased wear and potential damage.
Additionally, regular oil changes are essential for maintaining the health of your dirt bike’s engine. Fresh oil helps lubricate the moving parts, reducing friction and heat buildup. This, in turn, prolongs the engine’s lifespan and improves overall performance.
Now, let’s move on to the next section about stopping the engine with the kill switch.
Stopping the Engine with the Kill Switch
To stop the engine on your dirt bike, simply flip the kill switch. The kill switch is an important safety feature that quickly cuts off the electrical power to the engine, bringing it to a halt. It is usually located on the handlebars within easy reach of the rider.
When activated, the kill switch interrupts the flow of electricity from the battery to the ignition system, effectively shutting down the engine. It is crucial to regularly check the kill switch to ensure it is functioning properly. If you experience any issues with the kill switch, such as the engine not turning off when the switch is flipped, it is important to troubleshoot and fix the problem promptly to maintain your safety.
Now let’s move on to troubleshooting common electric start issues…
Troubleshooting Common Electric Start Issues
Now let’s address some common issues you may encounter when starting your bike using the electric ignition.
If you’re having trouble starting your bike, the first thing to check is the battery. Make sure it is fully charged and properly connected.
If the battery is fine, the next step is to troubleshoot the ignition switch. Check for any loose connections or damaged wires. Sometimes, the problem may be with the ignition switch itself, in which case it may need to be replaced.
Additionally, make sure the key is in the correct position and that the bike is in neutral.
By addressing these troubleshooting steps, you can ensure a smooth start to your ride.
Now, let’s move on to maintenance tips for the electric start system.
Maintenance Tips for the Electric Start System
Make sure you regularly check the connections and clean the terminals of your battery to ensure optimal performance of your electric start system.
Battery maintenance is crucial for the smooth functioning of your dirt bike’s electric start system. Over time, dirt and debris can accumulate on the battery terminals, leading to poor electrical contact and reduced performance.
To clean the terminals, disconnect the battery and use a wire brush to remove any corrosion or buildup. Make sure to inspect the battery cables for any fraying or damage and replace them if necessary.
Additionally, regularly check the battery’s voltage using a multimeter to ensure it is within the recommended range.
Following these maintenance tips will help prevent any issues with your electric start system and ensure a hassle-free riding experience.
Frequently Asked Questions
How do I know if my electric start system is not working properly?
If my electric start system is not working properly, I can troubleshoot it by checking the battery, connections, and starter motor. Common electric start issues include a dead battery, loose connections, or a faulty starter motor.
Can I use the electric start system if my battery is low?
Yes, you can jump start a dirt bike with a low battery. Connect jumper cables from a fully charged battery to the dead battery, ensuring proper polarity. Alternatively, you can use a kick-start method if available.
What should I do if the engine does not start after pressing the electric start button?
If the engine doesn’t start after pressing the electric start button, there are a few troubleshooting tips you can try. Common issues include a faulty ignition switch, a dead battery, or a problem with the starter motor.
How often should I check and maintain the electric start system?
I should regularly check and maintain the electric start system on my dirt bike. This includes checking the battery for proper voltage and troubleshooting any issues that may arise, such as loose connections or a faulty starter motor.
Is it possible to replace the electric start system with a kick start system?
Yes, it is possible to replace the electric start system with a kick start system. The kick start offers advantages such as simplicity, reliability, and weight reduction. However, it requires physical effort and skill to operate compared to the convenience of an electric start.
Conclusion
In conclusion, using an electric start on a dirt bike can be a game-changer for riders who prefer convenience and ease of use. By understanding the electric start system and properly maintaining it, you can ensure a smooth and hassle-free experience every time you start your bike.
Just like a well-oiled machine, a dirt bike with an electric start can bring a spark of excitement and ignite your passion for off-road adventures. So, gear up, hit the throttle, and let the electric start system rev up your ride like a bolt of lightning in the sky.