
To upgrade your beach-cruiser brakes, start by evaluating your current system and choosing compatible disc or drum components, ensuring they match your bike’s mount type and rotor size. Carefully remove the old parts, then install your new rotor and caliper, paying attention to alignment and secure attachment. Connect and route hoses or cables correctly, then fine-tune the setup with proper bleeding and brake bed-in procedures. Follow each step carefully to achieve safe, reliable stopping power—more detailed guidance awaits as you continue.
Key Takeaways
- Assess your current brake system, including type, wear, compatibility, and condition, before selecting new components.
- Choose compatible disc brake rotors, calipers, and adapters based on rotor size and mounting type for optimal fit.
- Carefully remove existing brake parts, organize hardware, and prepare the bike for new installation.
- Install new calipers, rotors, and hoses or cables, ensuring proper alignment, secure fastening, and correct routing.
- Perform final system checks, including alignment, bleeding if necessary, and test braking performance before riding.
Assessing Your Current Brake Setup
To upgrade your beach cruiser brakes effectively, start by evaluating your current brake system. Examine whether it has a coaster brake, disc brake, or drum brake setup. Check the brake pads for wear; note if they’re organic or metallic, as this impacts braking performance and maintenance. Measure the rotor size if your bike has disc brakes—larger diameters like 180mm or 200mm can offer better stopping power. Also, inspect the brake cables or hoses for fraying, corrosion, or leaks, which can hinder your braking efficiency. Additionally, understanding the symbolism of certain components can help you select the most effective upgrades. Proper knowledge of self watering plant pots can also enhance your ability to maintain and upgrade your bike’s braking system by ensuring you have the right tools and accessories. Lastly, review compatibility with potential upgrade components, considering your bike’s mounting types such as post mount or Centerlock. Understanding your current brake system helps you choose the right upgrades for improved stopping ability and safety. Additionally, consulting brake system specifications or experts familiar with your specific bike setup can ensure your upgrade is both effective and compliant with safety standards. Proper knowledge of home cinema projector contrast ratios can also help in selecting components that optimize your overall braking performance.
Selecting the Right Disc Brake Components
Choosing the right disc brake components depends on matching rotor size, material, and compatibility with your bike’s mounting system. Larger rotors, like 180mm or 200mm, provide more braking power and better heat dissipation, ideal for frequent or intense riding. Inspect rotor edges to determine the material: sharp, square edges indicate multi-material rotors, offering better durability, while rounded edges suggest resin-only, which may be quieter but less durable. Confirm your caliper supports the rotor size and mounting type—post mount or Centerlock. Use appropriate adapters, like 40mm or 43mm post mount adapters for larger rotors, to fit properly. Before buying, verify compatibility of all components—bolts, fittings, and mounts—with your bike’s frame and fork to ensure maximum braking power and safety. Additionally, understanding mounting systems is crucial for proper installation and performance.
Preparing Your Bike for the Upgrade
Start by gathering all the tools you’ll need, like Allen wrenches, a torque wrench, and a hose cutter, to make the process smooth. Then, remove the wheels and existing brake components carefully, ensuring the bike stays stable throughout. Finally, inspect the brake mounts and cables to confirm they’re clean and compatible with your new system. To ensure optimal performance, consider checking the brake system compatibility before proceeding with upgrades. Also, inspecting the signs of spoilage in your brake fluid or lubricant can help prevent issues with the new brakes. Additionally, verifying the shelf life of brake fluids can prevent degradation that might impair braking efficiency. Regularly reviewing essential oil properties can also help maintain your bike’s braking system and overall safety, and understanding air purifier maintenance principles can provide insights into proper care and longevity for your components.
Gather Necessary Tools
Before you begin upgrading your beach-cruiser brakes, gather all necessary tools to guarantee a smooth process. Essential tools include Allen wrenches, a Torx wrench (T25), a rotor lockring tool or bottom bracket tool, and various screwdrivers. Having the right tools helps you work efficiently and avoid damage. It’s also *vital* to confirm the compatibility of your new brake components with your bike’s frame and wheel hubs. Ensuring proper fit and function prevents issues during installation and operation. Organize your tools and parts in a clean workspace to streamline the process and reduce the risk of losing small components. Preparing everything beforehand saves time and keeps the upgrade process straightforward, allowing you to focus on installing your new brakes safely and effectively. Incorporating on-device AI capabilities can also assist in troubleshooting or providing real-time guidance during the upgrade.
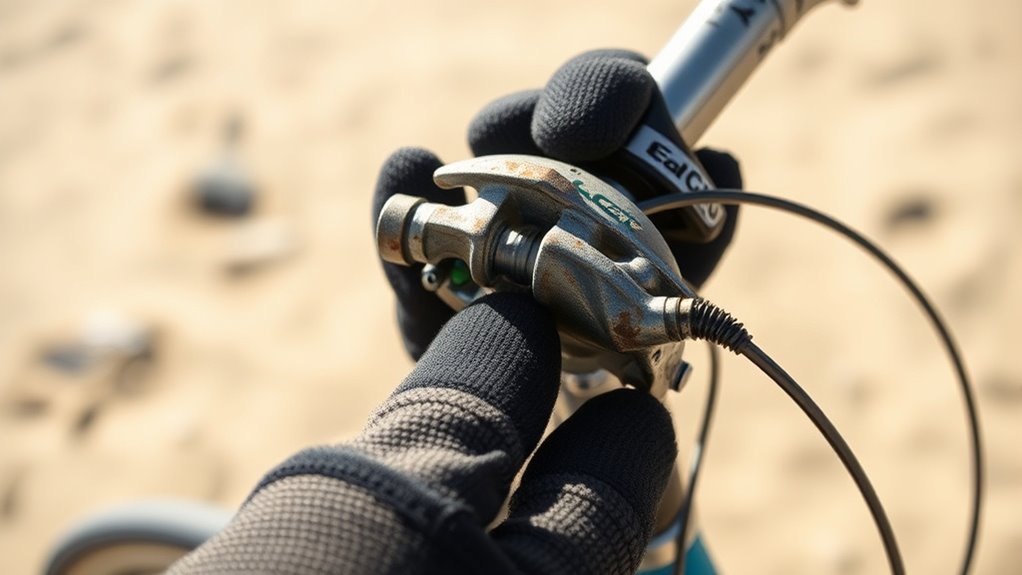
Remove Existing Brake Components
To begin removing your brake components, first take off the wheel to gain clear access and guarantee safety. Next, follow these steps:
- Carefully detach the brake caliper from the frame or fork, noting whether it’s bolt-on or quick-release for easy reinstallation.
- Remove the brake pads from the caliper to prevent contamination and simplify removal.
- Disconnect the brake cable or hose from the caliper, using pliers or a suitable tool, and take care not to damage the cable housing.
- If upgrading to disc brakes, dismount the existing brake rotor from the hub with the appropriate tools, setting aside all parts for disposal or reuse.
This process prepares your bike for the brake upgrade efficiently and safely. Additionally, understanding fuel injection cleaning can help maintain optimal vehicle performance during any related upgrades or repairs.
Removing Existing Brake Parts
Start by using the right tools, like Allen wrenches or Torx drivers, to carefully loosen and remove the brake caliper bolts. Next, detach the brake cable from the caliper or lever, making sure all connectors are fully released. Keep your workspace organized and clean to make reinstallation or upgrades easier and smoother. Being aware of e-commerce credit card processing options can also help streamline your upgrade process. Familiarizing yourself with pinball machines and classic arcade game components can provide additional insights into maintaining and upgrading your bike’s braking system effectively. Additionally, understanding divorce party decorations can help when planning celebrations for your new beginning. Paying attention to auditory processing strategies can also improve your overall troubleshooting and maintenance skills. It’s also helpful to know the store hours of beauty retailers for scheduling any in-person purchases or consultations.
Detach Brake Components
Removing the existing brake components is a straightforward process that requires careful attention. First, you’ll need to detach the brake caliper by loosening and removing its bolts with the appropriate tool. Next, detach the brake cable or hose from the caliper, making sure to secure or cap the line to prevent contamination. Then, remove the brake pads from the caliper, noting their orientation for easy reinstallation later. If your bike has a rotor, unscrew or unclip it from the hub, following manufacturer instructions to avoid damage. Finally, carefully dismount the entire brake assembly from the frame or fork, keeping track of all hardware and connectors for the reinstallation process. These steps ensure a clean removal of your old brake components. Additionally, inspecting the brake system for wear or damage can help prevent future issues and ensure optimal performance. Regularly checking the wear of brake pads is also recommended to maintain effective braking. Incorporating proper maintenance practices can extend the lifespan of your brakes and improve safety during riding.
Prepare Workspace Properly
Before diving into removing the existing brake parts, make sure your workspace is prepared for a smooth process. Prepare workspace properly by clearing the area of clutter and gathering all necessary tools, such as Allen wrenches, screwdrivers, and Torx wrenches. Remove the wheels to access the brake system easily and avoid damage. Carefully dismantle brake components, including brake calipers, brake levers, and cables, following manufacturer instructions. To prevent pistons from moving and causing damage, insert a bleed block into each brake caliper. Keep all removed parts organized and in a safe place, making reassembly straightforward. Proper preparation ensures you work efficiently and reduces the risk of losing parts or damaging your bike during the upgrade.
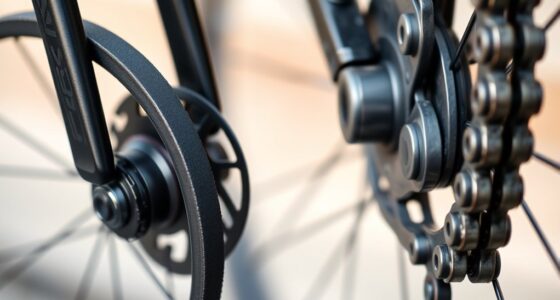
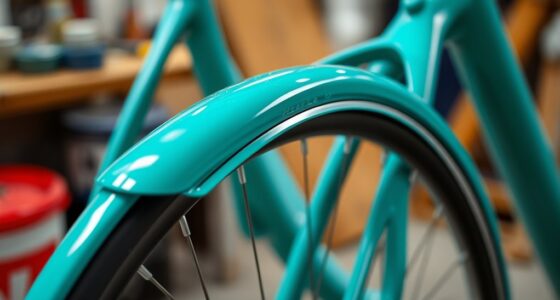
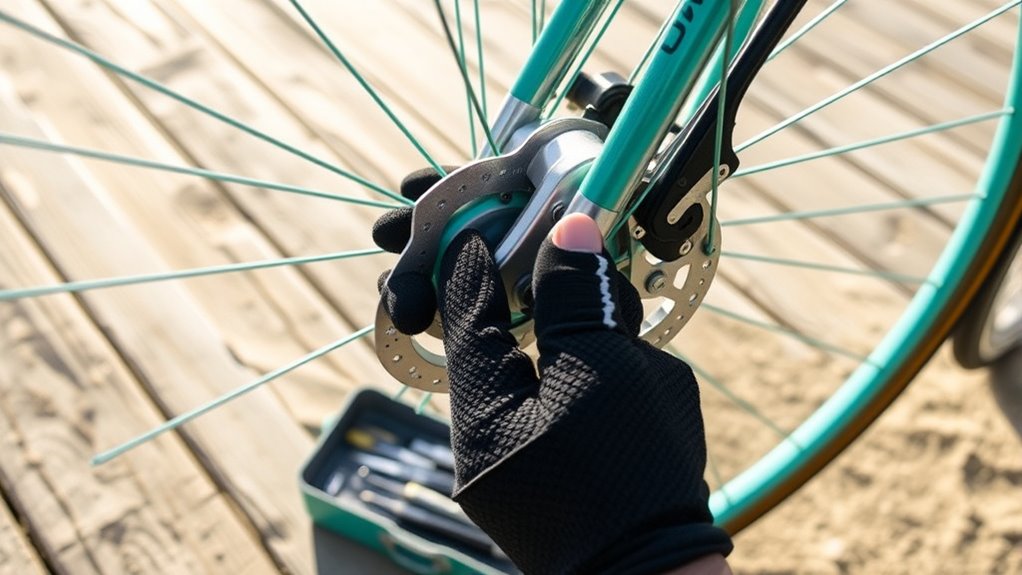
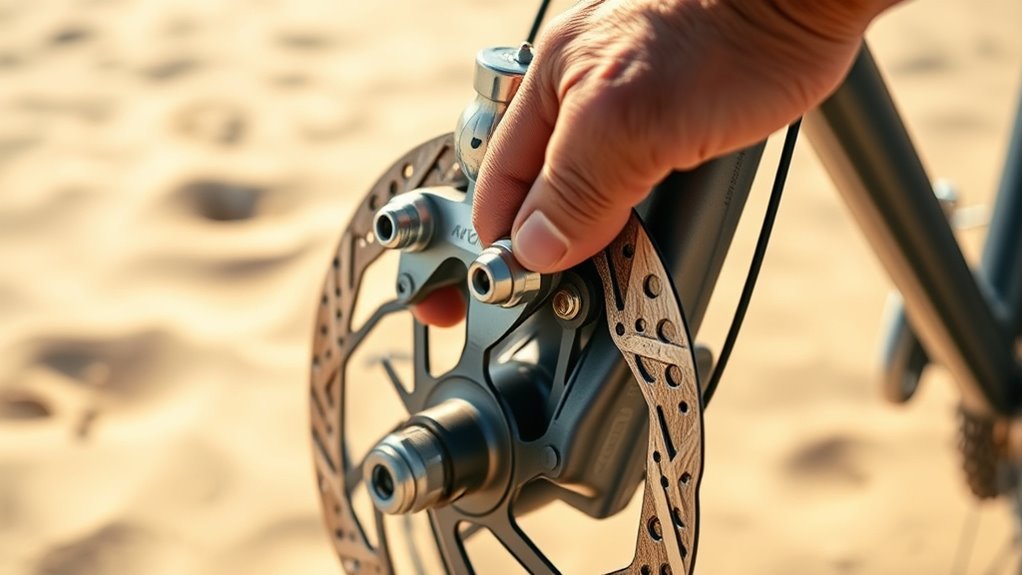
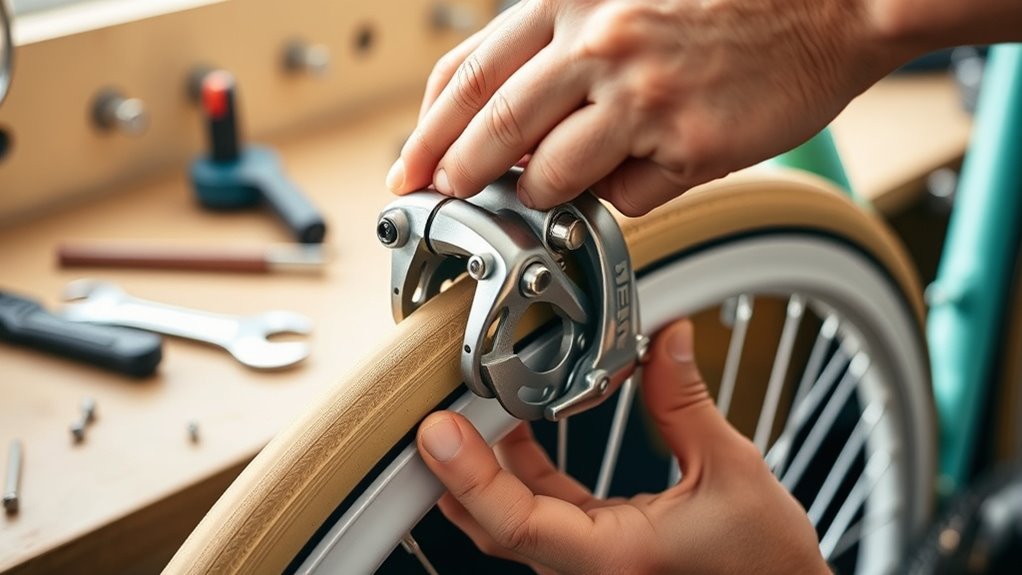
Installing the New Disc Rotor and Adapter

To install your new disc rotor and adapter, begin by selecting the correct rotor size that matches your bike’s compatibility and your braking needs, such as 160mm, 180mm, or 200mm. Next, follow these steps:
- Attach the brake rotor to the hub, ensuring the correct orientation, using six bolts or a Center Lock ring.
- Use a torque wrench to tighten the rotor bolts or ring to the manufacturer’s specifications.
- Choose and install the appropriate adapter (e.g., 40mm or 43mm) to fit your frame or fork’s post-mount or Center Lock system.
- Confirm the rotor spins freely without rubbing and is properly aligned before moving on to caliper installation.
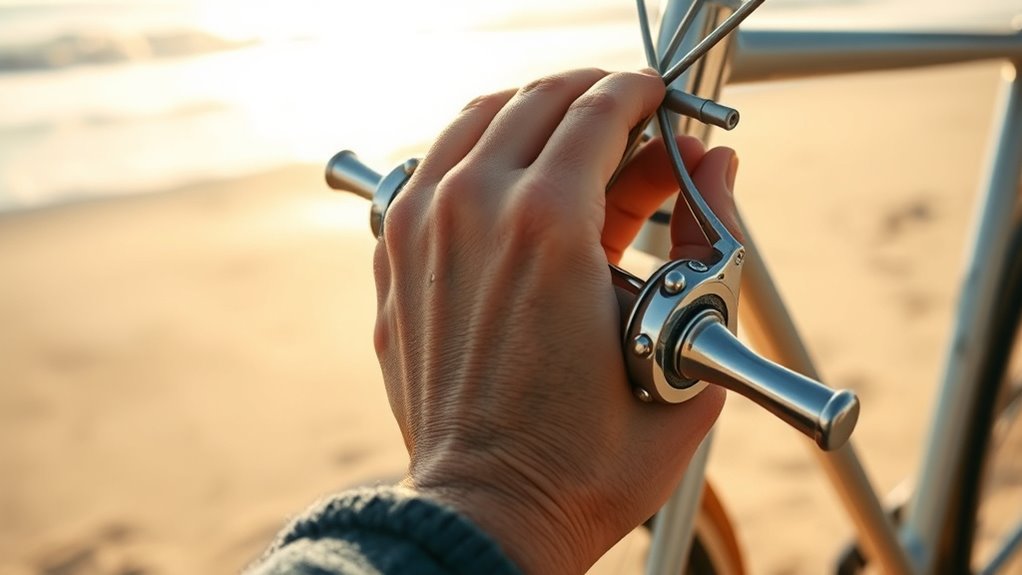
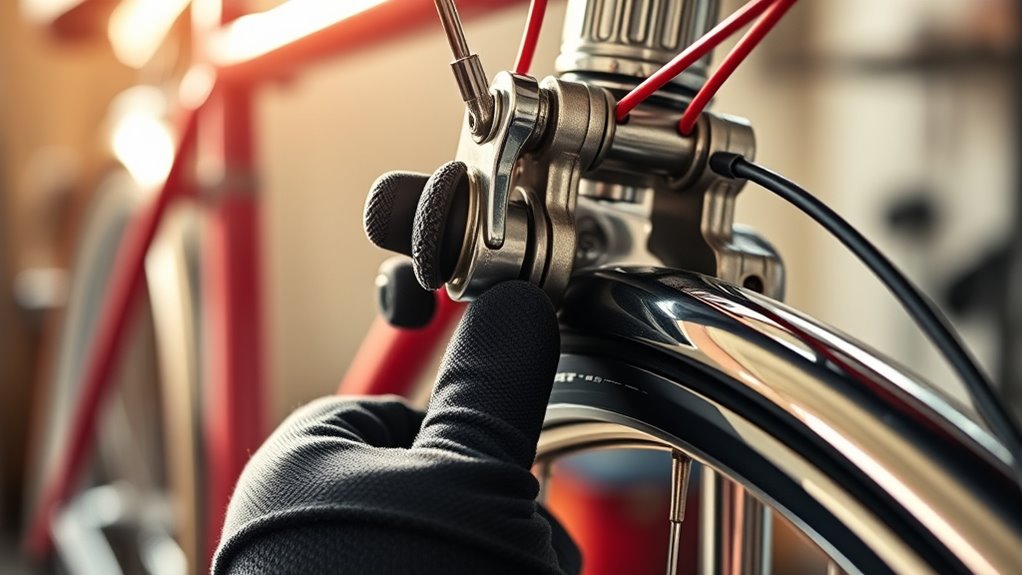
Mounting the Brake Caliper and Lever
Once you’ve prepared the rotor and adapter, the next step is to mount the brake caliper and lever. Start by attaching the brake caliper to the frame or fork using the appropriate adapters. Make sure it lines up correctly with the rotor or rim for smooth braking. Next, attach the brake lever to your handlebar, choosing between internal or external routing based on your setup. Connect the brake hose or cable to both the caliper and lever, ensuring the fittings are secure and correctly oriented. Gradually tighten the caliper bolts, balancing even pressure to position the caliper properly. Before moving on, check that the brake lever engages smoothly and that the caliper aligns correctly with the rotor or rim for *ideal* braking performance.
Routing and Connecting Brake Hoses

Routing and connecting brake hoses correctly is essential for reliable braking performance. Proper hose management prevents rubbing, snagging, and air leaks that can compromise your braking. Here’s what to do:
Proper brake hose routing ensures safety and reliable performance.
- Measure and mark the hose length needed, then cut with a hose cutter for a clean fit.
- Replace the olive and pin fittings on the hose ends, following manufacturer specs before connecting to the caliper and lever.
- For external routing, run the hose along the frame, securing it with clips or zip ties at regular intervals.
- When internal routing, use guides or tools to thread the hose through the frame’s channels, avoiding sharp bends or kinks. Double-check all fittings and bleed the brake if air enters during installation.
Fine-Tuning and Bed-In Procedures
After routing and connecting your brake hoses correctly, the next step is to fine-tune your brakes through proper bed-in procedures. To bed-in, you’ll need to perform 10-20 gentle stops from about 15-20 mph, applying consistent, smooth braking. This process helps transfer pad material evenly onto the rotor surface and ensures effective stopping power. Before starting, make sure your brake pads are properly installed and the rotor is clean, free of oil or contaminants, using isopropyl alcohol or brake cleaner. During the bed-in, avoid abrupt or aggressive braking to prevent uneven pad transfer or rotor warping. Once complete, check for even pad wear, rotor surface condition, and verify the brake lever feels firm with no sponginess. Regularly inspect and adjust as needed to keep your brakes responsive.
Frequently Asked Questions
How Do You Change Brakes Step by Step?
If you’re wondering how to change brakes step by step, start by removing the wheel and old brake components. Then, install the new rotor, making sure it’s aligned and torqued properly. Attach the caliper loosely, route the brake hose or cable smoothly, and connect it securely. Bleed the system to remove air, adjust the caliper for even pad contact, and test the brakes. Tighten everything and verify proper function before riding.
Is It Worth Upgrading Bike Brakes?
Is upgrading your bike brakes really worth it? If you frequently ride in wet, sandy conditions or want better stopping power, then yes, it’s a smart choice. Modern disc or hydraulic brakes can boost safety and confidence, especially on larger or heavier bikes. While the cost and effort may seem high, the improved performance and peace of mind often outweigh the investment, making your riding experience safer and more enjoyable.
Do Upgraded Brakes Make a Difference?
Upgrading your brakes definitely makes a difference. You’ll notice increased stopping power, better control, and improved safety on your rides. Hydraulic disc brakes respond more quickly and smoothly than traditional coaster brakes, especially on steep or wet terrain. Plus, upgraded brakes reduce brake fade and last longer, giving you more confidence on diverse routes. Overall, investing in better brakes enhances your riding experience and keeps you safer out on the road or trail.
Can You Replace Bike Brakes Yourself?
Yes, you can replace bike brakes yourself if you’ve got basic mechanical skills and the right tools like Allen wrenches and possibly a brake bleed kit for hydraulic systems. You’ll need to remove the old parts, install new rotors, pads, or calipers, and make sure everything’s aligned and adjusted properly. Check your bike’s brake type and follow manufacturer instructions or tutorials to do the job safely and effectively.
Conclusion
With your work done, you’re ready to ride with renewed reliability and responsive brakes. By balancing, adjusting, and bedding-in your new setup, you’ll enjoy a smoother, safer cruise along the beach. Remember, patience and precision pave the path to perfection. So, take your time, tighten those tweaks, and trust your tireless efforts. Now, hit the highway and harness the harmony of hassle-free braking—your beach cruiser’s best upgrade begins here!