As someone who loves cycling, I know how vital it is to have brakes that work well on a bike. No matter if you’re biking across town or speeding along a mountain path, being able to swiftly and securely halt your bicycle is essential.
However, over time, brakes can become misaligned or worn, leading to decreased performance and potential safety hazards. That’s why it is essential to know how to adjust your bicycle brakes.
In this article, I will guide you through the process of adjusting both rim and disc brakes on your bicycle. I will provide step-by-step instructions, along with tips for identifying the type of brakes on your bike and checking their performance.
Additionally, I will offer some regular maintenance tips to keep your brakes functioning at their best. So, if you’re ready to get your brakes back in top shape, let’s dive in!
Key Takeaways
- Regular maintenance is crucial for optimal brake performance, regardless of the type of brake system.
- Rim brakes may experience issues such as worn brake pads, loose cables, and misaligned brake arms, while disc brakes may encounter warped rotors, contaminated brake pads, and air bubbles in the hydraulic system.
- Adjusting rim brakes involves loosening the bolt holding the brake cable, adjusting cable tension with the barrel adjuster, and checking brake pad alignment. Replacing worn or damaged brake pads can be done by removing the retaining screw or bolt and sliding out the old pad.
- Adjusting disc brakes typically involves removing the wheel and retaining clip, replacing the pads, and aligning them with the rotor. However, troubleshooting disc brake issues may require professional help. Testing brake performance involves checking brake pad wear, cable tension, wheel spin, and brake lever travel, followed by final adjustments to ensure proper brake lever and cable tension, as well as brake pad alignment and toe-in.
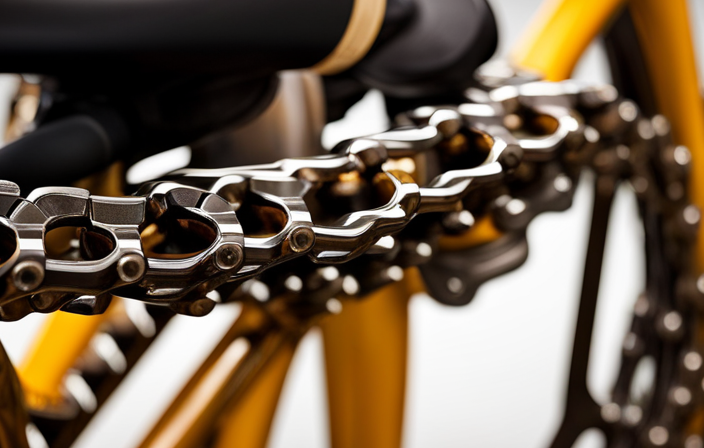
Identify the Type of Brakes on Your Bicycle
You gotta figure out what type of brakes your bike has before you can start tweaking them for maximum stopping power.
There are two main types of brakes: rim brakes and disc brakes. Rim brakes work by squeezing the rim of the wheel with brake pads, while disc brakes use a rotor and caliper system to slow down the bike.
When it comes to maintenance tips, both types of brakes require regular cleaning and adjustment to ensure optimal performance.
Common issues with rim brakes include worn brake pads, loose cables, and misaligned brake arms. On the other hand, disc brakes can suffer from warped rotors, contaminated brake pads, and air bubbles in the hydraulic system.
Once you’ve identified the type of brakes on your bike and familiarized yourself with some common issues, you can move on to adjusting them for maximum stopping power.
Adjusting Rim Brakes
To ensure efficient braking, it’s crucial to properly align the brake pads with the rim. Here are some steps to follow when adjusting rim brakes on your bicycle:
- Loosen the bolt that holds the brake cable using a 5mm Allen key.
- Adjust the cable tension by turning the barrel adjuster located on the brake lever or at the brake caliper until the brake pads are positioned correctly against the rim.
Check that the brake pads are hitting the rim evenly by spinning the wheel and observing the distance between the rim and the brake pads. If one side is closer than the other, adjust the position of the brake pad by loosening the mounting bolt and repositioning the pad.
If the brake pads are worn or damaged, it may be necessary to replace them. To do this, remove the retaining screw or bolt that holds the pad in place and slide the old pad out. Insert the new pad and tighten the retaining screw or bolt.
Now that you know how to adjust rim brakes, it’s time to move on to adjusting disc brakes.
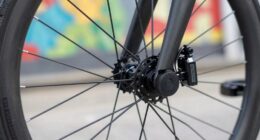
Adjusting Disc Brakes
As you squeeze the brake lever, the metallic screech of the pads gripping the rotor echoes through the air, reminding you of the importance of properly maintaining your disc brakes. To ensure optimal brake performance, you must know how to replace the brake pads and troubleshoot any issues that may arise.
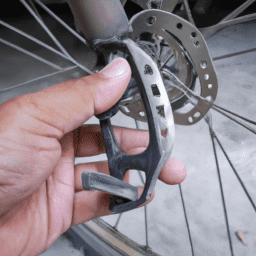
Replacing the pads on disc brakes is a relatively straightforward process. Start by removing the wheel and then the retaining clip that holds the pads in place. Remove the old pads and insert the new ones, making sure they’re properly aligned with the rotor. If there’s any rubbing, adjust the position of the pads until they’re centered on the rotor.
Troubleshooting issues with disc brakes can be more complex, but some common problems include squealing, vibrations, and a lack of stopping power. If you’re experiencing any of these issues, it’s best to consult a professional who can help diagnose and fix the problem.
With proper maintenance, your disc brakes should provide reliable stopping power for years to come.
As you finish adjusting your disc brakes, it’s important to check their performance before hitting the road. With the wheel back in place, squeeze the brake lever and make sure the pads engage with the rotor smoothly and without any rubbing or vibrations. Test the brake’s stopping power by riding at a low speed and braking firmly. If you notice any issues, go back and re-check your adjustments or seek professional help.
With properly adjusted disc brakes, you can enjoy a safer and more comfortable ride.
Checking Brake Performance
Now that I’ve adjusted my disc brakes, it’s time to check their performance.
To ensure that they’re working properly, I’ll perform a series of tests. These tests will include a visual inspection, a quick spin, and a full stop.
If necessary, I’ll make final adjustments to ensure that my brakes are functioning at their best.
Testing the Brakes
First, make sure you’re sitting on the bike and gently squeeze the brake levers to test the responsiveness of the brakes. Here are four things to check when testing your brakes:
-
Check the brake pads for wear by looking at the grooves on the pads. If the grooves are no longer visible, it’s time to replace the pads.
-
Make sure the brake cables are properly tensioned by squeezing the brake lever and checking for the appropriate amount of resistance.
-
Spin the wheel and check for any brake rubbing. If you hear or feel any rubbing, adjust the brake pads until they are centered on the rim.
-
Check the brake lever travel by squeezing the lever all the way to the handlebar. If the lever touches the handlebar, you need to adjust the brake cable tension.
Once you’ve tested your brakes and made any necessary adjustments, it’s time to make final adjustments to ensure your brakes are in top condition.
Making Final Adjustments
To fine-tune your brake system, it’s essential to ensure that everything is perfectly aligned and working smoothly, so you can stop on a dime like a pro. The first step is to check the brake lever and cable tension. The lever should sit parallel to the handlebars when it’s released, and when you squeeze it, it should stop about an inch from the handlebar. If it doesn’t, adjust the cable tension using the barrel adjuster until it’s in the correct position.
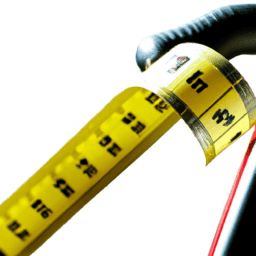
Next, focus on the brake pad alignment and toe-in. The brake pads should be positioned so they make even contact with the rim when the lever is squeezed. Use a ruler to measure the distance between the pad and the rim on both sides and adjust as needed. Additionally, the pads should be "toed-in"slightly, meaning the front of the pad should touch the rim before the back. This helps prevent squeaking and improves braking performance. Use the table below to ensure proper pad alignment and toe-in:
| Pad Alignment | Distance from rim |
|---|---|
| Left pad | 1-3mm |
| Right pad | 1-3mm |
| Pad toe-in | 1-2mm |
With these adjustments made, your brakes should be working smoothly and effectively. However, keep in mind that regular maintenance is crucial to keep them in good condition. In the next section, I’ll discuss some tips for maintaining your bike’s brakes.
Regular Maintenance Tips
One easy way to keep your bike brakes in good working order is by regularly maintaining them with a few simple tips.
First, it’s important to use proper lubrication techniques when working on your brakes. This means applying a small amount of lubricant to the pivot points of the brake arms and the brake cable guide. Be careful not to overdo it, as excess lubricant can attract dirt and grime, which can cause your brakes to wear out faster.
Secondly, cleaning methods are also important to ensure your brakes work properly. Start by wiping down the brake pads and rims with a clean cloth to remove any dirt or debris. Then, use a gentle degreaser to remove any buildup on the brake pads and rims. Finally, rinse everything off with water and dry with a clean cloth.
Regularly cleaning your brakes will help prevent premature wear and tear, and keep them functioning at their best.
Frequently Asked Questions
How often should I replace my brake pads?
I once had to replace my brake pads after 500 miles of riding. To know when to replace your brake pads, inspect them regularly for wear, such as a thinning or uneven surface.
Can I use any type of brake pads on my bicycle?
When choosing compatible brake pads for my bicycle, it’s important to consider the material. Using the wrong type of pads can damage the braking system. Selecting high-quality pads can improve stopping power and reduce wear on rims and discs.
Should I adjust both front and rear brakes equally?
Do both front and rear brakes need equal adjustment? It depends on your bike’s design and your riding style. Troubleshoot uneven brake wear by checking brake pads and caliper alignment. Adjust as needed to ensure consistent stopping power.
How do I know if my brake cables need to be replaced?
I can tell my brake cables need replacing if I notice signs of frayed cables, such as visible damage, reduced brake power, or unusual noises. Regular maintenance is important to prevent such issues.
Is it safe to ride my bicycle if the brakes are not working properly?
I once rode with malfunctioning brakes and almost collided with a car. Bicycle brake maintenance is crucial for safety. Conduct a brake safety inspection regularly to avoid accidents. Never ride with faulty brakes.
Conclusion
In conclusion, adjusting bicycle brakes may seem like a daunting task, but it’s essential for safe and efficient riding. By identifying the type of brakes on your bike, you can easily adjust them to the desired tension.
For rim brakes, adjust the cable tension and position the brake pads correctly.
For disc brakes, adjust the caliper and rotor alignment.
Remember to always check the brake performance before riding, and make regular maintenance a priority. As the saying goes, "an ounce of prevention is worth a pound of cure."
By taking the time to adjust and maintain your brakes, you can avoid accidents and costly repairs down the road. So, get out there and ride with confidence, knowing that your brakes are in top shape.