As someone passionate about biking, I understand the importance of a secure and comfortable hold on your bike’s handlebars for ensuring a safe and seamless ride. This is why I’m thrilled to impart my wisdom on installing bike hand grips with you.
First things first, let’s gather the necessary tools and supplies. You’ll need a pair of new hand grips, a utility knife or scissors, rubbing alcohol, and a clean cloth.
Once you have everything ready, we can move on to removing the old hand grips and installing the new ones. Don’t worry, it’s not as complicated as it may seem, and with a little bit of patience and attention to detail, you’ll have a brand new pair of hand grips in no time!
Key Takeaways
- Choosing the right grip design and material based on riding needs and style is important for a comfortable and secure grip on handlebars.
- Proper removal of old hand grips and cleaning of handlebars before installing new grips is essential.
- Testing new grips for comfort and control before hitting the road is recommended.
- Regular handlebar maintenance, including cleaning and checking grip tightness, is crucial for a safe ride.

Varstrom 48V 1000W 1500W Rear & Front Hub Motor Kit - Ebike Conversion Kit for 26"/27.5"/28"/29"/700C Front Rear Wheel,Electric Bike Conversion Set with Display & Ebike Battery (Optional)
【POWERFUL 48V 1000W Front Hub Motor Kit】: 48V 1000W front wheel motor kit is designed for a variety...
As an affiliate, we earn on qualifying purchases.
Gather the Necessary Tools and Supplies
You’ll need a few tools and supplies to get started, like a pair of pliers to remove the old grips and some rubbing alcohol to clean the handlebars.
When it comes to bicycle grip designs, you have a few options to choose from. Some are designed for comfort, while others are geared towards performance. It’s important to choose the grip that suits your needs and riding style.
Choosing grip materials is another important factor to consider. Grips can be made from a variety of materials, including rubber, foam, or silicone. Rubber is the most common material used in grips due to its durability and affordability. Foam grips are popular for their comfort and shock-absorbing properties, while silicone grips are known for their tackiness and grip in wet conditions.
With the right tools and materials, you’ll be ready to tackle the installation process. Next, let’s move on to removing the old hand grips.

Ktaxon Electric Bike Conversion Kit, 48V 1000W Ebike Conversion Kit, 26" Front/Rear Wheel E-Bike Conversion Kits with PAS, LCD Display, Aluminum Alloy Frame and Gearless Hub Motor (Front Wheel)
【UNMATCHED MOTOR KIT】With 48V 1000W brushless and gearless hub motor, this ebike conversion kit creates efficient and noiseless...
As an affiliate, we earn on qualifying purchases.
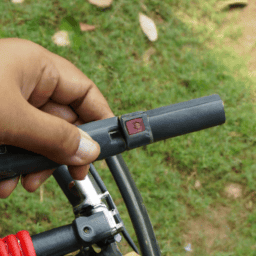
Remove the Old Hand Grips
Okay, time to get started on removing those old hand grips. First things first, let’s loosen them up a bit by spraying some rubbing alcohol or water underneath the grips.
Once they’re loose enough, we can start working them off the handlebars, being careful not to damage the bars or the grips.
Finally, before we put on the new grips, let’s take a moment to clean the handlebars thoroughly to ensure a good grip and prevent any slipping.
Loosening the Grips
First, you need to get a good grip on the situation by using a hair dryer to heat up the grips. Hold the hair dryer about 2-3 inches away from the grip and move it around, so that the heat is evenly distributed. Keep heating the grip for a few minutes until it becomes pliable and easier to remove.
If you don’t have a hair dryer, you can also try soaking the grips in warm water for a few minutes to achieve the same effect. It’s important to note that if you plan on reusing the old grips, you should be careful not to overheat them, as this could cause them to crack.
Additionally, if you’re looking for an alternative grip material, you could consider using silicone or rubber grips, which are easy to install and provide a comfortable grip. Once the grips are heated and pliable, you can move on to the next step of removing them, using a flathead screwdriver or grip removal tool to gently prise them off.
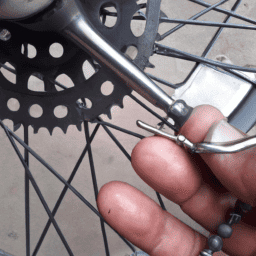
Removing the Grips
Now that the grips are pliable, it’s time to gently remove them using a flathead screwdriver or grip removal tool, making sure not to damage the handlebars.
Start by inserting the screwdriver or tool between the grip and the handlebar, and then slowly work your way around the grip, gently prying it off as you go.
If the grip is particularly stubborn, you can try spraying a small amount of rubbing alcohol or hairspray between the grip and the handlebar to loosen it up.
Once you have successfully removed the grips, you may be wondering what to do with them.
If they are still in good condition, you can consider recycling them or using them on another bike.
Alternatively, you may want to explore alternative grip options, such as ergonomic grips or those made from different materials.
Whatever you decide, make sure to clean the handlebars thoroughly before installing new grips to ensure a secure fit.
Cleaning the Handlebars
Before proceeding with any further steps, it’s crucial to thoroughly clean the handlebars to ensure a secure grip for the new set of handlebar grips.
Handlebar maintenance is often overlooked, but it’s essential to keep them clean and free from dirt, grime, and debris. A clean handlebar will provide a better grip and prevent any slippage while riding.
To clean the handlebars, use a clean cloth and a mild detergent solution. Scrub the handlebars thoroughly, ensuring that all the dirt and grime are removed.
After cleaning, let the handlebars dry completely before installing the new hand grips. Additionally, choosing the right grip color can also add a personal touch to your bike. Consider selecting a color that complements your bike’s overall look and style.
With the handlebars fully cleaned and prepped, it’s time to move onto the next step, installing the new hand grips.

PEXMOR Electric Bike Conversion Kit, 20"/24" Front Wheel Ebike Conversion Kit, 36V 750W Electric Bike Hub Motor Kit w/3 Mode Controller/PAS/LCD Display/Twist Throttle Electric Bicycle Ebike Kit
【POWERFUL BRUSHLESS MOTOR】-The 36V 750W ebike front wheel conversion motor kit features a powerful brushless hub motor.It runs...
As an affiliate, we earn on qualifying purchases.
Install the New Hand Grips
To get the ultimate comfort while cycling, it’s essential to install the new hand grips that’ll make you feel like you’re riding on a cloud. Here’s how to install bicycle hand grips like a pro:
-
Begin by choosing the right grips that match your riding style and personal preferences. Look for materials that offer excellent grip and comfort, such as rubber or silicone.
-
Once you have the new grips, remove the old ones by spraying rubbing alcohol onto the handlebars and twisting the grips off. Clean the handlebars thoroughly before installing the new grips.
-
Apply a small amount of rubbing alcohol to the inside of the new grips to help them slide onto the handlebars smoothly.
-
Push the new grips onto the handlebars, making sure they are evenly aligned and snug against the end of the handlebars.
With the new grips in place, it’s time to secure them in position.

26 Inch 48V 1000W Rear Wheel Electric Bicycle Conversion Kit, Electric Bike Rear Wheel Hub Motor, Rears Wheel Electric Bicycle Motor Kit
Premium Material: This product is made of aluminum, iron, copper, magnetic steel, aluminum alloy, and rubber butyl. All...
As an affiliate, we earn on qualifying purchases.
Secure the New Hand Grips
Once the new grips are in place, it’s important to secure them properly to avoid any mishaps during your ride. There are different types of hand grips available in the market, so make sure you choose the right size that fits your handlebars. A grip that is too big or too small can cause discomfort and affect your control over the bike.
To secure the new hand grips, start by tightening the screws or bolts that came with the grips. Use a wrench or Allen key to ensure they’re tightened enough to keep the grips in place. Then, apply some grip glue to the inside of the grip and slide it onto the handlebar. Make sure it’s positioned correctly, and hold it in place for a few seconds until the glue sets.
Repeat the process for the other grip, and give both grips a firm tug to ensure they’re secure. Once you’re satisfied, you’re ready to test your new grips and enjoy your ride!
Test Your New Grips and Enjoy Your Ride!
Now, you can finally feel the difference in comfort and control as you take your bike for a spin with your new grips. But before you hit the road, make sure that your new grips are properly positioned on your handlebars. Proper grip positioning is crucial for optimal comfort and control while riding.
Here’s how to make sure your new grips are in the right position:
-
Position the grips so that they are flush against the end of the handlebars.
-
Adjust the angle of the grips so that they align with your wrists when your hands are in a natural riding position.
-
Ensure that there is enough space between the grips and brake levers or shifters, so that they don’t interfere with each other.
-
Tighten the grip clamp bolts evenly, making sure that the grips are secure but not over-tightened.
In addition to proper positioning, choosing the right grip material can also enhance your riding experience. There are different materials available, such as rubber, foam, and silicone. Each material offers unique benefits, such as increased grip and shock absorption. Experiment with different materials to find the one that feels best for you.
With your new grips properly positioned and chosen for optimal comfort and control, you’re ready to hit the road and enjoy your ride!
Frequently Asked Questions
How often should I replace my bicycle hand grips?
As an experienced cyclist, I know that signs of wear on hand grips can include tearing, cracking, or loss of grip. Grip material options, such as rubber or foam, can also affect their lifespan. I typically replace mine every 6-12 months.
Can I reuse my old handlebar plugs with the new hand grips?
Sure, you can reuse old handlebar plugs with new hand grips, but it’s not recommended. Different grips have different compatibility with plugs. Plus, using old plugs can cause slipping, which is dangerous.
How do I choose the right size hand grips for my bike?
To choose the right size hand grips for my bike, I use measuring techniques to determine the grip diameter and length needed. Common grip materials include rubber, foam, and silicone. It’s important to select a grip that feels comfortable and secure.
Can I install hand grips without any tools?
I once had to replace my grips mid-ride and had no tools on me. I improvised and used a combination of spit and elbow grease to remove the old grips and slide on the new ones. No tool installation alternatives include using hairspray or soapy water to lubricate the handlebar. DIY grip removal techniques involve using a flathead screwdriver to pry the grips off.
Are there any special care instructions for maintaining my new hand grips?
To maintain hand grips, use appropriate cleaning techniques to avoid damage. Best grip materials are those that are durable and provide a secure hold. Regularly inspect grips for wear and tear, and replace as necessary.
Conclusion
Well, that’s it folks! I hope this guide has helped you successfully install your new bicycle hand grips.
Remember, safety is key, so be sure to choose the right type of grip for your style of riding. Whether you’re a casual rider or a professional cyclist, having a secure grip on your handlebars is crucial to having a smooth and enjoyable ride.
As I was finishing up this guide, I coincidentally received a message from a friend who had just installed new hand grips on her bike. She mentioned how much more comfortable and confident she felt while riding, and how it made a significant difference in her overall biking experience.
It’s amazing how such a small change can have such a big impact! So, don’t hesitate to upgrade your bike with new hand grips, and see for yourself what a difference it can make in your ride.
Happy cycling!