Taking off bicycle handlebar grips might appear to be challenging, almost as if they were glued on tightly. However, fret not! By utilizing the correct tools and methods, you can successfully tackle this job.
In this article, I will guide you through the step-by-step process of removing bicycle handlebar grips, ensuring a smooth and hassle-free experience.
So grab your tools and get ready to say goodbye to those old grips and hello to a fresh start for your handlebars!
Key Takeaways
- Improved comfort and control
- Avoiding common mistakes
- Use proper tools to prevent damage to handlebars
- Preserve grip quality by avoiding excessive force and tears/rips

Schwinn Sporterra RX Gravel Bike, 700c Mens and Womens Bike, 14-Speed Drop Bar Gravel Bicycle, Mechanical Disc Brakes, Rigid Fork, Aerodynamic Riding Position, Quick Release Seat Post, Adult Bicycle
GRAVEL BICYCLE: Enjoy next level riding with the Sporterra RX by Schwinn. With 700c wheels, this mens and...
As an affiliate, we earn on qualifying purchases.
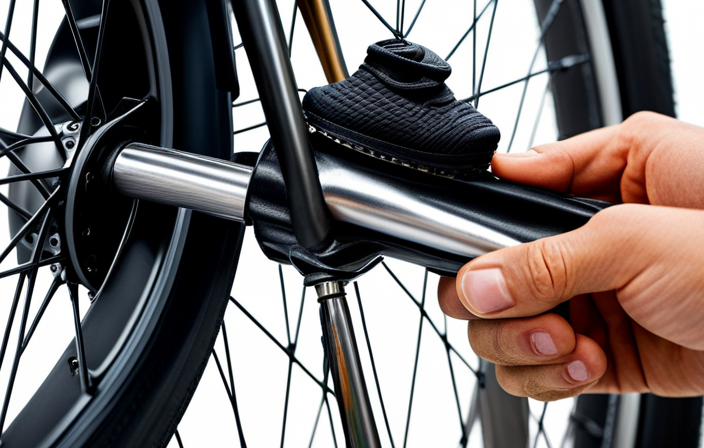
Gather the Necessary Tools
You’ll need a few tools to remove the bicycle handlebar grips.
There are different types of bicycle handlebar grips available in the market, so it’s important to know which one you have before you start. The most common types are slip-on grips, lock-on grips, and glue-on grips.
Slip-on grips can be easily removed by simply pulling them off the handlebars, while lock-on grips require an Allen wrench to loosen the bolts on the ends. Glue-on grips are a bit trickier and may require a utility knife to carefully cut them off.
When removing the grips, it’s important to avoid some common mistakes, such as using excessive force or damaging the handlebars.
Once you have gathered the necessary tools, you can move on to the next step of loosening the grips.

Swagman Standard Fork Mount Rooftop Bike Carrier
EASY TO ASSEMBLE: The STANDARD is easy to assemble with no tools required, sets up in just minutes...
As an affiliate, we earn on qualifying purchases.
Loosen the Grips
To start, simply loosen the grips by twisting them gently. Proper grip maintenance is essential for a smooth and comfortable ride. Here are three key points to keep in mind when removing your bicycle handlebar grips:
-
Determine the type of grip you have: There are different types of handlebar grips, such as lock-on grips, slide-on grips, and glued-on grips. Each requires a slightly different approach for removal.
-
Use a grip removal tool: A grip removal tool, such as a flathead screwdriver or a grip cutter, can help you loosen the grips without damaging them or the handlebars.
-
Apply lubricant if needed: If your grips are stubborn and difficult to remove, applying a small amount of lubricant, such as rubbing alcohol or water, can help loosen them up.
Now that the grips are loosened, let’s move on to the next step of applying lubricant to make the removal process smoother.
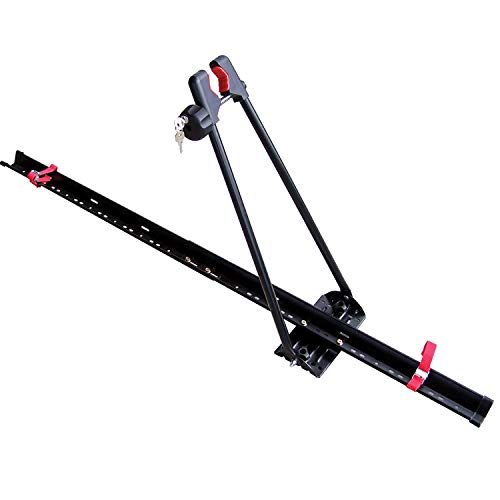
Swagman UPRIGHT Roof Mount Bike Rack
EASY TO ASSEMBLE: The UPRIGHT roof rack installs in minutes following the instructions and carries one bike with...
As an affiliate, we earn on qualifying purchases.
Apply Lubricant
Once the grips are loosened, it’s time to apply lubricant to make the removal process smoother. Lubricant application techniques can greatly aid in the effortless removal of bicycle handlebar grips. Applying lubricant reduces friction between the grip and the handlebar, making it easier to slide off. There are various techniques for lubricant application, such as spraying lubricant directly onto the grip or using a small brush to apply it evenly. The benefits of using lubricant for handlebar grip removal are manifold. Firstly, it facilitates a seamless removal process, saving time and effort. Secondly, it minimizes the risk of damaging the handlebar or grip during removal. Lastly, lubricant ensures a smooth transition when installing new grips. With the grips loosened and lubricant applied, the subsequent section will discuss the ‘twist and pull’ technique for removing the grips.

SYDSZ Roof Bike Rack Mount Upright Roof Bike Rack 1 Bike Carrier Car Roof Bicycle for Car Only Suitable for Removable Universal Crossbars
【COMPATIBILITY】Only applicable for installation on the driver's roof, fits 20" - 29" wheels. 64" long tray. Fits up...
As an affiliate, we earn on qualifying purchases.
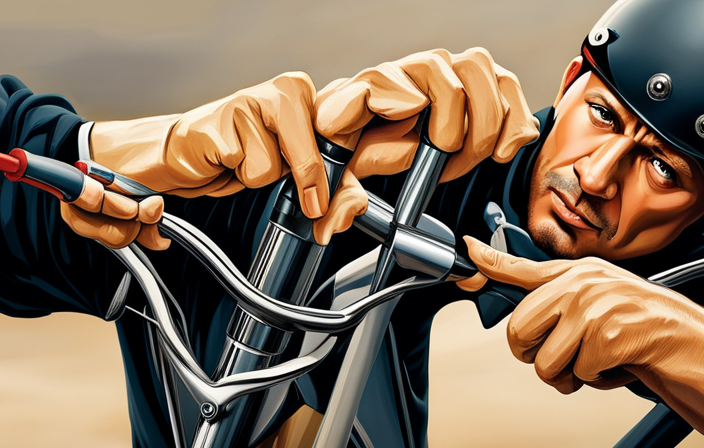
Twist and Pull
To successfully take off the grips, simply twist and pull them away from the handlebars.
Here are some grip removal alternatives to consider:
-
Use an air compressor: By applying air pressure between the grip and handlebar, you can loosen the grip, making it easier to remove.
-
Apply heat: Use a hairdryer or heat gun to warm up the grip. This will soften the adhesive and allow for easier removal.
-
Use rubbing alcohol: Soak a cloth with rubbing alcohol and slide it between the grip and handlebar. The alcohol will dissolve any adhesive, making it easier to pull off the grip.
-
Use a wire or string: Slide a wire or string under the grip and move it back and forth in a sawing motion. This will break the bond between the grip and handlebar, allowing for removal.
If you’re reusing old handlebar grips, be sure to clean them thoroughly before reinstalling.
Now, let’s move on to the next section about using a grip removal tool.
Use a Grip Removal Tool
If you want an easier way to take off your handlebar grips, try using a grip removal tool. This tool is designed specifically to help you remove grips without damaging them or your handlebars.
It provides an alternative method to the twist and pull technique, which can sometimes be difficult, especially if the grips are tightly attached. The grip removal tool works by creating leverage between the grip and the handlebar, allowing you to easily slide the grip off.
This tool is particularly useful if you have common grip problems, such as grips that are stuck or worn out. Once you have successfully removed the grips using the removal tool, you can move on to the next step of cutting the grips to fully remove them from your handlebars.
Cut the Grips
Start by cutting through the grips using a sharp utility knife. This method is one of the most common and effective ways to remove bicycle handlebar grips. Make sure to exercise caution when using a knife to avoid injury.
Begin by making a small incision at the end of the grip and gradually work your way around, cutting through the material. If the grips are particularly stubborn or if you don’t have a grip removal tool, this method can be a great alternative. However, always remember to prioritize safety and wear protective gloves to prevent any accidents.
Once the grips are cut, you can proceed to the next step of cleaning the handlebars, ensuring they are free from any residue or debris.
Clean the Handlebars
First, you need to thoroughly clean the handlebars to remove any dirt or grime. This is an important step in handlebar grip maintenance as it ensures a clean surface for the new grips to adhere to.
Start by wiping down the handlebars with a damp cloth to remove any loose debris. Then, use a mild soap or bike-specific cleaner to scrub away any stubborn dirt or grease. Pay extra attention to the areas where the old grips were attached, as they may have left behind residue.
Rinse the handlebars with clean water and dry them thoroughly before proceeding to the next step of choosing the right handlebar grips.
By cleaning the handlebars properly, you’ll ensure a solid foundation for the new grips to be installed securely and comfortably.
Install New Grips
To properly install new grips on your bike, begin by applying a small amount of grip glue or rubbing alcohol to the handlebars for added adhesion.
When it comes to choosing the right grips for your bike, there are various options available in the market. You can choose from foam, rubber, or even silicone grips, each offering different levels of comfort and grip. Consider factors such as the type of riding you do and personal preference when selecting the material.
Additionally, it is important to choose the right size grips that fit your handlebars properly. Grips that are too small may cause discomfort, while grips that are too large can affect your control over the bike.
After installing the new grips, it is essential to test and adjust them to ensure they are secure and comfortable for your ride.
Test and Adjust
Once the new grips are installed, it’s important to test and make any necessary adjustments for a secure and comfortable ride.
Handlebar grip maintenance is crucial to ensure optimal performance and safety.
Start by checking if the grips are properly aligned and centered on the handlebars. If not, loosen the bolts and adjust them accordingly.
Next, hold onto the grips firmly and simulate different riding positions to see if they provide enough support and cushioning.
Troubleshooting common grip removal issues may include applying a small amount of isopropyl alcohol or soapy water to loosen stubborn grips. Additionally, using compressed air can help create a gap between the grip and handlebar, making removal easier.
Once you are satisfied with the grip placement and comfort, you can move on to the next step and enjoy your newly removed grips!
Enjoy Your Newly Removed Grips!
Now that you’ve successfully taken off your bike’s grips, it’s time to enjoy the improved comfort and control they provide.
After removing the grips, it’s important to be mindful of common mistakes to avoid.
First, make sure not to scratch the handlebars while removing the grips. Use a flathead screwdriver or a grip removal tool to gently pry the grips off, being careful not to apply too much force.
Another mistake to avoid is damaging the grips themselves. Take your time and be patient when removing them, as pulling too hard or using excessive force can cause tears or rips in the grips.
Additionally, it’s important to note that removing the grips should not cause any damage to the handlebars. As long as you are careful and use the proper tools, the handlebars should remain intact throughout the process.
Enjoy your newly removed grips and the enhanced riding experience they bring!
Frequently Asked Questions
What are the potential risks or damages that can occur if the handlebar grips are not properly removed?
If the handlebar grips are not properly removed, potential injuries can occur such as blisters, cuts, and strain on the hands and wrists. Additionally, there is a risk of damaging the handlebars, affecting the bike’s stability and control.
Can I reuse the old handlebar grips after removing them?
Yes, you can reuse old handlebar grips after removing them. However, it’s important to note that they may not provide the same level of grip and comfort. Consider alternative grip options for a better riding experience.
Are there any specific types of lubricants recommended for removing bicycle handlebar grips?
For removing bicycle handlebar grips, it is recommended to use a lubricant specifically designed for grip removal. Alternatively, you can try other methods like using compressed air or applying heat to loosen the grip.
Can I remove the handlebar grips without using any specialized grip removal tools?
Yes, you can remove handlebar grips without specialized tools. One alternative grip removal method is to use compressed air to loosen the grip’s adhesive. Another DIY technique is to apply rubbing alcohol under the grip to dissolve the adhesive.
How often should I replace my bicycle handlebar grips?
I recommend replacing bicycle handlebar grips every 1-2 years to avoid long term effects like decreased grip and hand fatigue. To extend their lifespan, clean them regularly, use gloves, and avoid excessive exposure to sunlight and moisture.
Conclusion
So there you have it, folks! With the right tools and a little bit of know-how, you can easily remove those pesky bicycle handlebar grips.
Just remember to loosen them, apply some lubricant, and twist and pull with all your might.
If you’re still having trouble, don’t worry! There are grip removal tools available to make the job even easier.
Once you’ve successfully removed the old grips, take a moment to clean the handlebars and install your brand new ones.
Then, sit back, relax, and enjoy the smooth and comfortable ride that awaits you.
Happy biking!