Taking off bike hand grips might appear challenging, yet it’s quite an easy procedure that can be accomplished in a handful of steps. Throughout this piece, I’ll walk you through how to strip those worn-out grips from your bike’s handlebars, making way for fresh replacements.
Before we get started, make sure you have all the necessary tools on hand. You’ll need a flathead screwdriver, a pair of scissors or a utility knife, and some rubbing alcohol or soapy water.
Once you have everything you need, we can begin the process of removing those old, worn-out hand grips and replacing them with fresh new ones.
Key Takeaways
- There are two main types of bicycle hand grips: slip-on and lock-on.
- The necessary tools for removing hand grips include a flathead screwdriver, scissors/utility knife, and rubbing alcohol/soapy water.
- Different types of grips are available, including rubber, foam, and silicone, and choosing the right grip depends on personal preference, riding style, and terrain.
- Before installing new grips, it is important to clean the handlebars and remove the old grips, and to apply rubbing alcohol/hairspray to the inside of the grip before sliding it onto the handlebar and aligning it with brake/gear shifters before securing it in place.

CXWXC Bike Repair Stand 88lbs- E Bike Stand for Maintenance Workstand - Ebike Repair Stand Shop Home Mechanics for Mountain Bike and Road Bike (Max. 88lbs)
【Easy-Breezy Bicycle Maintenance】: A bike repair stand is an essential item when you’re working on your bike or...
As an affiliate, we earn on qualifying purchases.
Gather Your Tools
You’ll need to grab some tools before you can start removing those pesky hand grips, and it’s important to have everything ready to go to make the process as smooth as possible.
Firstly, you’ll need to identify the type of bicycle grips you have. There are two main types: slip-on and lock-on. Slip-on grips are pushed onto the handlebars, while lock-on grips are held in place with a clamp.
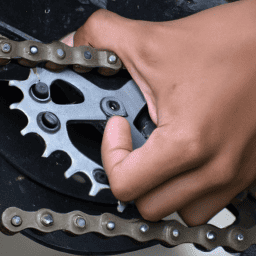
Once you’ve identified the type of grips, you’ll need to properly place your hands on the bicycle handlebars. This will ensure that you have a stable grip and won’t accidentally damage your bike while removing the grips. To do this, place your hands on the handlebar grips with your fingers wrapped around the brake levers. This will give you a secure grip on the handlebars and prevent your hands from slipping while you work to remove the grips.
Now, let’s move on to loosening the grip.

GOEHNER's Upgrade 2.0 Bike Repair Stand (Max 110 lbs) – Portable Aluminum Bicycle Workstand for Electric, Mountain, and Road Bikes
【Max Load 110lbs】 Crafted from durable #6070 aluminum, this lightweight yet heavy-duty bike repair stand can support bikes...
As an affiliate, we earn on qualifying purchases.
Loosen the Grip
To loosen the grips, simply squeeze the brake levers and use a twisting motion while pulling them away from the handlebars. If the grips are particularly tight, you may need to use some lubricant to make the process easier. Just spray some lubricant between the grip and the handlebar, and then twist and pull as before. This should help loosen the grip and make it easier to remove.
Another method you can try is using heat. This involves either using a hair dryer or a heat gun to warm up the grip, which will make it expand and become easier to remove. Simply apply heat to the grip for a few minutes, and then try twisting and pulling it away from the handlebar. Be careful not to burn yourself or damage any other parts of the bike.
Once you have successfully loosened the grip, you can move on to the next step of cutting it off.

BALINGE Foldable Bike Repair Stand - Portable Bicycle Stand for Road & Mountain Bikes, Max 132 lbs
Please Watch our video to see how to properly use and adjust the repair stand.By watching the vedio...
As an affiliate, we earn on qualifying purchases.
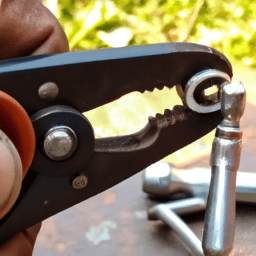
Cut the Grip
When cutting the grip, it’s important to be cautious and wear gloves to protect your hands from any potential injuries. Did you know that according to a study by the National Safety Council, hand and finger injuries account for 10% of all emergency room visits in the United States? Therefore, it’s crucial to take the necessary safety precautions before attempting to remove the bicycle hand grips.
One alternative method to cutting the grip is using compressed air to loosen it. This method involves inserting the compressed air nozzle between the grip and the handlebar, and then blasting air into the gap to create a space for the grip to slide off. However, this method may not be effective for tightly stuck grips and requires access to compressed air equipment. Overall, cutting the grip is a reliable way to remove it, but remember to be cautious and wear gloves to avoid any potential injuries.
Moving on to the next section, let’s explore the twist and pull method for removing bicycle hand grips.

VEVOR Bike Repair Stand, 4-Leg Steel Bicycle Repair Stand, 42.5"-74.8" Adjustable Height Bike Maintenance Work Stand with Magnetic Tool Tray, Foldable Bike Service Stand for Home, Shop (Max 80 Pounds)
80 lbs High Load Capacity: Crafted from heavy-duty non-rust steel with a thick column diameter, the bike repair...
As an affiliate, we earn on qualifying purchases.
Twist and Pull
By twisting and pulling, it’s possible to remove your bicycle hand grips without having to cut them. This method is particularly useful if you want to reuse your old grips or if you don’t have any tools available to cut them off.
To begin, find a comfortable position where you can twist and pull the grips with ease. You can stand over the bike, sit on a chair, or place the bike upside down. Then, grab the grip firmly with one hand and twist it back and forth while pulling it away from the handlebar.
You can also use a twisting motion with both hands to make the grip come off more easily. If the grip is too tight, try spraying some rubbing alcohol or compressed air under it to loosen it up.
If all else fails, there are alternative grip removal methods such as using a hammer or a grip removal tool, but be careful not to damage your handlebars in the process.
Once you have removed the grips, you can clean and install new ones to ensure proper grip installation.
Clean and Install New Grips
Get ready to feel the thrill of a brand-new grip as you clean and install them onto your handlebars. Before you start, it’s important to choose the right grips for your bike. There are different types of grips available in the market, each with its own unique features. Some are made of rubber, while others are made of foam or silicone. Choosing the right grip depends on your personal preference, riding style, and the kind of terrain you’ll be riding on.
Upgrading your grips has several benefits. Firstly, it can improve your grip and control over your bike, which is particularly important when riding on rough or slippery terrain. Secondly, it can reduce hand fatigue and numbness, which can be a common problem for long-distance riders. New grips also give your bike a fresh, new look, making it feel like a brand-new ride.
Once you’ve chosen the right grips, it’s time to clean your handlebars and remove the old grips. Follow the Twist and Pull method mentioned earlier to remove them. Then, clean any residue left behind with alcohol or soapy water.
Finally, install the new grips by applying a small amount of rubbing alcohol or hairspray to the inside of the grip, then sliding it onto the handlebar. Make sure the grip is aligned with the brake and gear shifters before securing it in place.
With your new grips installed, you’re ready to hit the road with improved control and comfort.
Frequently Asked Questions
Can I reuse the old grips after removing them?
I wouldn’t recommend reusing old grips after removal. Not only do they lose their grip, but it’s also unhygienic. Instead, consider eco-friendly alternatives like cork or recycled rubber grips.
How do I know if I need to replace my bike grips?
I need to replace my bike grips when I see signs of wear, such as cracks, tears, or loss of grip. It is recommended to replace grips every year or every 2,000 miles to ensure proper safety and performance.
What are some common mistakes to avoid when removing bike grips?
Avoiding damage during proper grip removal is crucial. Did you know that 30% of cyclists damage their handlebars when removing grips? To avoid this, always use a lubricant and slowly work the grip off, avoiding excessive force.
Is there a specific way to dispose of old bike grips?
Recycling options for old bike grips depend on the material. Rubber grips can be recycled with other rubber materials at local recycling centers. However, foam grips cannot be recycled and should be disposed of properly to reduce environmental impact.
Can I remove bike grips without the use of tools?
At first, I thought removing bike grips without tools would be impossible. But, after some experimentation, I found that using household items like hairspray or rubbing alcohol can loosen the grip. Alternative methods include using compressed air or a wire coat hanger.
Conclusion
Well, that’s it! You now know how to remove bicycle hand grips!
It may seem like a small task, but it can make a big difference in your ride. Just like changing the tires on your car, changing your bicycle grips can give you a whole new feeling when you ride. It’s like putting on a new pair of shoes – the fit and feel can make all the difference.
Remember, having the right tools on hand is essential for any bike repair or maintenance task. And when removing your grips, take your time and be careful not to damage your handlebars. With a little patience and some elbow grease, you’ll have those old grips off in no time.
So, go ahead and grab your pliers, scissors, and new grips, and get ready to enjoy a smoother, more comfortable ride!